Feel it – Hot! Hot! Hot! I can hear the music now. In the summer of 1990, Hubby and I took our kids on a cruise to the Caribbean. The waitstaff on our cruise line were a combination food server and entertainer. They sang and danced in a whirl of color while presenting the evening’s highlighted dish from the masters in the galley.
When it came time to serve the Baked Alaska, they sang and danced all around the dining room as they balanced plates of the Meringue Covered Frozen Treats. The lights in the dining room were dimmed, allowing the full visual impact of twirling sparklers sticking out of the tops of our pending desserts. This delighted the passengers who let their approval bubble out with claps and oohs and aahs.
Ten years later; yet long before my blogging days and the routine habit of snapping photos of just about anything that came from my kitchen, I decided to recreate that wonderful frozen dessert for a small dinner party. I had no recipe, only a fond memory of sponge cake, ice cream and toasted meringue. My brother-in-law at the time was a trained chef. Naturally, I gave him a call for a little assistance. He told me I was out of my mind to attempt a Baked Alaska, having no formal training. (Why is it that people with “formal” training think the rest of us can’t be self-taught? Don’t get me wrong – an education is a great thing. However; it’s much easier to color outside the lines when you don’t see the lines). As for my brother-in-law’s prediction of failure – he was wrong. Baked Alaska is easy. It’s all a matter of common sense. Work swiftly, keep the kitchen cold, the ice cream solid and the baking quick. The key to success for this recipe is to keep the ice cream as cold as possible and turn up the oven as high as it will go. The meringue should be piled on nice and thick – it will act as in insulator and keep the ice cream from becoming a river of milky colors.
I will admit; while the recipe is mine; the photos are snatched from the internet. It’s been a while since I last made Baked Alaska. Maybe now I will get motivated enough to treat Kiddo to a twirling, swirling frozen tundra.
In case you were wondering; according to google search on the history of the Baked Alaska:
Charles Ranhofer, chef at the famous Delmonico’s restaurant in New York, is given credit for creating a new cake to celebrate the United States purchase of Alaska from the Russians. Ranhofer is said to have invented the frozen treat to commemorate Seward’s purchase of Alaska in 1867. However; it is possible that what Ranhofer deserves is the credit for popularizing an already known dessert.
Easy Baked Alaska
Meringue Topping
4 Egg Whites
½ Cup Sugar
½ teaspoon Cream of Tartar
Place egg whites in a bowl and beat with electric mixer until very foamy. Continue to beat whites while slowly adding sugar and Cream of Tartar. Beat on high until stiff peaks form. Set aside.
Baked Alaska
1 Angle Food Cake or Sponge Cake Loaf or package of Dessert Cups
1/2 Gallon Neapolitan Ice Cream
Meringue Topping (above)
Parchment Paper
Note: I like the Dessert Cups best. They are a nice size and provide a little “bowl” for the ice cream. Plus there’s no trimming involved.
If using a Loaf-Type Cake Base: Trim off ends of the cake loaf, discard. Slice remaining cake into six slices about ½” thick each. Using a large drinking glass or cookie cutter for a template, cut each slice into a circle. If using those Sponge Dessert Cups, skip this step.
Place 1 large scoop of ice cream in the center of each cake round; making sure each scoop has all three flavors of ice cream. Place in the freezer until ready to serve. If ice cream becomes too soft during preparation, freeze for several hours and continue. The ice cream must be rock-hard before it can be placed under the broiler. Otherwise, you end up with a deflated, soupy mess.
Preheat Broiler of oven. Line baking sheet with parchment paper. Place frozen cake rounds on baking sheet, leaving enough room between each to work around. (Another option is to work with one round at a time, once covered, pop in refrigerator and start on the next one).
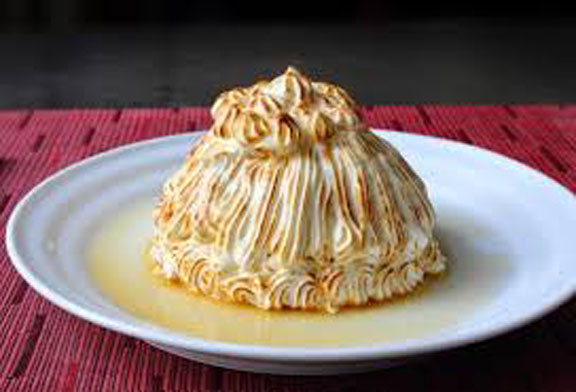
Working quickly, cover each ice-cream topped cake completely with meringue, making sure the ice cream is well sealed beneath the meringue. If desired, pipe meringue to create a pretty design. Or use a fork to make drag marks for another pretty look.
Place baking sheet under the broiler and brown meringue. Keep the door slightly opened and keep a sharp eye on the meringue. You want to brown without burning.
To serve, plate individually and serve immediately.
Optional: Brown meringue using a kitchen torch. Again, work quickly!!!
Depending upon how the meringue is sculpted onto the frozen treat will render a different charm to the final presentation.


