Meatballs and Mushroom Sauce over Buttery Egg Noodles

One night for dinner, I decided to see what else I could whip up using frozen prepackaged meatballs. My Teriyaki Meatballs had been such a huge hit, I was anxious to see what else these frozen shortcut gems could become. So off to the kitchen I went.

Continue reading “Meatballs and Mushroom Sauce over Buttery Egg Noodles”

Avocado BLT Sandwich with Basil Mayonnaise

Did you know that April is BLT month? That means tomorrow, April 1st, is April Fools Day, Easter Sunday and the start of BLT month.

The BLT has been around for ages, taking its time to emerge into a roadside diner favorite.  The early makings for a BLT have been around since the Egyptians first  began baking bread and cultivating lettuce. Pigs were domesticated by 500 BCE.  Tomatoes traveled from the new world to Europe in the 16th century. Around 1756  the French came up with a sauce that would later evolve into what we now know as Mayonnaise. Still, no sandwich. It took the Fourth Earl of Sandwich, John Montagu, to come up with the concept of placing meats between two slices of bread and thus giving birth to the sandwich in 1762. Had the Earl of Sandwich been a pious man, it may have taken longer. However; he was a gambling man. Not even hunger could move him from the gaming tables. With the invention of the sandwich, he could play cards with one hand while eating with the other. And they say nothing good ever comes from gambling! How combination of the bacon, lettuce and tomato sandwich came into existence isn’t clear. All evidence indicates that BLTs weren’t available until sometime around 1900, at least not in printed references. The BLT grew in fame and was widely popular after World War II, with the expansion of supermarkets and the ingredients readily available to the masses. As for the catchy name – BLT – many believe it was diner shorthand. While Bacon, Lettuce and Tomato Sandwich appeared on the menu, when sending an order back to the cook it was easier to write BLT.

Topping a BLT sandwich with avocado is nothing new – not even all that “fancy”. Living in California, avocados are found on nearly everything from hamburgers to tacos to grilled cheese sandwiches. What makes these sandwiches absolutely glorious is the Basil Mayonnaise. You will end up with far more mayonnaise than you can use for the BLTs. However; this spread will keep for several days in the refrigerator without loosing its beautiful color and it is awesome on smoked turkey sandwiches. Yum!!! So it’s safe to say this is two recipes in one.

The original recipe can be found at http://www.thekitchn.com/recipe-california-blt-with-avocado-and-basil-mayonnaise-173957 (Yeah, I made a few changes – but it’s fairly close to the original). Even the “original” recipe is an adaptation from another recipe – as part of that lovely evolution in cooking.

Avocado BLT Sandwich with Basil Mayonnaise
Avocado BLT Sandwich
12 Thick slices of smoked bacon

8 slices good-quality bread (Italian sliced or sourdough)
2 tomato, large – heirloom if you can get them
1 ripe avocado
Green Leaf Lettuce
Basil Mayonnaise (recipe follows)

In a large skillet, fry the bacon until crisp. Drain on a plate lined with paper towels. Toast the bread. (For BLTs using sliced bread, I like to put two slices of bread into each toaster slot – it will toast nicely on the outside, while the inside slice stays soft. For sourdough, grilled is the only way to go).

While the bread is toasting; slice the tomatoes and avocado.

Spread one piece of bread with the basil mayonnaise. Top with the lettuce, tomato, bacon and as many avocado slices as you are happy to eat.

Spread basil mayonnaise on the other slice of bread, top sandwich and cut in half if desired.

Basil Mayonnaise
1/2 cup packed basil leaves
4 tablespoons olive oil
1 teaspoon lemon juice
2 medium garlic clove, chopped
Zest of one lemon
1 cup mayonnaise

For the Basil Mayonnaise: In a blender or small food processor, combine the basil, olive oil, lemon juice, garlic and lemon zest. Process until finely chopped and relatively smooth, scraping down the sides of the bowl occasionally. (For smooth mayonnaise, use the young tender leaves; for chunkier mayonnaise, add the larger leaves as they won’t process down completely).

Place the mayonnaise in a small bowl and whisk in the basil mixture until thoroughly combined.

Store in the refrigerator, where it will keep for up to a week, though the color will dull after 2 days.

Enjoy!

NOTE: Try these served on grilled sourdough bread. The crisp, buttery sourdough brings yet another dimension to the sandwich and the bread is the perfect size for long strips of bacon!


The Importance of Sunny Pepperoni Pie

Not that long ago, Hubby asked if I were in the mood for pizza. He knows I’m not a huge pizza fan. For him to ask meant he was the one craving a slice. Naturally, I said yes. Hubby came home with the most incredible take out pizza pie I’ve ever seen. It was one of those take and bake jobs from Papa Murphy’s – their Five-Meat Stuffed Pizza. Have you seen that monster of a pizza? It’s two meaty pizzas stacked one on top of the other with a braided edge holding the two together. I swear, it weights a ton. As I said, I’m not a huge fan of pizza, but this pizza was awesome. It reminded me of another “pizza pie” – one of my own creations. While the two pies look nothing alike, the concept is the same.

Continue reading “The Importance of Sunny Pepperoni Pie”

Egg Salad Sandwich with Butter

Easter is behind us. All those painted eggs for the egg hunt (hopefully) have been found. Now the real question is, what to do with all those hard-boiled eggs? Did you make some deviled eggs for your Easter table? Or perhaps added some sliced eggs to a toss green salad for added texture and flavor. I can see potato salad or macaroni salad in the very near future.

When I was a young girl, I can remember getting up early in the morning and watching my Dad pack his lunch. Back then, he worked as a plumber for a construction company. Often Dad made an egg salad sandwich to pack in his lunch box. This was in the old days, when a lunch box was made of metal, with a place for a thermos in the lid and the lunch below. There were no ice packs or means to keep foods from spoiling in the heat of the day. Instead of using mayonnaise in his egg sandwiches, he used soft butter. The eggs were still warm when Dad mashed them with butter, salt and pepper. I love the smell of eggs in the morning. It brings back such clear memories from my childhood. To this day, one of my favorite things to do with hard-boiled eggs is to make Egg Salad Sandwiches.

Egg Salad Spread with Butter
8 Hard Boiled Eggs
1 Tablespoon Soft Butter
1/4 cup mayonnaise
1 Tablespoon Pickle Relish
2 Tablespoons Finely Chopped Red Onion
1 Celery stocks, finely chopped
salt and pepper to taste
8 Slices of Italian, Multi-Grain or Soft Sourdough Sandwich Bread
4 Lettuce Leaves

Just a few quick notes: Pickle relish is an optional ingredient. Either Sweet or Dill relish can be used, depending upon personal tastes. Another option would be to finely dice whole pickles to add to the mix. Bread can be your preferred type, so long as it isn’t a thin slice of bread. The egg salad spread might be a bit much for thin sandwich bread. Finally, the bread can be toasted for an extra layer of texture, or soft.

To Prepare Eggs: Place eggs in a large pot. Cover with COLD water. Place over medium-high heat and bring to a boil. Remove from heat, cover pot with tight-fitting lid and let steep for 12-14 minutes.

Drain, remove eggs and plunge into ice water. Place into refrigerator to cool, about 15 minutes.

Gently roll eggs on counter to crack shell. Return to bowl of cold water and let soak about 15 minutes before peeling.

Peel eggs and cut in half lengthwise. On a small dish, place 1 egg half at a time, yolk side down. Using a fork, crumble/mash into small pieces. Place egg into a large mixing bowl. Repeat with remaining eggs. Mash butter into egg mixture, season with salt and pepper, mix well.

To Prepare Sandwich Spread: Add mayonnaise, pickle relish, onions and celery to eggs. If mixture appears too dry, add additional mayonnaise 1 tablespoon at a time.

Refrigerate until well-chilled or until ready to use.

Divide egg salad mixture between 4 slices of bread. Top with lettuce leaves and remaining 4 slices of bread. (Bread may be toasted, if desired). Press lightly on sandwich to hold in place, cut in half diagonally.

Serving Suggestions: Chips or Macaroni or Potato Salad – put those eggs to work!


Grilled Asparagus with a Tarragon Cream Sauce – French Style

I love asparagus, especially asparagus that are pan seared, roasted or grilled. When “charred” just a little, the asparagus takes on a whole new dimension of smoky flavor. I love cream based sauces – so rich and decadent. I adore the wonderful licorice flavor that tarragon imparts. You can see why this recipe was perfect – bringing all those marvelous flavors together in one sinfully yummy side dish.

Continue reading “Grilled Asparagus with a Tarragon Cream Sauce – French Style”

Anne’s Awesome Bacon-Spinach Quiche

It’s funny how certain “first” bites just stay with you forever. My first bite of an Omelette was  – of all places – on an airplane flight. My first bite of Quiche was at a little mid-town bistro – and it was an instant love affair. I’m not sure if it was the Quiche itself that I fell in love with or the quaintness of this tiny French Bistro (long since gone) that I adored so much. Many a Sunday morning was spent there, sipping a Mimosa and nibbling on fresh-baked goodies. Many a Saturday nigh I could be found sipping Champagne and indulging in Chocolate Mousse perfection while discussing the politics of the day. Oh to the finer things in life!

1917767_102923659725576_1228181_n-1I was fortunate enough to have grown up in an atmosphere that centered around family times, and plenty of entertaining – both in and out of the kitchen. We didn’t need a holiday as an excuse to get together. Family gatherings always included plenty of wonderful food, lots of laughs and some of the best off-key entertaining on the planet. While the adults put out a spread to end all spreads; the kids could count on a captive audience that loved everything we did. I can remember my sisters doing a wild hula dance. We sang “I want to Hold Your Hand” so off-key that the dogs in the neighborhood howled! It was only natural that as adults we love to entertain – and ham it up in the process.

Anyway, the first time I had home-made Quiche was at a family brunch. It was an Easter extravaganza to end all Easters. My middle sister, Anne, made the most awesome Bacon-Spinach Quiche as her contribution to the festivities. I’ve since collected and perfected a few recipes of my own, but hers has a very special place in my heart.

Anne’s Bacon-Spinach Quiche Pie
1 Pound cooked Bacon, crumbled
1 Package Frozen Spinach, thawed and drained of liquids
½ Cup Cheddar Cheese, shredded
½ Cup Jack Cheese, shredded
½ Cup Sliced Mushrooms
10 Eggs
½ Cup Milk
Dash of Nutmeg
Uncooked Pie Crust

Preheat oven to 400-degrees. While the oven is heating, fry up the bacon and drain on paper towels. Let the bacon cool, then crumble and set aside.

Roll out pie crust and place crust in a deep-dish pie pan and set aside.

Shred cheeses, mix together and cover bottom of pan about 1/3 of the way up with a layer of the cheese mixture.

Layer spinach, mushrooms and bacon over the cheese. Whisk eggs, milk and a dash of nutmeg together. Pour over Quiche.

Bake in preheated oven for 10 minutes. Reduce heat to 325 degrees and continue to bake for 45 minutes to an hour until firm and cooked through.

************

Here’s to childhood memories and first bites!

Garlic Mashed Potatoes with a Twist

I love mashed potatoes – a beautiful canvas for so many wonderful things! Smothered in gravy – oh my! Oozing with melted butter – oh yeah! As a bed for stews or meatballs or just the way they are – I’m there!

Continue reading “Garlic Mashed Potatoes with a Twist”

A Cheater’s Guide to Buttery Croissants with a Kiss of Almond

I adore a breakfast of pastries, fresh fruits, good coffee and fresh squeezed orange juice. I hold a special fondness for light, delicate pastries on a spring morning, when the very air is an invention to linger. Fresh pastries on Easter Morning are especially welcome.

Continue reading “A Cheater’s Guide to Buttery Croissants with a Kiss of Almond”

Easter Basket Cupcakes

Growing up, we could always count on Dad’s Easter Cake. He baked a layer cake, frosted it with green-tinted buttercream and topped his cake with coconut that had also been tinted green for the grass. Dad made a big handle for his Basket Cake by folding a large sheet of foil into just the right size and bending it into shape.

Continue reading “Easter Basket Cupcakes”

New England Cod on Potato Shingles with Zapped Broccoli

The absolute best part of the Lenten Season is that the supermarkets are jam-packed with fish and seafood – and just about everything is on sale!  It gives me a chance to stock up on all sorts of yummy things to keep in the freezer. (Yeah, I know fresh is best, but when you live on a budget sales are even better!)

Continue reading “New England Cod on Potato Shingles with Zapped Broccoli”

Brown Sugar Pecan Glazed Pork Tenderloin

A few years back, there was a miscommunication with regard to Easter and who was hosting the event. Typically, my youngest sister plays hostess to a potluck Easter feast.  I’m generally in charge of the appetizers and desserts, while my sister and her family provide the main attractions – the ham and all its beautiful trimmings. I assumed we would be going to my sister’s house, as we had in the past.

You know what they say about the word assume, right? Ass-U-Me. A few days before Easter as I put together the shopping list for the week, I shot my sister a quick email to ask what time we should be at her house. For whatever reason, my sister FORGOT that we usually gathered at her house for Easter Supper, so she and her family had accepted another invitation. Oh my! No worries. I immediately called my Dad. He and his wife had no plans for Easter. Great – we’d move everything to the farm instead. And with a smaller group, there was no need for a big ham dinner. I knew the perfect alternative to ham – beautiful, festive and sure to please. This spectacular Pork Tenderloin is great for entertaining a few friends for dinner. The presentation alone is sure to get plenty of wows and praise.


Brown Sugar Pecan Glazed Pork Tenderloin
3 1/2 pound pork loin roast
1 teaspoon salt
1/2 teaspoon freshly ground black pepper
3/4 cup light brown sugar
1/4 cup Dijon mustard
3/4 cup roughly chopped raw pecans

Preheat oven to 425 degrees.

Trim the fat from the roast, leaving only a quarter-inch of fat on top that will melt away, creating a nice golden under crust while basting the meat in its flavorful goodness.

Season the pork loin with salt and pepper. Place pork on a roasting rack over a shallow foil-lined rimmed baking pan. (Easy clean up). Roast pork in a 425 degree oven for 30 minutes. (It doesn’t hurt to brush the rack with a little olive oil to prevent pork from sticking and to help with the clean up there as well).

While the pork is cooking, combine the brown sugar and Dijon mustard into a paste. Fold the chopped pecans into the paste and set aside until ready to use. (To chop pecans, work in small batches. Lay pecans in a single layer on a chopping board. Chop with a hand-held food chopper – about 5 or 6 “wacks” should give you nicely chopped pecans. My food chopper is from Pampered Chef – had it for years and love it!)

After pork loin has roasted in the oven for 30 minutes, remove the loin from oven. Reduce heat to 375 degrees. Spread prepared baste evenly over the of the top of the pork loin and return to oven.

Baste the roast about every 15 minutes, scooping up the glaze and nuts that fall off back over the top of the roast.

Continue to roast pork loin until the internal temperature reaches between 145 to 160 degrees on a meat thermometer. (That’s about 20 to 25 minutes per pound). The pork will still have a little pink at 145 degrees, which is safe to eat. At 160 degrees, the pork is well-done.

If the glaze starts to burn, simply cover loosely with foil and continue to cook.

Remove pork from oven, tent and let rest for 10 minutes before carving.

**********

This roast is especially delicious when served with Rice Pilaf or caramelized apples. A nice green vegetable such as Asparagus or Green Beans adds color to the plate.

Hope you enjoy!

Smokin’ Cowboy Rib-Eye Steak with Spicy Onion Rings

Many, many year ago, Hubby and I took a road trip, just the two of us, to New Mexico. I can’t remember the last time a road trip, or any vacation for that matter, didn’t include Kiddo. This was one of those “we are a couple, right?” kind of trips. Just the two of us, doing whatever we pleased. While in Santa Fe, we had an unforgettable steak dinner at Mark Miller’s Coyote Cafe. Hubby and I both adore spicy foods, and New Mexican cuisine is out-of-this-world delicious. You haven’t truly experienced heat on a plate until you’ve dined in New Mexico!

Continue reading “Smokin’ Cowboy Rib-Eye Steak with Spicy Onion Rings”

Smoked Paprika Chicken – Dark Meat Chicken At It’s Best!

In recent weeks, I’ve been organizing and reorganizing my Yumprint recipe collection.  Originally my “cookbooks” within Yumprint were organized in categories such as a beef cookbook, a chicken, a pork and so forth. In other words, all my beef based recipes were lumped into one book aptly named Beef.  As the collection grew, finding something Italian or French within a sea of Beef or Chicken recipes became increasingly more difficult. While searching through recipes often brought inspiration, it was also a pain if I were looking for a particular type of cuisine in a hurry. Naturally, I went through all my various cookbooks and redefined the recipes (Yumprint sorts recipes in an alpha-numerical listing within each book). the only way that seemed to make sense – I read each recipe, then gave it a country of origin such as Chicken – Italian: Chicken Parmesan for example. This worked well for a while, but did not completely solve the hunt and peck grind. Sure, I could have simply typed Chicken Parmesan into the search parameters, but when you have thousands of recipes to search, it takes a minute. No, this simply would not do – more information was needed. What if I were standing in front of a freezer packed with chicken legs that I needed to use up but did not have clue one as to what I wanted to make with all those legs. Now the focus had shifted from just a country of origin to inspiration using a particular cut of meat. Problem solved. Everything was renamed yet again.  Chicken- French: Chicken Provencal  became Chicken, Legs – French: Chicken Provencal. Now all my recipes using breasts or legs or thighs are lumped into separate groups,  followed by country, followed by the actual name of a dish. As I plunged head-long into this process, I began to notice something that caused me to wonder. Chicken, Breast – American held far more recipes than Chicken, Thighs – American. Why was that? Do Americans eat more white meat than dark, thus explaining a broader assortment of recipes calling for breast? The answer? Yes, we do. Studies indicate that an average, meat-consuming American will eat approximately 60 pounds of chicken a year. (Obviously this study does not take into consideration chicken wings and Super Bowl Sunday). Of the chicken eaten, a whopping 80% of that is breast meat. Wow! The real kicker here is that most professional chefs would rather work with dark meat – thighs in particular. Dark meat is less dry that white meat, it has more depth of flavor and that slightly gamey wow factor. So what gives with the rest of us? There are all sorts of theories floating about, but the bottom line is we need to embrace the deliciousness of dark meat. I for one intend to do just that!

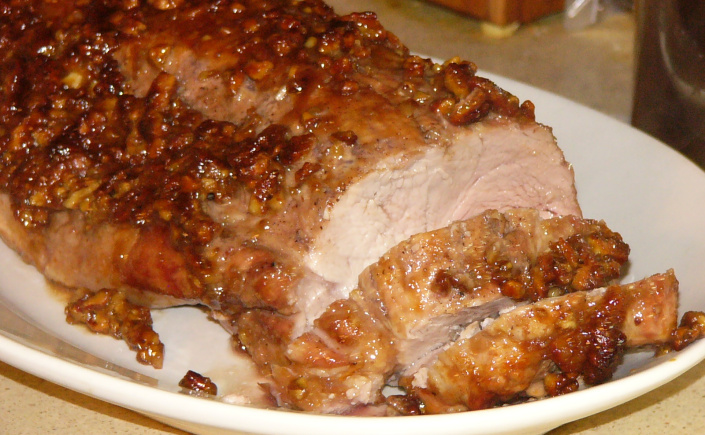
To begin with, isn’t the picture lovely? In all fairness, it’s not mind – the photo; like the recipe, is a William-Sonoma creation (http://www.williams-sonoma.com/recipe/paprika-chicken.html). When I cooked for my guys, they were far to hungry to wait for the usual “photo” section – we cooked, we ate, we enjoyed. Boy, it was good!

This recipe is perfect for a delicious week-day meal. From start to finish, it took under an hour. Okay, so maybe it’s not speedy-quick, but it’s one of the tastiest chickens I’ve prepared in under an hour. I will admit, I did find that the cooking time was a little longer than the recipe called for, but then again I had fairly large thighs in the skillet, so it would make sense. Not only was the finished dish very tasty, it was juicy, too. Hubby and Kiddo have let me know this recipe is a real “keeper”. Now Hubby has always been a fan of dark meat, so it’s no surprise that he enjoyed it. However; Kiddo is funny when it comes to chicken – he rarely likes chicken on the bone, although I don’t have a clue as to why. And he prefers white meat over dark meat hands down. So for Kiddo to say he want this again, that’s two thumbs up. Yeah, it’s good!

As usual, I made a few changes to the original recipe. First off, as the photo shows, William-Sonoma uses legs and thighs in their recipe (3 each). I elected to go with just the thighs (7 – strange package) because it’s what I had in the freezer. As it turns out, the rub was perfect for the amount of chicken I had on hand. I did change the rub just a bit – using chopped roasted garlic rather than roasted garlic powder. (What can I say, I’m a huge fan of garlic!) The only other change I made was to lift the skin from the thigh (without removing it) and put some of the rub between the meat and the skin, thus increasing the wonderful flavor throughout the meat. Beyond that, no other changes or alternations were necessary.

Now that I’ve shared my tips and alterations, let’s get down to the real reason we’re here – to cook up a wonderful chicken recipe using dark meat that is fast and tasty.

Smoked Paprika Chicken
1 tablespoon Smoked Paprika
1 teaspoon Chopped Roasted Garlic
1 teaspoon Kosher Salt
1/8 teaspoon Cayenne Pepper
1 teaspoon Brown Sugar
6 Chicken Thighs, bone-in; Skin-on*
1 Tablespoon Cooking Oil

Note: I prefer thighs, but this recipe will work with all legs or a combination of legs and thighs.

In a small bowl, stir together the paprika, garlic powder, salt, cayenne and brown sugar. Set aside.

Gently lift skin from meat without removing the skin. Sprinkle a little rub under the skin, gently message into meat.  Rub remaining spice mixture evenly over the entire chicken pieces.

In a nonstick fry pan over medium-high heat, warm the oil. Add the chicken skin side up. Reduce the heat to medium, cover and cook about 15 minutes.  Turn chicken, cover and continue to cook until juices run clear, about 10 minutes longer.

Uncover the pan, increase the heat to medium-high and cook until the skin begins to crisp, 2 to 3 minutes. Serve immediately.


Easter Appetizers That Are Sure to Please

Now that I’ve shared an elegant Easter Supper, I thought I’d press on with the whole Easter Celebration Theme. I simply adore appetizers, don’t you? Little bite-size morsels of goodness that you can just pop in your mouth. What’s not to love? Best of all, appetizers provide variety – in color, in texture, in flavors – all on one plate.

Continue reading “Easter Appetizers That Are Sure to Please”

An Elegant Easter Supper in Four Courses

Before we know it, Easter will be upon us – a time of celebration, for renewal and rejuvenation.  I grew up in a different time – when wearing your “Sunday Best” meant something extra special. Brother Dear always got a new suit for Easter, complete with a bow-tie. My sisters and I could count on new Easter Bonnets and bright new shoes. Back in those days, ladies covered their heads at Mass and a new hat was always cause for excitement.

Continue reading “An Elegant Easter Supper in Four Courses”