Wow! This is one spicy, hot chili. When I told Kiddo it was Three-Alarm Chili, he said it was more like four. This from a kid that eats roasted jalapeno peppers like candy! All I can say is that you’ll want to have plenty of cheese and sour cream handy to take the edge off this smokin’ hot chili. If you can’t take the heat, use half of the spices. Let it cook a little longer for the heat to intensify, then adjust if necessary. Remember, you can always add more, but once it’s in – it’s in there for good.
I grew up on chili and corn bread. Love the stuff. My dad makes a decent chili, but I’ve taken it up a few degrees. I like the extra flavor that good quality chorizo adds to the mix. The longer you let the chili cook after the spices are added, the more intense the heat becomes. Dad’s is saltier than mine, while mine is much hotter. Still, the basic technique is the way he taught me.
Good chili takes time – time to pick through the beans, time to soak them and time to cook them tender. The best way to make chili is to allow the beans to soak in a pot of water over night, rinse well the next morning and the cook them slowly in a crock pot. Sometimes I forget to soak my beans the night before. No worries, you can speed up the soaking time by bringing the beans to a boil, remove from heat and let them steep for about an hour or so in the heated water before proceeding. This works fine, but the over night method is better. I don’t know why, it just renders a more “beanie” bean. The beauty of cooking chili in the crock pot is that you don’t need to tend to it much. When cooking chili in a large pot on the stove-top there’s always the danger of browning the beans at the bottom of the pot. The only way to avoid that is to stir the pot regularly – every hour or so. And the cooking liquid tends to evaporate. With a crock pot, you won’t have those problems.
 One final note regarding the chili – this recipe is made with both ground chuck and chorizo. Make sure you use good quality bulk chorizo. Make a little trip to the Mexican Market, make it from scratch or look for Texas Brand Chorizo. I cannot stress this enough – DO NOT use that stuff in the grocery store in a long plastic rope. All you’ll end up with is a skillet of red grease You want a chorizo that is going to crumble up just like ground beef.
Like most cooks, I have several corn bread recipes at my disposal. This particular recipe is truly rooted in the South. Start with the fact that it is baked in a cast iron skillet. Then there’s the use of bacon grease both to season the skillet and flavor the bread. I don’t know of many Northerners that keep a tin of bacon grease handy, but no self-respecting Southern kitchen would be without it. Okay, so I was born and raised in California, but my dad was an Okie through and through. He did a lot of things “Southern” that he learned from his momma, and she from her momma. He passed those on t me, and I to my children and grandchildren. That’s just the way it works, from generation to generation, each adding their own personal touch while preserving the basic heritage of the dish.
There are two ways to keep your bacon grease – on the stove top (that’s the old southern way) or in the fridge, which is how most cooks today hang on to that wonderful fat. Some folks strain the bacon grease through a coffee filter to remove all the little bits of bacon, saving only the pure fat renderings. There is some speculation that having little bits of pork in the fat might cause it to go rancid. I suppose that could happen, if you left it long enough. We use it all the time so it never sits for very long. Next time you make some refried beans, try putting a little bacon grease in the skillet and really “fry” those beans. The flavors are amazing. I’ve tried frying eggs in other oils, but nothing compares to dirty fried eggs, speckled with little flakes of bacon. Next time you’re having bacon and eggs, keep the bacon warm and fry the eggs in the same skillet. It’s the only way to fry eggs if you ask me.
As for the type of container – true Southerners would use a coffee tin. Now a days, coffee rarely comes in a tin. For years I used a small metal mixing bowl with a lid. Somewhere between moves, it got lost in the shuffle. So now I use a glass bowl fitted with a lid. I’ve seen people use mason jars or clean out a jelly jar. The only problem with glass is that you need to let the grease cool a little or you run the risk of breaking the glass with the sudden change in temperature.
What’s the difference between Northern and Southern Corn Bread? That’s easy – Northern Corn Bread is moist, sweet and more cake-like. It is usually cooked in a cake pan or square glass dish. Generally speaking, Northern Corn Bread uses equal parts corn meal and flour. Southern Corn Bread usually isn’t sweetened (although I like mine sweet, so I add some sugar to the mix). Southern Corn Bread uses more corn meal than flour and is usually cooked in a very hot skillet, making the crust crisp. Northern Corn Breads use butter or oil as the fat, Southern corn bread uses bacon grease.
Enough chatter from me – let’s get to cooking, shall we?
 Beefy Chili Beans with Chorizo
1 cup pinto beans
1 cup pink beans
1 Can Beef Broth
1 lb lean ground beef
1 lb chorizo
1 tablespoons Cayenne pepper
½ teaspoon sea salt
1 tablespoon Mexican Hot Chili powder
½ teaspoon Cumin Seasoning
Pick over the beans. Rinse lightly. Soak beans in water overnight. Drain and rinse beans again.
Pour beans into a crock pot. Pour beef broth over beans. Cover and cook on HIGH for 5 hours.
Brown ground beef and chorizo together in a large cast iron skillet. Crumble the meat as it cooks, breaking it into small, uniform size pieces. Once cooked through, drain off any fat. Add meat to beans, stir well and continue to cook in crock pot on LOW until beans are tender, about 2 hours. (At this point, add an additional cup of water if the beans appear too dry).
At the end of 7 hours of cooking time, add all the spices. (You want your beans to be tender BEFORE adding any seasonings. Adding spice, especially salt, too early will cause beans to become tough). Continue to cook 45 minutes. Taste and adjust spices as desired.
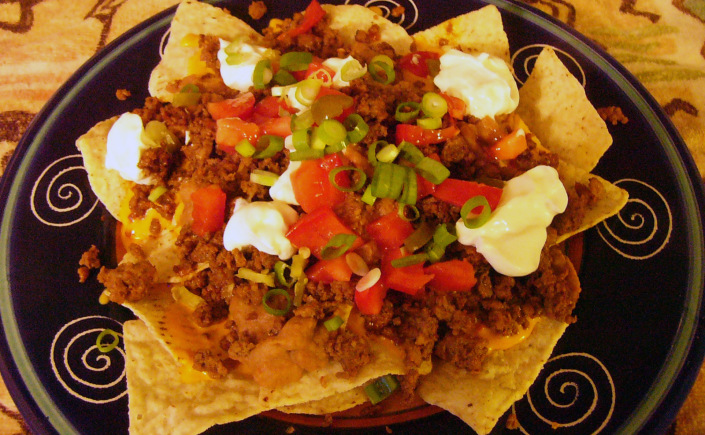
Serve with grated sharp cheddar cheese, chopped onions and sour cream as garnish.
**********
 Southern Skillet Corn Bread
4 teaspoons bacon drippings
1 1/2 cup yellow corn meal, preferably stone ground
1/2 cup all-purpose flour
2 tablespoons sugar
1/2 teaspoon salt
2 tablespoons baking powder
1 tablespoon baking soda
1/2 cup rapidly boiling water
1 cup buttermilk
1 large egg, beaten lightly
Cornmeal mush of just the right texture is essential to this bread. The mush must be smooth without overworking the batter. Don’t rush the buttermilk and you’ll have less lumps to break up.
Another “must” is a hot cast-iron skillet. Although the bread can be made in a cake pan or square casserole dish, that would just be too “Yankee” to do the bread justice.
Adjust oven rack to lower middle position and heat oven to 450 degrees. Set 8-inch cast iron skillet with bacon fat in heating oven.
Measure 1/2 cup cornmeal into medium bowl. Set aside.
Mix remaining 1 cup cornmeal, flour, sugar, salt, baking powder, and baking soda in small bowl; set aside.
Pour boiling water all at once into the 1/2 cup cornmeal; stir to make a stiff mush. Whisk in buttermilk gradually, breaking up lumps until smooth, then whisk in egg.
When oven is preheated and skillet very hot, stir dry ingredients into mush mixture until just moistened. Carefully remove skillet from oven. Pour hot bacon fat into batter and stir to incorporate, then quickly pour batter into heated skillet.
Place skillet back into the oven, then immediately lower the temperature of the oven to 425 degrees.
Bake until golden brown, about 15-20 minutes. Remove from oven and instantly turn corn bread onto wire rack; cool for 5 minutes, then serve immediately.
If desired, spread a little honey butter over the top of the corn bread and let it seep in just before serving. The honey will help to off-set the heat of the chili.
Here’s to good eatin’!


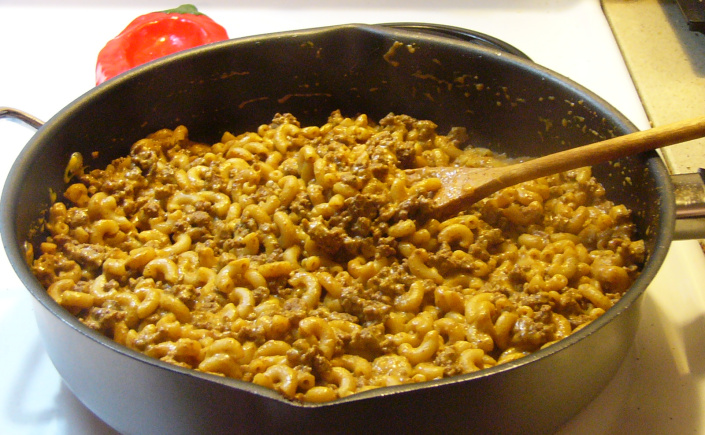
 Goulash makes me think about galoshes – you know – rain boots. When Kiddo was a little kid (around 1st grade) and living in the middle of a desert in Nevada; the students were asked to identify which shoes children should wear when it rains. They were shown three pictures – flip-flops; sneakers and galoshes. Almost all of the children picked the sneakers – especially since most of them had never seen galoshes before. Southern Nevada gets an average of 4″ of rain a year – and most of that falls in a day! Special shoes for rainy days just never occurred to these children of the desert. The same standardized test asked this question: “It’s getting dark outside. What should the driver of this car do?” As adults, we all know the answer – turn on the headlights. Kiddo’s response is one I will never forget. “Go home because it’s bedtime.” Hey, it made sense!

")

 My love for cooking came from my parents. They knew their way around the kitchen, and Mom loved to entertain. Our home was always filled with people – extended family, neighbors, friends. Ours was the house with the door open to everyone and plenty of good food to share. Many of the recipes I like to share come from those warm memories.