
No matter how much I plan, it seems that I always make too much food. Especially when I make things like Spaghetti and Meatballs. Hubby stares down into what seems to be a bottomless bowl and asks “So, when are the guest getting here?”
Continue reading “Oh What To Do with those Pesky Left-Overs? Make Sandwiches, of course!”Frijoles Negros Refritos (Refried Black Beans)
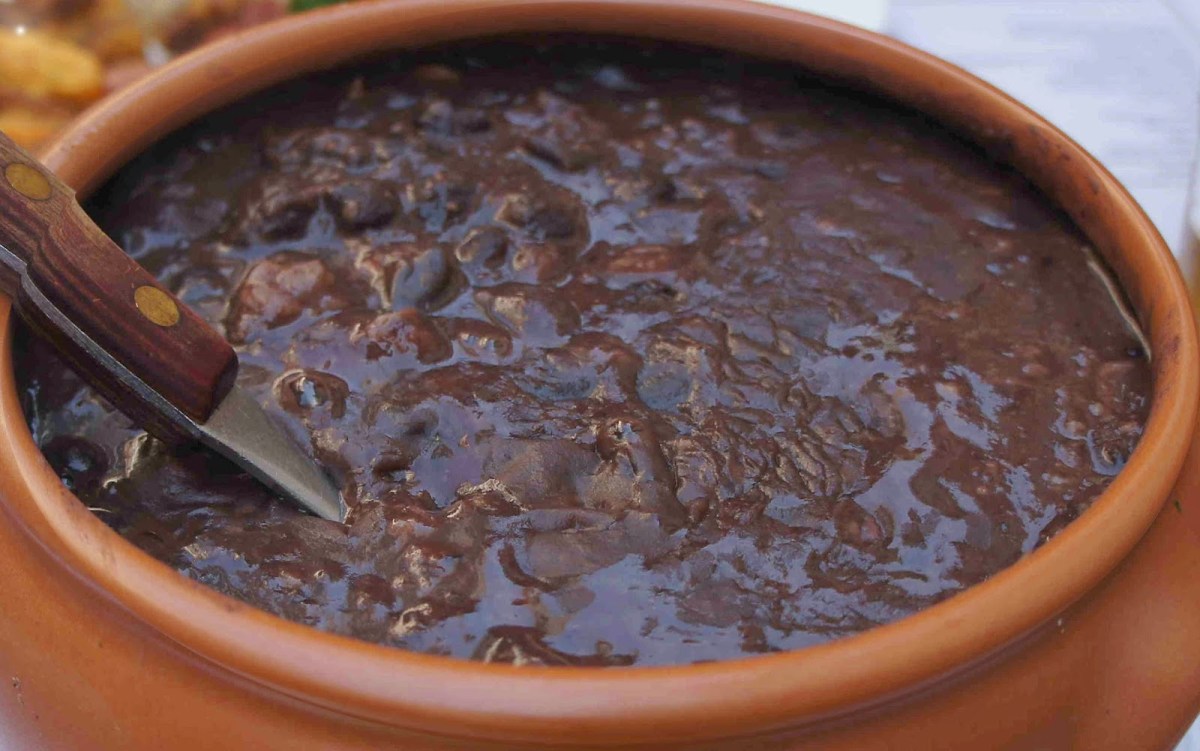
Yesterday I gave to you my latest Mexican creation, Pork Salsa Verde. It was part of a desire to break out of a garden-fresh rut. Yeah, even when whipping up dishes with things straight from my garden, it’s possible to get stuck in a rut.
Continue reading “Frijoles Negros Refritos (Refried Black Beans)”Grilling Up Porterhouse Magic

For our wedding anniversary, Hubby and I decided years ago to forego eating out. Eating out requires too much effort when you’re spending a lazy day together – all that fuss of getting dressed up. Besides, when you’re married to your best friend, every day is a celebration of togetherness.
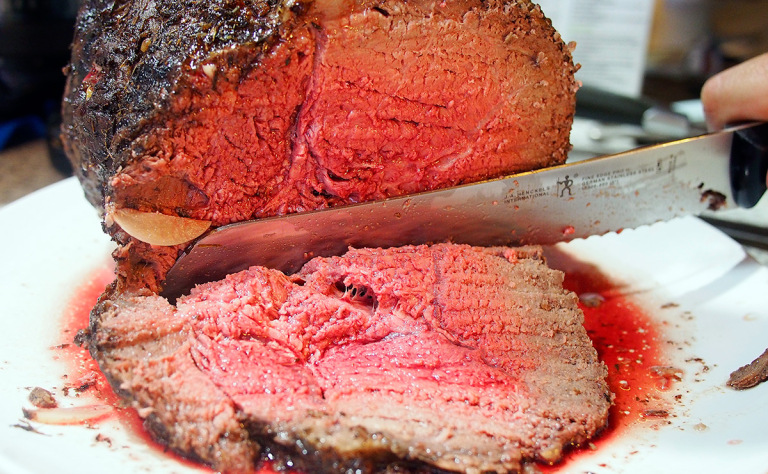
We were in the mood for an awesome steak dinner with a giant baked potato on the side and a nice bottle of wine. (Kiddo is always in the mood for a good steak, so we didn’t even bother to consult him). We aren’t talking wimpy steaks for our anniversary – we’re talking about monster steaks – about 28 ounces of rich red beef – enough to feed a small country! These bad boys take patience to cook just right. But then, you can’t rush perfection.
Timing is everything to make sure everyone gets their steak grilled “just right”. In our house, there are only two ways to grill a steak – medium for the guys (pink but not bloody) and medium-rare for me (meat warm, with a bright pink color and the natural red juices running all over the plate). To achieve this, the medium steaks are started about 10 minutes ahead of their rare cousins. To keep the medium steaks cooking without over-grilling, a short “nap” on the warming tray of the grill is a must while the rare steaks are seared.
Have I mentioned that Hubby is a grilling master – at least in my book. He’s got grilling foods over an open fire down to a fine art – always turning out grilled foods that are cooked to perfection – never tough, burnt or dried out.
Porterhouse Magic
1 Large Porterhouse Steak Per Person, about 1 ½ inches thick, 28-30 oz each
Salt to taste
Johnny Trigg Champion Meat Rub to taste
This first step is very important – buy your steaks the day of grilling and not a day sooner. Have a conversation with your butcher – ask him to cut your Porterhouse about 1 ½ thick. Tell him to give you steaks that he would have cut for his own family, with a generous side of filet and New York Strip on either side of the bone.
DO NOT put the steaks in the refrigerator. Open the package, sprinkle with salt on both sides. Then sprinkle with Meat Rub, pat into steaks. Allow the steaks to rest on the counter at lease an hour or two to draw in the salt with the rub.
Build a nice fire in the grill. Get it good and hot with a light covering of ash.
For medium – sear steaks for about 4 minutes per side. Transfer to warming rack of grill while searing less-done steaks.
For Medium-Rare – sear steak as above, skipping the transfer to warming rack of grill.
Return steaks to be cook medium back to main grill alongside those to be grilled medium-rare. Lower coals (or raise rack, depending upon grill type) and continue to grill with the lid closed for about 5-6 more minutes. Raise lid, flip steaks, then close grill and cook an additional 5 minutes. (The medium steaks are on the grill about 26 minutes total, the medium rare about 18 minutes).
Remove all the steaks from grill, place on a platter and tent to keep warm. Allow steaks to rest for about 5-10 minutes to regain their juices.
Note: The best way to let the steaks rest and to keep warm is to place the steaks, stacked one on top of the other, on a dinner plate. Place a steel mixing bowl over the steaks to create a dome, keeping the heat and moisture in the steaks.
While the steaks are resting, it’s the perfect time to load up a baked potato with all your favorite toppings – butter, sour cream, chopped chives, salt and pepper to taste.

Place steaks on individual plates and drizzle with any juices that have accumulated on the platter.
Ready, set, enjoy! These are so flavorful, so tender and melt in your mouth good!

Irish Champ Potatoes

It would be safe to say no other food in the world is more closely associated with Ireland than the potato. By the 18th century, potatoes became a food staple in Ireland and the major crop grown there. By the 1840s, there were a half-million peasant farmers growing potatoes on small acreage.
Pork Salsa Verde
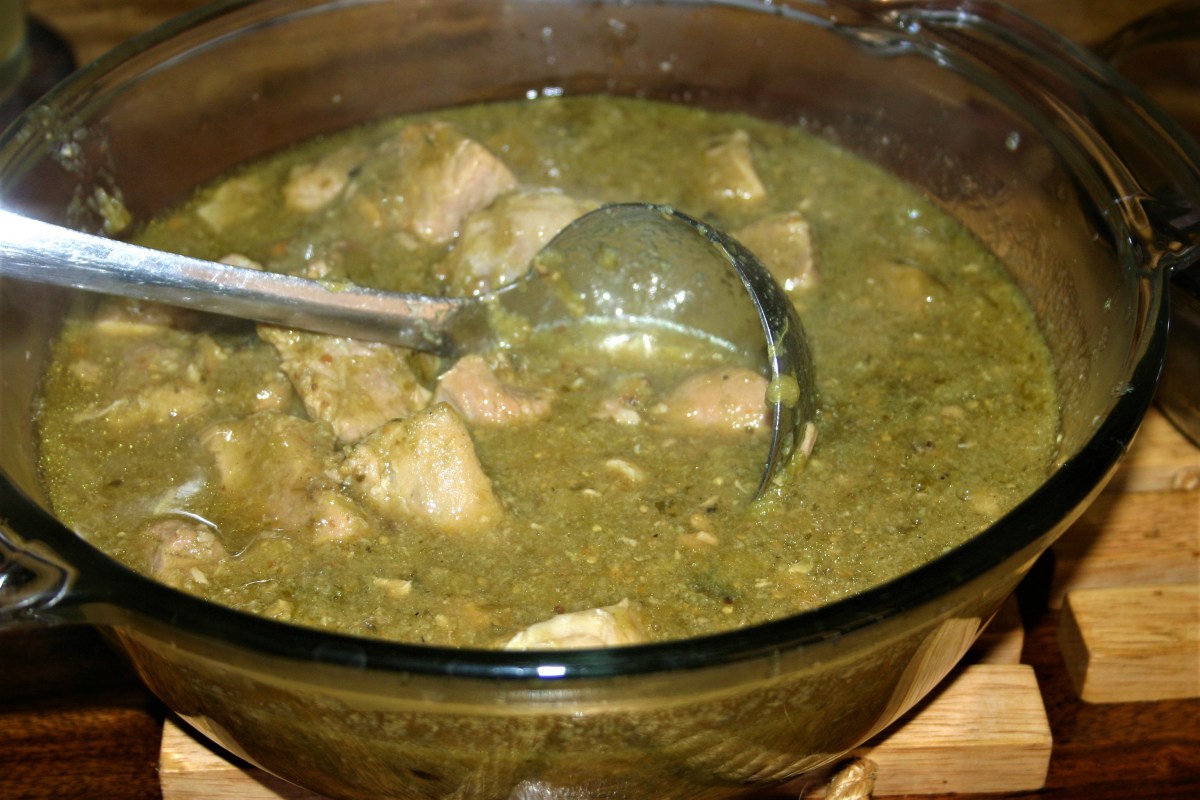
Yesterday evening Hubby and I puttered together in the garden at the end of our day. For me, it’s a special time, the highlight of my day. I look forward to just the two of us talking as we putter. We chat about future plans, world events or whatever happens to pop into our heads.
Spaghetti and Meatballs Enough for a Crowd

Did you know that Spaghetti and Meatballs isn’t an Italian dish? At least not in the way we think of Spaghetti and Meatballs. You know, big, juicy meatballs swimming in a rich red sauce poured over a mountain of spaghetti noodles. In Italy, you will find spaghetti noodles, tomato based sauces and even meatballs of sorts (called polpettes). These are not the meatballs we know and love. They are often eaten plain (as the meatballs alone) or in a soup. The meat is anything from beef to turkey to even fish. Often these meatballs are no bigger than a golf ball. In some regions, there are meatballs no bigger than a marble called polpettines. While polpettes are commonly found at the family table in Italy, they are rarely found in restaurants and never served with spaghetti. If you happen to be in Italy and find “Spaghetti and Meatballs” on the menu, then you have stumbled into a tourist spot that caters to American expectation.
Continue reading “Spaghetti and Meatballs Enough for a Crowd”
Mousse au Chocolat Nori

Recently I decided to rummage through photos I’ve taken over the years. Most of my personal photos are stored in albums on my personal Facebook page. While strolling down memory lane, I came upon today’s “featured” photo in an album called “Mother’s Day 2013” (back before my blogging days). My wonderful guys had cooked up an awesome Mother’s Day meal for me.
Serving up Sunday Supper on a Saturday Night with an Apricot Glazed Ham

Christmas is coming. Okay, so it’s a few months away, but it is coming none the less. Time to test a few new recipes for the Christmas Table. One thing I know for sure – Christmas will include a ham. In our house, it simply would not be Christmas without a ham.
It seems to me that more often than not, when I’m serving up a ham I tend to stick to the “traditional” glazed ham I know so well. You know the one – with pineapple ring and cherries held into place with whole cloves – such a delicious throw-back to childhood memories. I can almost smell my parent’s kitchen at the holidays, be it Christmas or Easter. That distinct aroma of cloves was undeniable. Our house was always bursting at the seams with cousins, uncles, aunts and assorted “adopted” family for holiday meals. On average, there were at least ten to twelve children – little staggered stepping-stones – twice as many children as adults.
The grownups naturally gravitated to the kitchen, cup of coffee in hand, taking up their respective places at the holiday table. For whatever reason, to my ears they all seemed to be chattering at once – the men in English, the women in a mixture of Spanish, English and Tagalog. Everyone was dressed up in their Holiday best, having just come from Mass.
Upon our return from Mass Dad, with a kitchen towel draped over his left shoulder, heads straight for the oven to check on his ham. The ham always seemed to take forever to reach that perfect doneness when the meat was cooked through, all smokey and flavorful, and the fat curled up nice and crisp. Just when it was that Dad popped his ham into a slow oven is beyond me. All I knew with any certainty is that it made its way into the oven sometime between Santa’s visit and our departure for Saint Paul’s to attend Mass. Satisfied that all is well, Dad would pour himself a cup of coffee and joins the others at the table.
Holiday meals were so special. Christmas Dinner was one of three “special” occasions when real butter would be at the table, along with hot dinner rolls and a big bowl of black olives – perfect for sticking onto the ends of our fingers. (Is there any other way to eat black olives?)
Yeah, we’ll be having ham for Christmas, even if I do decide to serve it along side a Christmas Goose. Some traditions will never die. These days it’s not a matter of “if” a ham will be served but more a question of how the ham is prepared. Recipes need to be tested – and in my book that’s as good an excuse as any to serve up a Sunday Ham Supper on a Saturday evening . . .
Apricot Brown Sugar Glazed Ham
1 (8-10 pound) smoked picnic ham (bone-in)
2/3 cup brown sugar
1/3 cup apricot jam
1 teaspoon dry mustard powder
Preheat the oven to 325 degrees.
Place the ham cut side down onto a sheet of aluminum foil, shiny side up. With a sharp knife, score the ham to allow glaze to seep into the meat.
Mix together the brown sugar, apricot jam and mustard powder in a small bowl. Pop mixture into the microwave for about 30 seconds to soften and make it more spreadable.
Brush onto the ham using a pastry or barbecue brush. Be sure to brush cut side as well. The ham should be well-coated with about half of the glaze mixture. Reserve remaining glaze for later. Enclose the foil around the ham and place on a rimmed baking sheet.
Roast in a preheated oven for about 15 minutes per pound.
About 20 minutes before the ham is done, apply all the remaining glaze. Roll foil down, exposing the ham so that glaze with thicken, and any skin or fat will brown nicely. (Note: If glaze has thickened simply zap in microwave for about 30 seconds).
************
Hold the presses! Dinner was unbelievable! This recipe produced the most tender, flavorful, moist ham I have ever eaten. I don’t know if cooking the ham in my roasting oven rather than the big oven made any difference. I know I have a few more recipes to try . . . yet I have to admit, this was delicious!
Shredded Pork Tacos – Slow Cooker Style
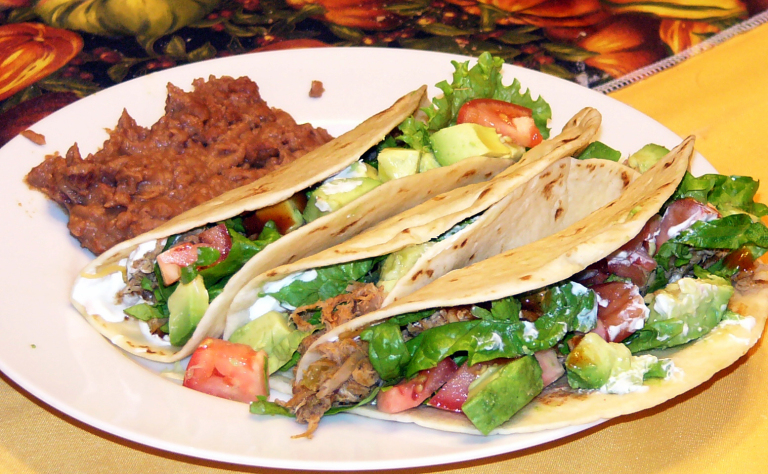
There is nothing like coming home to a wonderful meal, all cooked up in a slow-cooker, just waiting for the final touches. These Shredded Pork Tacos are absolutely delicious. The pork can be started in the crock pot while still frozen, perfect for forgetful cooks or last-minute decision makers – no need to defrost ahead of time. The slow-cooked pork is then finished in a large skillet, adding all the “taco” seasonings at the end. There will be plenty of meat left over for a second meal or to use as a filler to make pork enchiladas. The flavors are mild, lending easily to other creations.
Continue reading “Shredded Pork Tacos – Slow Cooker Style”Mom’s Chuck Roast Beef
This week Hubby and I will celebrate 32 years of marriage. I wanted the entire week to be “special”. One of Hubby’s favorite meals is Roast Beef with roasted potatoes and baby peas. I thought a nice Italian Roast Beef Tenderloin with Mushroom Sauce would be perfect. I could add some small Red Potatoes and buttery peas. A roasted tenderloin would make the cut of meat as special as the man I married. Perfect right?
Browned-Butter Brown Sugar Glazed Carrots with a Kiss of Kahlua
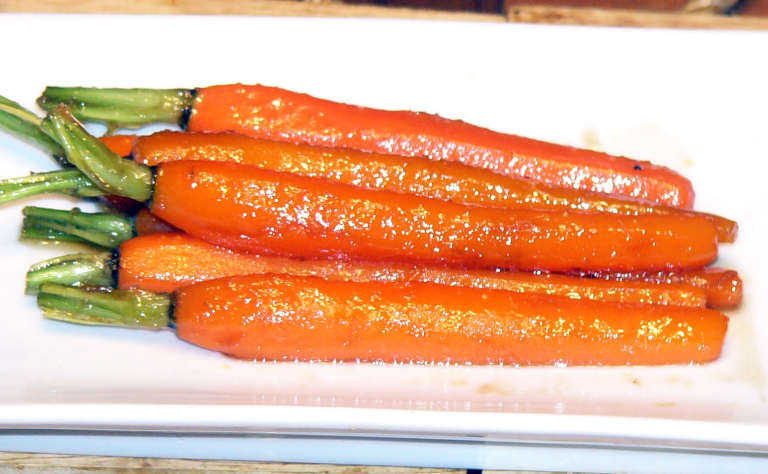
If you have been around for a while, you know that Brother Dear was not a vegetable eater. Corn – that was the extend of his vegetable tolerance. While Brother Dear was with us, his biggest complaint every night at dinner was that the table was set with the vegetables at his end. Meat at the head of the table, starches (potatoes, pasta and so forth) in the middle, vegetables at the foot of the table. Our plates were passed around the table until everyone had a serving of what was offered. Naturally, Brother Dear passed on the vegetables, unless it was corn. Every night, Kiddo would bug his Uncle to at least try a vegetable. Kiddo’s argument was how do you know you won’t like something if you have never given it a try. (Same argument I use with Kiddo. And guess what? Sometimes he will try something new to discover that he likes it.) Brother Dear liked both the butter and the brown sugar, so when it came time to finally give in to Kiddo’s nagging, he was willing to try Browned-Butter Brown Sugar Glazed Carrots. Much to his surprise, he liked it. So picky eaters be warned – you just might like this wonderful dish.
One of the things I like best about glazed carrots (besides the taste) is how colorful it looks on my plate. I love to serve anything with bright color.
Browned-Butter Brown Sugar Glazed Carrots
1 Bunch Baby Carrots, tops intact
2 Tablespoons Water
Pinch of Salt
4 Tablespoons Butter
4 Tablespoons Brown Sugar
1 Tablespoon Kahlua
Trim tops of carrots, leaving about 1 inch of the “green” intact.
Wash and peel carrots. Place in a microwave safe dish.
Add water and a pinch of salt. Microwave on HIGH for 3-5 minutes, until carrots are tender-crisp.
Heat empty skillet until almost smoking. Remove skillet from heat, add butter. Butter will begin to brown almost immediately. Swirl pan around and let butter become a light amber color. Add brown sugar, swirl until sugar has dissolved to create a nice glaze.
Add Kahlua, swirl pan to blend. Place carrots in pan with butter. Swirl to coat carrots, spooning the glaze over the carrots. You really want the glaze to be thick and shiny rather than have the carrots swimming in syrup. Place pan on low heat. Continue to swirl until carrots are nicely glazed and everything is hot.
Transfer to serving platter, allowing excess glaze to drip back into the pan. Serve immediately.
Grilled Smoked Sausages with Barbecue Sauce

 This is almost a silly posting – such a simple “recipe” – yet one of the favorites with my guys for a quick, easy dinner. Only two ingredients. From prep to table in about 20 minutes. Can’t beat that for easy. It’s one of those family favorite “junk” comfort foods. Coupled with the right sides, it’s both filling and delicious. There is a little more to this posting then what meets the eye. When I miss Brother Dear, I take to cooking his kind of grub. Grilled Smoked Sausage was one of his favorites.
These yummy grilled sausages not only make a great quick and easy supper, they would feel right at home at any backyard barbecue. Served along side such popular backyard favorites as barbecued chicken, these grilled sausages bring a little variety to the feast while stretching your food dollar in the process. The flavors of the grilled sausages and barbecue chicken would complement one another and take very little time to prepare. A boneless chicken thigh or two cooked up on the grill and kissed with your favorite barbecue sauce, a serving of “J” shaped barbecued sausage, some fried potatoes and maybe an ear of corn – your guests will be both full and satisfied. Sometimes we’ll have a “big barbecue” – some chicken, maybe a tri-tip or two, and I’ll trow on a few Smoked Sausages, knowing that Brother Dear will be sitting at the table with us, if only in spirit.
Grilled Smoked Sausages with Barbecue Sauce
2 Packages Hillshire Farms Smoked Beef Sausage
1 Cup Barbecue Sauce, any flavor
Heat small gas grill for direct cooking. Split sausages in half width-wise to create 2 halves. Split again lengthwise to open sausage. You will now have 8 “J” shaped sausages.
When grill is ready, place sausage haves on grill skin side up until nicely cooked. Turn, brush with barbecue sauce and continue to grill until heated through.
Serve with additional barbecue sausage if desired.
Great with Country Style Southern Fried Taters and corn.


Looking for more of Brother Dear’s favorite sausage? Try Brother Dear’s Smokes Sausage and Fried Potatoes
Summer Squash Sautéed with Garlic-Dill Weed
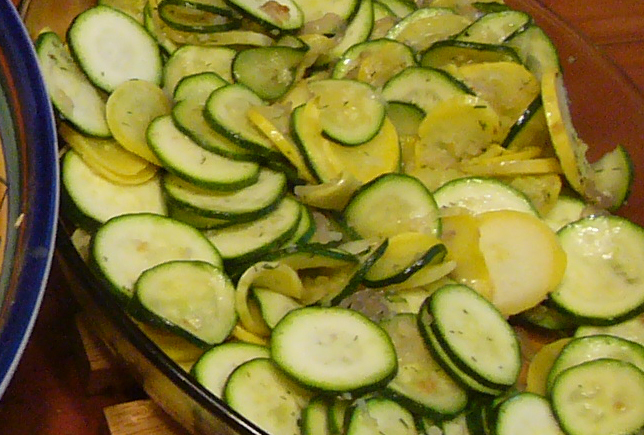
One of my favorite side dishes is also one of the easiest to make. A little slicing, a dash of seasoning, quick swirl in a pan and that’s it. The vegetables are seasoned just right with a kiss of garlic and a pinch of dill. Salt is purely an optional thing – a little Himalayan Pink Salt will go a long way to bring out the flavors of the squash.
Continue reading “Summer Squash Sautéed with Garlic-Dill Weed”
Butterfly Pasta with Chicken and Broccoli

This is one of those recipes that has made several appearances on our meal planner, only to be pushed aside, opting instead for fast food, a night of left overs or cold sandwiches. For whatever the reason, the dish could not find its way from the planning stage to the execution process. Finally, I painted myself into a corner – two beautiful breasts wrapped in butcher paper sat it the refrigerator, along with fresh broccoli from the farmer’s market and a bright orange pepper. No excuses – no backing down.
Continue reading “Butterfly Pasta with Chicken and Broccoli”
Kiddo’s Awesome Brown Sugar Bacon

Sometimes it’s better when you don’t know the “proper” way to do things. A few nights ago, Hubby and I came home from running errands, opened the front door and were promptly greeted by the aroma of bacon. Not just bacon, but brown sugar bacon. No doubt about the smells. Kiddo was in the kitchen, eager to greet us. He had cooked up some brown sugar bacon (Kiddo loves bacon – could live on bacon) and had managed enough self-control to save us about a quarter of a slice to “sample”. It was awesome – smoky and sweet without being overly sticky. Wow!
As I sampled my little bite of yummy brown sugar bacon, I noticed there were no baking pans soaking in the sink with caramelized brown sugar. No racks dripping with the goo. Not even a hint of a sticky piece of foil. The only thing in the sink was a griddle pan, and it wasn’t a huge mess either.
“How did you cook this?” I asked, surveying the lack of mess in my kitchen.
“Simple.” Kiddo replied with a big smile, his chest all puffed up with pride. “I added brown sugar to the fry pan.”
Really? Fried brown sugar bacon? Not baked, not broiled but fried, as in cooked on a flat fry pan. I was amazed.
For Sunday’s breakfast of French Toast I asked Kiddo to cook up his brown sugar bacon. It was really simple – so simple there’s really no need for a real recipe. It’s all a matter of how much bacon, and go from there.
Brown Sugar Fried Bacon
2 tablespoons Bacon Drippings or as needed
1 tablespoon Brown Sugar or as needed
6 Slices Smoked Bacon or as desired
Heat a flat skillet or griddle pan over medium heat.
Add about 2 or 3 tablespoons bacon drippings to the warm pan. Stir in about a tablespoon or so light brown sugar to the melted drippings. Lay bacon over the brown sugar flavored drippings and fry bacon as you normally would, turning as needed to prevent bacon from burning.
As the grease in the pan increases, add a little more brown sugar to keep it a glaze consistency. Continue to cook bacon until it is golden and crisp.
To cook up additional slices, transfer cooked bacon in an oven safe rimmed dish and keep warm in the oven. To the now empty skillet, add a little more brown sugar to the pan and continue to cook a second batch of smoky, yummy bacon.
Each batch of bacon takes about 10 minutes or so to fry up – much faster than baking in the oven with the same yummy results.
Clean-up is a snap. Dump grease into the can you keep under the sink for grease (you know, the one that is later thrown out with the trash – please don’t tell me you dump grease down the sink!) Then wash the pan in warm soapy water. No soaking necessary.
