In my mind, nothing renews the soul more profoundly than spending time in the Pacific Northwest – the morning mist, the rhythm of the sea and forlorn cries of gulls circling overhead – there is no comparison.
Lemon Chicken Stir-Fry with Ramen Noodles
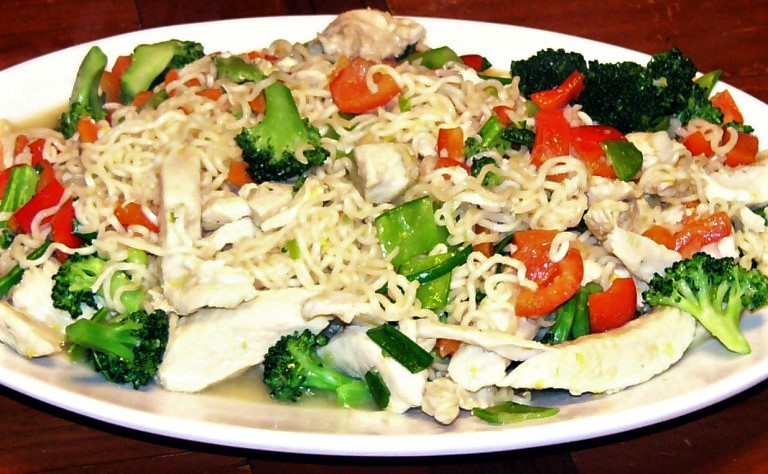
A family that cooks together, stays together. Okay, maybe not, but it sounds reasonable. Kiddo and I have spent enough time in the kitchen together to have that rhythm – almost like a dance, each knowing the other’s style, steps and timing. As for Hubby, we do well together when I prep and he grills. In the kitchen, my Master Griller becomes all-thumbs – and to equate it to dancing, it’s more like a stomp. Hubby tends to want to clean before we are ready to clean. For example, I’ll chop a veggie, place it in the pan, leaving the chopping board and knife on the counter. When I reach for it again, he’s already washed, dried and put it all away. (After a lifetime of marriage, you would think he understood – on counter, going to use again – in sink, okay to wash).
Continue reading “Lemon Chicken Stir-Fry with Ramen Noodles”
Pasta Prima Ravioli

This original recipe was inspired by a recipe I found at Taste of Home for Ravioli with Italian Sausage. Their recipe looked yummy. Cheese Ravioli, Italian Sausage, a meatless Pasta Sauce, chopped green bell peppers and Parmesan Cheese – what was not to like? I put it on my meal planner. Yeah, a quick weeknight supper. And it wouldn’t overheat our cozy kitchen on a warm summer night.
Antipasto Platter
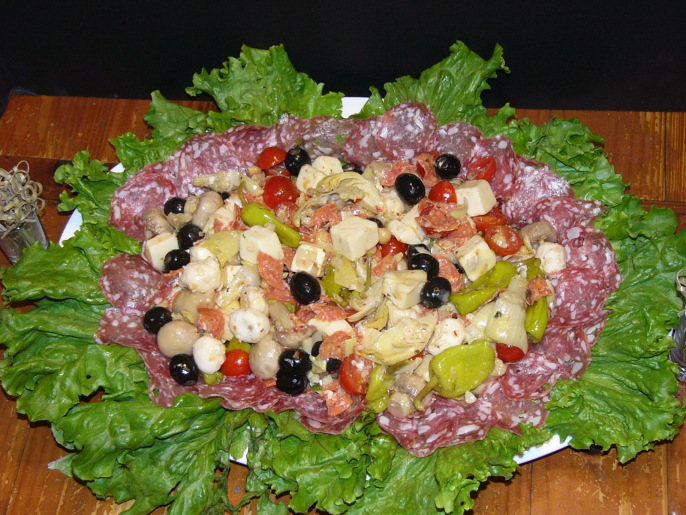
Recently, my baby sister invited Hubby, Kiddo and I to her home for an evening of Liar’s Dice. She was making a big pot of Spaghetti, bread and a salad. I wanted to bring something keeping with her Italian supper theme. If you haven’t noticed by now, let me clue you in – when invited to a party I always offer to bring a little something, and then go a little nuts. Dish after dish – not just one appetizer or side dish, but a trunk-load.
Continue reading “Antipasto Platter”A Labor Day Picnic to Bid Summer a Fond Adieu

I love picnics, don’t you? There’s something magical about eating outdoors – be it on the patio, at the beach, along a riverbank or under the canopy of beautiful trees that seems to make everything taste better. And what better way to bid farewell to summer than with a picnic?
Continue reading “A Labor Day Picnic to Bid Summer a Fond Adieu”
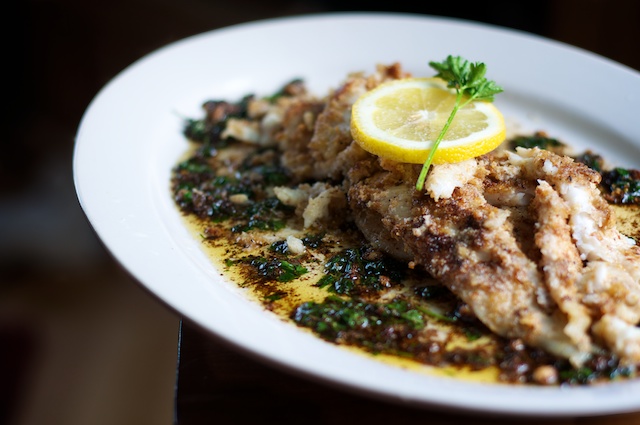
Chicken Breasts in a Caper Cream Sauce

Capers, cream, dill – what’s not to like? Okay, maybe the dill – it’s a seasoning not meant for everyone. I like dill mixed into cream cheese for a spread or over sautéed vegetables. Dill over salmon with lemons – delicious. But dill on chicken which was then covered in a caper-cream sauce? This was most assuredly going to be a new experience. But then, isn’t that the whole point of life and living? New experiences.
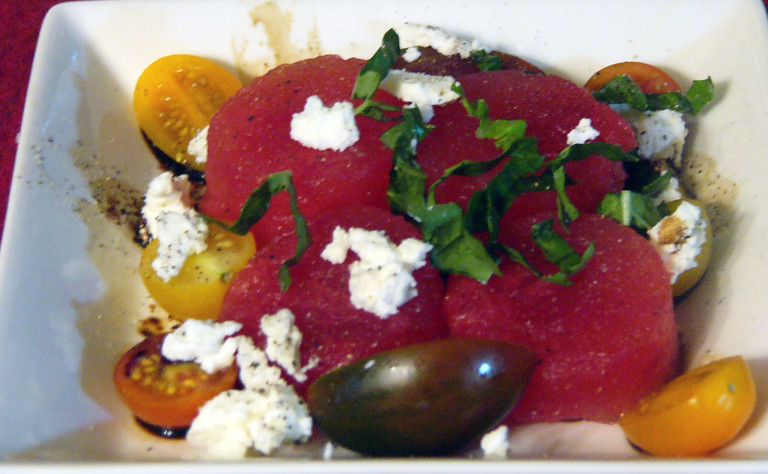
Refreshing Compressed Watermelon,Tomato and Goat Cheese Salad
 A little while back, I shared my desire to dine out in a gourmet restaurant while wearing my pajamas. If you are ever in Elk Grove, California you can experience the next best thing. Right on “main” street you will find the lovely little Boulevard Bistro hidden inside a 100-year-old bungalow. Seating for 30 – not 30 tables, but a total seating capacity for 30 people at a time. That’s it. The place has been there for nearly 10 years, is a 5-star rated restaurant, and is listed as one of the top 100 restaurants in the country. Yeah, surprise! In the heart of a cow town, who would have thought?
While the exterior is simple, the decor inside is elegant – black tie elegant – yet the patrons arrive in khaki shorts and saddles. The staff is well-trained, slipping in and out and around your table without notice, replacing flatware as it is used, clearing plates and pouring yet another glass of wine in a fresh glass. The chef Bret Bohlmann is a native of Elk Grove and a graduate of the San Francisco Culinary Academy. Together with his wife, they create some of the most awe-inspiring dishes combining Chef Bohlmann’s Old World French techniques and his passion for wild game.
We began our adventure with Pan-Seared Foie Gras – so tender, so wonderful so perfect. The Filet Mignons were so tender, you could almost eat them with a fork. The reduction sauce was to-die-for delicious. Deserts were a work of art that you could eat. Oh my. And the salad – so cool, so refreshing!
Naturally, I had to try to recreate as much of this awesome experience as possible. The salad is my own interpretation of the salad I had at the Boulevard Bistro. While this salad is close, it’s still a work in progress. Baby steps. That’s how I’ve learned – in baby steps.
Compressed Watermelon and Tomato Salad
1 small seedless watermelon
16 small tomatoes, assorted colors
3 oz Goat Cheese, crumbled
4 Basil Leaves, cut into narrow strips
1/4 Cup Fruit Balsamic Vinegar (see note)
1/4 Teaspoon Fresh Ground Pepper
Sea Salt to taste
Note: Any fruit balsamic vinegar will work. Experiment with Cherry, Raspberry, Blackberry or other flavors to see what pleases you.
Cut one end off the watermelon. (You want to begin working with a watermelon that has a flat; even end). Discard end slice or nibble on it while you work.
Cut round disk from remaining watermelon about 1 inch thick. Remove rind. Using a small shot glass, cut 8 circles from watermelon.
Place circles into a vacuum seal bag. Seal according to manufacturer’s directions.
Cut second round disk from watermelon. Again, cut 8 small circles from watermelon disk and seal in a vacuum seal bag.
Place vacuum sealed bags into the freezer for at least 3 hours. (Note: if bag is not gently compressing watermelon, place a pie tin on top of bag. Place a bag of frozen vegetables on pie tin to compress watermelon).
Once compressed; remove from freezer and let thaw. Keep chilled in refrigerator. You want the melon crisp-cold but not frozen.
When ready to serve, slice small tomatoes (grape size) in half. Stack fresh basil and roll tightly, creating a cigar-shape. Cut basil width-wise to shred into very narrow strips.
Place four watermelon circles on the center of four well-chilled salad plates.
Place tomato halves around watermelon in a pretty arrangement.
Sprinkle each plate with a little goat cheese. Scatter basil around plate..
Drizzle each salad with a little balsamic vinegar. Season with fresh pepper and a pinch of salt. Serve and enjoy.
Beef Enchiladas With Cilantro Cream Sauce

One of the things I look for in a recipe is down-time – you know, that time when the dish is cooking all on its own, without a great deal of attention. That “down” time allows me to do other things – run a few errands, putter about the house, reorganize a closet or simply relax with a cup of tea and watch the clouds roll by.
Continue reading “Beef Enchiladas With Cilantro Cream Sauce”
Chicken Santa Fe

So I gotta ask, isn’t this chicken dish pretty? Swimming in a spicy gravy, garnished with peppers and tomatoes – yum! And just feast your eyes on that gooie melted cheese. Serve this delightful chicken with a side of refried beans, some warm tortillas and maybe Peach Margaritas.
Labor Day – Oh My!

Labor Day is but a week away – can you believe it? When our children were still children, Labor Day wasn’t about picnics or backyard barbecues – it was about running away from home – headed up the California Coast and cool ocean breezes. Now, we are more home bodies – and Labor Day involves extended family – which is fine. I like my nutty family. Besides, planning family events teaches our children (or in this case, our grandchild) the importance of family ties. The older we get, the more we appreciate those ties.
Sweet and Salty Crock Pot Pork Tenderloin

After a day of antiquing, Hubby and I came home to a wonderful pot of falling apart, a little sweet, a little salty Pork Tenderloin. (And just for the record, we know nothing about antiques. We buy what we like and what we like are things that still have usefulness – like old tea cups). Since Kiddo declined to join us on our adventure, he was in charge of preparing supper. Like the dutiful assistant he is in the kitchen, Kiddo followed my recipe to a tee. Personally, I thought it was delicious. When asked their opinions, both Kiddo and Hubby agreed that the flavor was good, but the meat seemed a bit dry (especially for a crock pot) and there wasn’t enough juice. Hum, that was interesting.
Continue reading “Sweet and Salty Crock Pot Pork Tenderloin”
Cannoli Stuffed French Toast

Have I mentioned that I adore Cannoli? I first fell in love with Cannoli while attending an Italian Food Festival over twenty years ago at the Rio Hotel in Las Vegas. These were no ordinary Cannoli. These were genuine God Father Cannoli, made by the same man who made the Cannoli for the 1972 film, The Godfather. He had a little booth set up at the festival adorned with pictures from the film of him posing with some of the big name stars. An older Sicilian gentleman, he was a talker, sharing his experience with anyone willing to listen. Imagine the delight of my friend and I when he offered to teach us how to make his Cannoli! Hey, if you are going to learn to make Cannoli, why not learn from a behind-the-scenes Cannoli maker? I used to joke that I learned to make Cannoli from the Godfather’s baker himself. Now the problem with having genuine Cannoli is that these delicious, deep-fried shells stuffed with the most luscious of fillings became my yardstick by which all other Cannolis are measured. The key to good Cannoli is that the shells cannot be filled until just before serving. The shells need to be crisp. The filling well-chilled and then piped into the shell mere moments before you take your first bite. But all of that is a posting for another day.


While Cannoli are a dessert, the clever couple over at Two Peas and their Pods have taken this wonderful concept, given it a French Twist and much to our delight have legitimized dessert for breakfast. I’ve taken their recipe and doubled it. It’s an easy recipe to adjust and oh so delicious! What’s that you say? Someone at your table won’t eat Cannoli? That’s okay, leave out the filling and fry up a couple of extra slices of egg-dipped French Bread. Enjoy your stuffed toast and let them know just what they are missing.
Cannoli Stuffed French Toast
2 cup ricotta cheese
1/2 cup powdered sugar
1 teaspoon vanilla extract
2/3 cup semi-sweet chocolate chips
3 large eggs
1/2 cup heavy cream
8 slices French bread
4 tablespoons butter
Powdered sugar-for serving
In a small bowl, combine the ricotta cheese, powdered sugar, and vanilla extract. Stir in the mini chocolate chips. Set aside.
In a shallow bowl or pie plate, whisk the eggs and heavy cream together. Spread 4 slices of the bread with the ricotta mixture, about 1/2 cup per slice. Place the other slices of bread on top and gently press them together. Carefully dip both sides of each sandwich into the egg mixture until well coated.
On a flat griddle melt the butter on medium heat; about 325 degrees. Add the French toast sandwiches and cook until golden, about 4 minutes per side. Cut the sandwiches in half on the diagonal and transfer to plates. Dust with confectioners’ sugar and serve immediately.
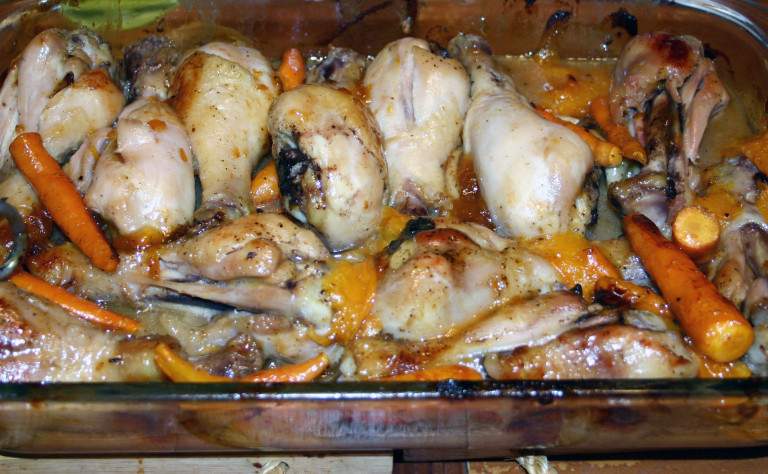
Apricot Sage Honey Glazed Drumsticks with Young Carrots
Recently Hubby, Kiddo and I spent a day at a Flea Market (of sorts) on Treasure Island in the San Francisco Bay. TreasureFest, as it is now called, is a mixture of vintage peddlers,  and local craftsmen. There is everything from recycled art to small cottage-kitchen homemade goods. We found a vendor peddling her homemade marshmallows in a variety of flavors (our favorites were the salted caramel and peanut butter mallows). We sampled some wonderful, creamy goat cheeses from a nearby farm (bought four different flavored cheeses), various honey from local keepers, balsamic vinegars, and bottles of the most flavorful olive oils. These vinegars and oils are lovingly made in small batches – a bit pricey, but well worth the extra costs. If you are ever in the San Francisco area on the last weekend of the month, I highly recommend a side trip to Treasure Island. The views of the bay are spectacular, the merchandise offered is unique and the endless assortment of food trucks (the best in the bay) are sure to satisfy whatever craving you may have. Get there early, as the crowds grow throughout the day. And plan for a lot of walking.
Needless to say, we were in hunter’s heaven. Hubby bought a great hand-crafted leather belt. I found vintage dishes, hand-painted serving bowls and all sorts of honey, cheeses, vinegars and oils to stock my pantry. The Cherry Balsamic Vinegar was a great update to my refreshing Compressed Watermelon,Tomato and Goat Cheese Salad. This awesome summer salad was part of my Summer Birthday Bistro. I’ve got big plans for the Lemon-Goat Cheese (for a creamy sauce to add with chicken – but that’s a post for another day). I love these types of markets – so filled with inspiration!
The sage honey was awesome in this glazed chicken recipe. So golden, so delicate, so down right delicious. Both the apricots and young carrots came from a visit to the farmer’s market. While large carrots can be used, or the baby carrots in a bag, there is something sweet about the young, tender carrots with their tops that add to the dish (just be sure to cut off the green tops before using!)
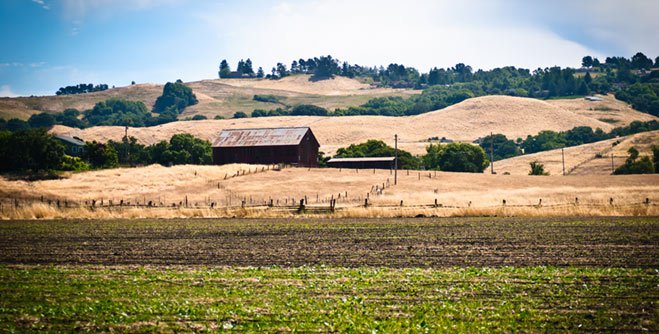 Needless to say, the quality of your chicken will greatly impact the flavor of your dish. Whenever possible, look for hormone-free, antibiotics free, all natural chickens. The “brands” that I prefer are Rocky or Rosie Chicken – both from the same company. Their chickens come from Sustainable Farms in and around the Sonoma area of California. The chickens are then packaged in nearby Petaluma. Beautiful country – great farms, vineyards and awesome foods abound throughout the Sonoma Valley.
Apricot Sage Honey Glazed Drumsticks with Carrots
Chicken Drumsticks
10 drumsticks
Salt to taste
freshly ground black pepper to taste
1 tablespoon olive oil
4 fresh apricots
10 young carrots
To prepare Chicken: Pre-heat oven to 425 degrees.
Season the chicken generously with salt and pepper. Set aside.
Pit the apricots, then slice into strips. Set aside.
Wash carrots, trim tops and ends. Cut as necessary into 2″ long sections. (Mine were perfect, needing almost no cutting beyond the trimming stage). Set aside.
Heat oil in heavy bottom skillet over medium high heat. Once oil is hot, brown the drumsticks on all sides, about 8-10 minutes, turning as needed. While chicken is browning, make apricot glaze.
Apricot Sage Honey Glaze
1/2 cup apricot jam
1 tablespoon red wine vinegar
3 tablespoons Sage Honey
1 tablespoon Dijon mustard
2 cloves garlic, crushed
½ teaspoon salt or to taste
To Prepare the Apricot Glaze: Combine apricot jam, red wine vinegar, sage honey, mustard, garlic and salt in a small bowl. Whisk mixture thoroughly to combine. Reserve 2 heaping tablespoons of the glaze and set aside.
Using a pastry brush, brush the remaining glaze over the drumsticks on all sides. (You will not use all the glaze in this application).
To the remaining glaze in the bowl, add carrots and apricots. Mix to coat well. Set apricot/carrot mixture aside.
Arrange drumsticks in a large casserole dish. Spoon carrot/apricot/glaze mixture over legs, spread evenly.
To Bake the Chicken: Place chicken in the oven to bake. After about 20 minutes, remove dish from oven, close door to retain heat, Rotate legs, and brush with reserved glaze. Return dish to oven for another 20 minutes.
Check for drumsticks for doneness. If more time is needed, rotate legs once more and return to oven for an additional 5 to 10 minutes of baking.
To serve: Plate legs and carrots, drizzle with juices from the casserole dish. Serve with fluffy rice such as Rice Pilaf.

Portuguese Grilled Chili Basted Game Hens

A few years back, I was on a Portuguese cooking kick. I couldn’t get enough of it. In this quest, I stumbled upon a treasure-trove of wonderful dishes at portuguesecooking.com. Not only were there recipes, but stories and tantalizing tidbits of how the dish came to be from folklore and historical facts of many of the dishes. Needless to say, I was in heaven, devouring the tidbits while adding recipe after recipe to my collection. I adore them all.
Continue reading “Portuguese Grilled Chili Basted Game Hens”
Angel Hair Pasta with Shrimp in White Wine
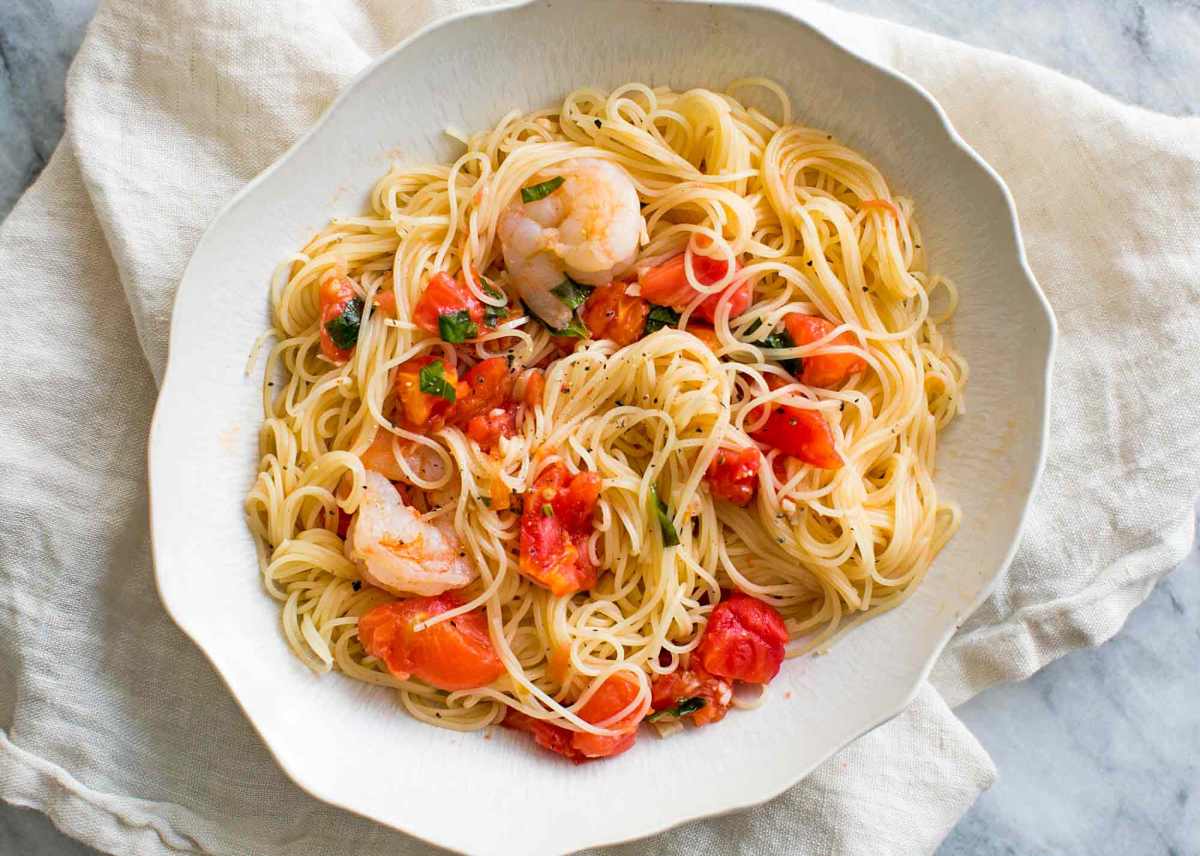
So pretty. So delicate. So delicious. Served along side warm garlic bread and a simple salad of leafy-lettuce with tomatoes, this makes for one romantic supper or impressive meal when company comes a calling. I love pasta dishes for entertaining. Maybe that’s just the romantic in me – imagine a table set in the middle of a vineyard – friends gathered round just as the sun begins to set. In the twilight of the evening, we break the bread and let the lively conversation begin. Laughter and love floating in the air, dancing together, intertwined as one. Oh, life is good under a setting Tuscan sun.
Continue reading “Angel Hair Pasta with Shrimp in White Wine”
