Caramelized Onion Roasted Pork Tenderloin

comparing cuts of porkOne of my favorite cuts of pork has to be the tenderloin. This is not to be mistaken for a pork loin. These are two different cuts of meat from two different parts of the animal. The Tenderloin is thin and small, while the Port Loin is wide enough to cut steak-like pieces from it. These cuts of pork aren’t even cooked the same. While both can be roasted, the tenderloin is best cooked quickly using high heat, while the loin lends itself well to slow-roasting or indirect grilling methods. Just as the beef tenderloin gives us Filet Mignon, the Tenderloin of a pig gives us pork Medallions, tender and delicious with a mild flavor on their own. Just as Filet Mignon embrace additional sauces and flavoring agents, so too do Medallions.

This recipe is perfect for a lazy weekend supper or easy midweek dinner. From prep to table, it’s about an hour total. While that might not seem like a midweek recipe, with longer days it’s not out of the realm of possibilities. We tend to eat later in the evening during the spring and summer months. It has something to do with sunlight in general. A meal at six in the evening during the winter feels more like midnight, while supper around seven in the summer somehow makes sense. Crazy, huh?

This roasted Pork Tenderloin goes well with a simple side dish of rice, such as a Pilaf or buttery garlic, and some steamed green beans. Not too filling, but oh so satisfying. A larger tenderloin may be used, simply increase the cooking time accordingly. For the three of us, it was the perfect size.

Caramelized Onion Pork Tenderloin
1 large sweet onion, thinly sliced
1 teaspoon sugar
2 teaspoons olive oil
1 pork tenderloin (1 pound)
1/4 teaspoon salt
1/8 teaspoon pepper

In a large skillet, cook onion and sugar in oil over medium-low heat until onion is tender and golden brown, about 30 minutes, stirring every 10 minutes or so.

Preheat oven to 425 degrees. Cover a 13 x 9 rimmed baking pan with foil. Place a V-shaped rack into baking pan and with cooking spray. Set aside until ready to use.

Once onions are caramelized, place pork tenderloin onto the V-shaped rack. Sprinkle with salt and pepper. Top with caramelize onions. Cover and bake for about 20 minutes. Remove from oven, add a little water to the bottom of the baking pan, cover roast with foil and continue to cook another 20 minutes or until center of pork reaches 160 degrees, checking every 10 minutes.

Remove tenderloin from oven, keep warm and let rest 5 minutes before slicing.

A Midsummer Night’s Delight – Lasagna with a Meaty Sauce and Mini Garlic Monkey Bread

Monkey Bread. Monkey Bread. What a fun thing to say. Monkey Bread.

Under normal circumstances I wouldn’t even dream of making Lasagna in the summer. I try to avoid anything that is baked in the oven, even for a short time. I try to avoid dishes that are heavy when it’s hot. Summer is a time for light meals, and lots of cooking outdoors.

Continue reading “A Midsummer Night’s Delight – Lasagna with a Meaty Sauce and Mini Garlic Monkey Bread”

Our Holiday Vacation to the Wilds of Wyoming – Day 2

Our second day of vacation was actually the first day in the park. We headed out from Rand Creek Ranch early in the morning with the plan to spend the entire day exploring the park and hitting all the “major” attractions. We wanted to get an overview of the entire geothermal areas, with return trips later in the week to those features of greatest interest.

Continue reading “Our Holiday Vacation to the Wilds of Wyoming – Day 2”

1913 Style Deviled Egg Tea Sandwiches

I like to read old cookbooks. One of the things I find interesting about old recipes is that so many do not contain a list of ingredients followed by instructions. You need to read through the recipe’s “how to” and extract a list of ingredients from the instructions. Even then, measurements are often “assumed” – case in point would be the recipe below. The instructions were all I had to go by. It was through simple trial and error that I was able to get at lease some “measurements”. Sometimes when using old recipes, I’ve had to google the instructions to refine them a bit – terms such as “kitchen spoonful”, or “saltspoon”, quick or slow oven, finely pulverized sugar – were once foreign to me. A slow oven is around 300-325 degrees, while a quick oven is around 400-425, and a very quick oven is around 450.  A saltspoon equates to about 1/4 teaspoon by today’s standards, while a kitchen spoon is about 1 tablespoon. As for pulverized sugar, that’s a gimme – powdered sugar!

One of the things I like about old cookbooks is that they contain recipes long since forgotten. Some for good reason – such as Vinegar Pie! No, not a crust made with vinegar, but an actual pie called Vinegar Pie – made with eggs and vinegar. Very inexpensive, very big during the depression.

Other “vintage” recipes are worth keeping – boiled frosting is a good example. And then there are things we simply don’t think about today – placing a cake in front of an open window to cool. Think about it – you’ve just baked a cake, and the kitchen is warm from the oven. What better way to cool the cake (and the kitchen) than to open a window?

This recipe for Deviled Egg Salad Sandwiches was first published in 1913. The  same year the 16th Amendment to the United States Constitution was ratified giving the government the power to collect income tax. Woman marched on Washington in the first official Woman Suffrage Procession. Richard Nixon, Rosa Parks and Jimmy Hoffa were all born that year. All in all, it was an interesting year.


Deviled Egg Salad Sandwich – 1913 Style
6 Eggs, Hard-Boiled
Olive oil
Wine Vinegar
Salt & Pepper to taste
¼ teaspoon French mustard
2 Drops Tabasco sauce
3-4 Tablespoons mayonnaise
Lettuce Leaves (Optional)
Bread, lightly toasted
Dill pickle spears for garnish (Optional)

Peel some boiled eggs, then separate the yolks and whites.

Mash the yolks of hard-boiled eggs to a powder and moisten with olive oil and a few drops of vinegar. Work to a paste, add salt, pepper and French mustard to taste, with a drop or two of hot sauce.

Now chop the whites of the eggs until they are a fine yet coarse mixture. Place them with the yolk paste. Add mayonnaise and mix well until spreadable.  Adjust seasonings if necessary.

Spread egg mixture on lightly toasted bread, crusts removed. Quarter to create triangle shapes.


Personally, I like to make my egg salad sandwich with green leaf lettuce for color and “crunch”, then serve them up with a nice, crisp pickle spear. These little sandwiches would also be a nice “old-fashioned” addition to an afternoon tea.

Tips to Boiled Eggs: Place eggs in a pan and cover with cold water. Bring to a full boil. Remove from heat, cover and let rest for 12-14 minutes. Drain, then plunge eggs into ice-cold water to cease the cooking process. The results will be a perfectly cooked egg with a sunny yellow yolk. Once eggs have cooled enough to handle, gently roll on counter top to “crack” shell. Return to water and soak for about 20 minutes. The water will seep under shell and make peeling easier.

Super Easy Green Chili Chicken Enchiladas

The first time these Chicken Enchiladas were served up for supper, Kiddo was in charge of making dinner. He knocked it out of the ballpark with just a few simple ingredients. One thing is certain, Kiddo knows how to cook.

Continue reading “Super Easy Green Chili Chicken Enchiladas”

Our Holiday Vacation to the Wilds of Wyoming – Day 1

When Hubby and I still newly married, one of our first trips together was a road trip to Montana via Yellowstone Park. The reason behind such a strange route to the Indian Battlefields of Montana (our real destination) was so that I could visit with my cousin. 1st trip to yellowstone
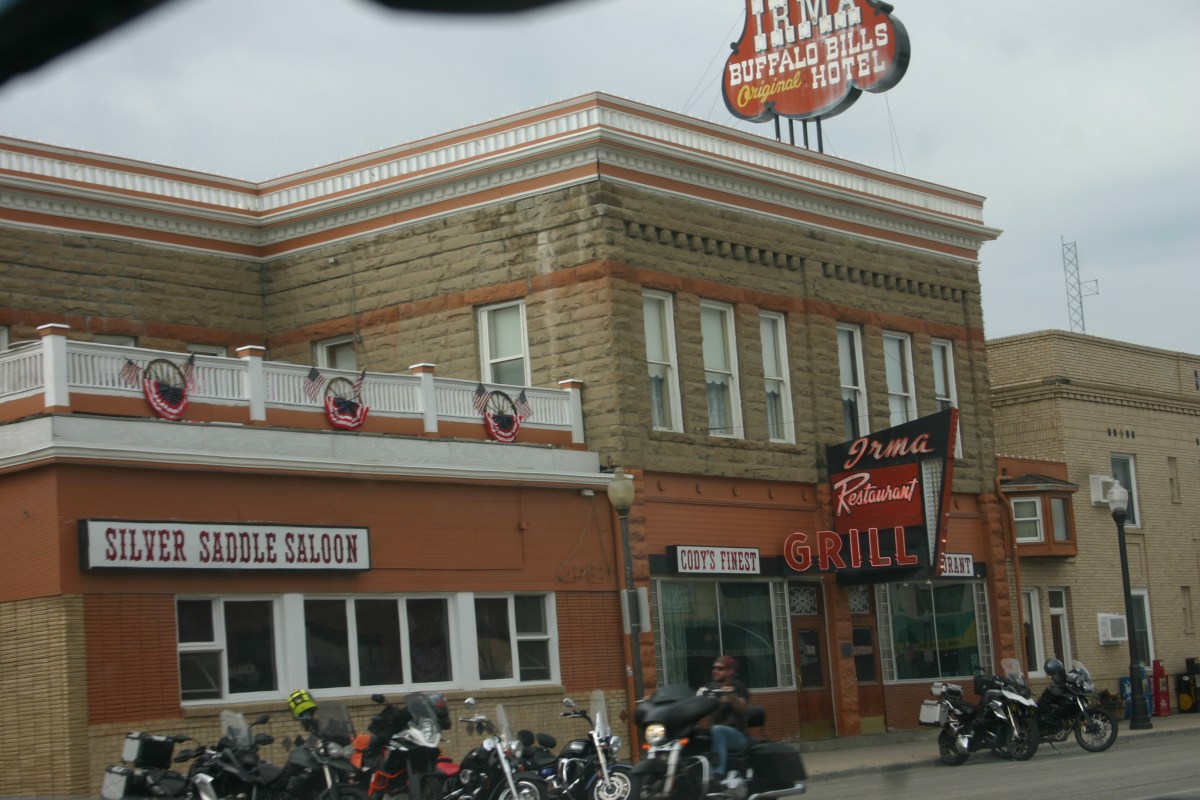
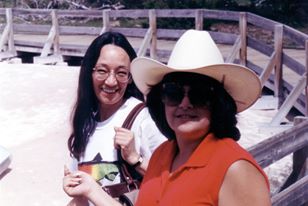
She and her fishing-guide husband lived just outside West Yellowstone, Montana. Although that first trip was “passing through” on our way to the Little Big Horn, Yellowstone and its surrounding area captured our hearts. While most of Yellowstone is in Wyoming, the park spans almost 3,500 miles, extending into parts of Montana and Idaho, making it one of the largest National parks in the US.

Continue reading “Our Holiday Vacation to the Wilds of Wyoming – Day 1”

Crescent Wrapped Sesame Dogs

2002-12-10As most of us know from childhood, crescent wrapped dogs are so much fun. Kiddo’s first experience with Crescent Wrapped Dogs was when we were invited to a friend’s house for dinner and games. He was maybe nine or ten at the time and thought these were the greatest invention since sliced bread. It wasn’t until I watched in amazement as Kiddo made a huge deal out of something so simple as crescent dogs that I realized his was not a typical childhood.

Continue reading “Crescent Wrapped Sesame Dogs”

Brother Dear’s Smokes Sausage and Fried Potatoes

jimboI’ve been thumbing through my recipe repertoire, looking for a few of my brother’s favorites to share. He has been in my heart (always) and my thoughts – especially of late with what should have been his 61st birthday just around the corner. I miss him at my table, even if he was a pain to cook for with all his picky dislikes. There will always been certain foods that I cook and when I do, he will fill the room with his presence. In my heart, I can see his face, with that twinkle of mischief in his dark brown eyes and a warm smile that lights up the room.
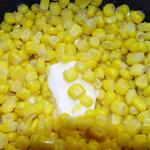
One of his favorite “comfort” suppers is Smoked Sausage and Fried Potatoes with a side of corn. When he lived with us, I tried to make this once a week because I knew it was something he would eat. Since my baby brother went be with our mother, I don’t make it nearly as often. Yet whenever I do, Kiddo says “Uncle Jimbo’s favorite.” And we smile.

In our house, we’ve always put food on the table in the same order – vegetables at one end, (to my right), with potatoes (rice or what have you) at the other end, and the meat or main dish in the middle. Hubby usually has seconds of meat and potato servings, while I like a second helping of veggies. When my baby brother came to live with us for a while, his end of the table just happened to be the end with the vegetables – green beans, squash, asparagus, wilted spinach – the good stuff. He would take his place at the dinner table, survey the evening’s offerings and then ask the same question “How come you always put the yucky stuff by me?” His question always got the same reply from Kiddo “She’s hoping maybe you’ll take the hint and eat something green.” My brother would wrinkle his nose, let out a big laugh and pass his plate down to the far end of the table so Hubby could load him up with a big helping of starch and meat. You can see why Smoked Sausage and Fried Potatoes with a side of corn was one of his favorite meals. No “yucky” stuff on the entire table.

Smoked Sausage & Fried Potato Skillet Dinner
3 Packages Hillshire Farms Smoked Beef Sausage, coin cut
1 Tablespoon Olive Oil
1 Tablespoon Butter
6-8 Medium Size Red or Russet Potatoes (about 1 ½ – 2 lbs) cut into thin slices
Onion Powder to taste (about a tablespoon)
Plenty of Salt & Pepper to Taste
A dash or two of Paprika for color

In a large skillet over medium-high heat, melt butter with olive oil. Wash the potatoes and slice into thin slices.

Sauté potatoes, stirring to coat the slices with the warm butter and oil. Season with onion powder, salt, pepper and a dash or two of paprika. Add a little water, cover and allow potatoes to “steam” fry with a well-fitted lid until almost soft, about 8-10 minutes, stirring occasionally to prevent over-browning.

Remove cover, add sausage and continue to cook until nicely browned, 8-10 minutes longer, turning as necessary to prevent burning.


As far as Brother Dear was concerned, this meal wasn’t complete without some buttery corn straight from the can . . .

buttery cornButtery Canned Corn
1 Can Corn, well-drained
¼ Cup butter
Kosher Salt to taste

Drain corn and rinse well to remove any of the packing liquid.

Place corn in a saucepan over low heat until all liquid has evaporated, about 5 minutes.

Add butter, increase heat to medium. When butter melts, stir into corn. Season with a pinch of kosher salt. Continue to heat until corn is hot, about 5-10 minutes.  Transfer corn to serving bowl and serve.


To my baby brother – I love you every day!

Those Wild and Crazy Bears – The Golden Days in Yellowstone

We recently spent a week roaming through Yellowstone Park, the first National Park in America. It was great to spend all that time in the park. You can bet we took lots of pictures that I’ll be sharing with you soon.

Continue reading “Those Wild and Crazy Bears – The Golden Days in Yellowstone”

Absolutely The Bomb – The Ultimate Bloody Mary

I came across this recipe for the Ultimate Bloody Mary about four years ago at Honestly Yum (https://honestlyyum.com/). I remember back – way, way back in the days when I was single. Many a Sunday morning, I found myself sitting at a bar sadly sipping a hair of the dog that bit me in the form of a Bloody Mary.

Continue reading “Absolutely The Bomb – The Ultimate Bloody Mary”

Cajun Bay Scallops over Spicy Spanish Rice – A Worldly Dish

Hot, hot, hot! Feel it . . . hot, hot, hot. I don’t know which sizzles more, the bay scallops or the spicy rice. Put the two together and you’ve got one incredibly spicy dish. While so many dishes feature the Sea Scallops (those are the bigger scallops – 20 or so per pound), this recipe centers around the Bay Scallops (their smaller cousin – 70 or so per pound). Bay Scallops are naturally sweeter, which helps to offset the intense heat of this scorching hot dish.

Continue reading “Cajun Bay Scallops over Spicy Spanish Rice – A Worldly Dish”

Chicken Milano

Have you ever noticed how hard it is to get back into the swing of things after a vacation? Not only for my guys to get back into the routine of a working stiff, but for me to get my butt back into the kitchen. I love to cook, don’t get me wrong. But it sure is nice when someone else does all the work and all we need do is show up.

Continue reading “Chicken Milano”

Butterfly Pesto Pasta Salad

The first time I made this dish, it was to pack for an elegant picnic. It was a first for a lot of things that day – the picnic’s spice-rubbed chicken and the pesto sauce for the salad. I had never made pesto sauce before. I’ve eaten pesto sauce recipes in restaurants and found the sauce at times to be a bit over baring. I’ve tried commercially prepared pesto sauces, and found them to be “okay” but lacking in something, I just didn’t know what.

So why make a pesto pasta salad? I was convinced Pesto was a good thing – and like escargot – it was an acquired taste. As a fan of spinach, basil and all things Italian (thus far), Pesto was a taste I was determined to acquire if it was the last thing I did!

Wow! This is really good. I mean really good! The salad is intended to be served at room temperature, which made it a good choice for a picnic or buffet table. It is creamy and deliciously sublime.  The pasta of choice is Farfalle Pasta, better known in America as bow tie pasta. Yet I prefer the Italian translation – Butterfly. It could also be made with any type of broad pasta, although I would not recommend a tube or shell pasta as some of the sauce may gather inside and over power the overall dish.

On a final note before cooking, I recently read that Walnuts can be used in place of the Pine Nuts, which tend to be an expensive ingredient. While I haven’t tried that, I can see where it might work. If substituting Walnuts for Pine Nuts, I would use only a few, adding as needed until you’ve reached the desired taste.

Butterfly Pesto Pasta Salad
3 Garlic Cloves, unpeeled
1 Cup Fresh Basil
1 ½ Cups Baby Spinach
¼ Cups Pine Nuts
¼ Cup Olive Oil
3 Tablespoons Lemon Juice
1 Tablespoon Red Wine Vinegar
Salt & Pepper
¼ Cup Parmesan Cheese
½ Cup Best Foods Mayonnaise
1 lb Farfalle Pasta (bow-tie)
1/4 Cup or so Reserved cooking water

Toast garlic in a small skillet over medium-heat, shaking pan occasionally, until fragrant and color deepens slightly, about 7 minutes. Let garlic cool, then peel and chop coarse.

Process garlic, basil, spinach, pine nuts, olive oil, lemon juice, salt and pepper in food processor until smooth, stopping to scrape down bowl as needed. Add Parmesan Cheese and mayonnaise, continue to process until thoroughly combined. Transfer pesto to a small bowl, cover and refrigerate until needed. (Mixture can be refrigerated for up to 24 hours).

Bring a large pot of salted water to a rapid boil. Add pasta and cook, stirring often, until pasta is just past al dente. Reserve ¼ cup of pasta cooking water, drain pasta. Toss pasta with a little olive oil and spread into a single layer on rimmed baking sheet. Let pasta cool to room temperature, about 30 minutes.

In a large bowl, toss cooled pasta with pesto, adding reserved pasta water, 1 tablespoon at a time, until pesto evenly coasts pasta.

Just as a side note, I brought my Butterfly Pesto Pasta to a family gathering a few years back. Feeling rather cleaver, I put the pasta into a butterfly shaped cake pan, inverted it onto a serving platter and attempted to “decorate” the salad as a butterfly. While the end result was “cute” it’s still very much a work in progress. What can I say? I like to play with my food! The nice thing about salads such as pastas, rice or potato salads is that they are easy to “mold” using just about any shape bowl or container.

Just remember, when playing with your food, it’s important to have fun!

06-21-2014-18

06-21-2014-19


Marinated Artichoke-Chicken Fettuccine with Smoky Bacon

If I had to describe this dish in a single word it would be scrumptious. I had some reservations – Dijon Mustard and Mayonnaise in the sauce – really? Yes, really. One word of caution, the dish comes together rather quickly, so make sure you have a clear path in the kitchen – there will be a great deal of jumping from task to task. Gather your ingredients, and have everything at the ready so it’s just a matter of dump and go on to the next thing.

Continue reading “Marinated Artichoke-Chicken Fettuccine with Smoky Bacon”

Better Betty Crocker Au Gratin Potatoes – Almost from Scratch

Before writing this next post, I went in search of the history of Betty Crocker’s Boxed Potatoes on the internet. Aside from a TV spot on YouTube featuring an ad that first appeared in 1974, I really couldn’t find much. What I did find were a lot of rave reviews for the Boxed Potatoes and various tips (like this one I’m about to share) on how to kick them up a notch. That makes me feel oh so much better, to know I’m not alone in using boxed potatoes as a base for a quick and easy side to some of my favorite home-cooked meals. Now I don’t feel so “guilty” of a little cheating.

Continue reading “Better Betty Crocker Au Gratin Potatoes – Almost from Scratch”