Simple Ground Beef Goulash

Growing up; every now and again Mom would make Goulash. Just as when Mom would make Picadillo; I thought Goulash was a made-up word for throw a bunch of stuff into a pot and see what happens. After all; Goulash sounds like a made-up word, doesn’t it? No offense to the Hungarian people.

goulashGoulash makes me think about galoshes – you know – rain boots. When Kiddo was a little kid (around 1st grade) and living in the middle of a desert in Nevada; the students were asked to identify which shoes children should wear when it rains. They were shown three pictures – flip-flops; sneakers and galoshes. Almost all of the children picked the sneakers – especially since most of them had never seen galoshes before. Southern Nevada gets an average of 4″ of rain a year – and most of that falls in a day! Special shoes for rainy days just never occurred to these children of the desert.  The same standardized test asked this question: “It’s getting dark outside. What should the driver of this car do?” As adults, we all know the answer – turn on the headlights. Kiddo’s response is one I will never forget. “Go home because it’s bedtime.” Hey, it made sense!

Now where were we? Oh yeah – Goulash is an all around comfort food. It’s also a great campfire meal, utilizing a lot of canned ingredients that are easy to pack and some ground beef that takes up very little space in a cooler. Throw all the spices into a sandwich bag marked “Goulash” and there you go. A great supper for that first night under the stars. (In case you are wondering about the soy sauce – save a packet from your next Chinese take-out).

While I’ve reduced my recipe for our family of three, this recipe can easily be doubled for a larger group gathered round your campfire or dinner table.

Ground Beef Goulash
1 pounds lean ground beef
1 large yellow onions, chopped
3 cloves garlic, chopped
1 1/2 cups water
1 (15 ounce) cans tomato sauce
1 (14.5 ounce) cans diced tomatoes
1 1/2 tablespoons soy sauce
1 tablespoons dried Italian herb seasoning
2 bay leaves
1/2 tablespoon Hungarian Paprika
1 cups uncooked elbow macaroni

In a large Dutch oven, cook and stir the ground beef over medium-high heat, breaking the meat up as it cooks, until the meat is no longer pink and has started to brown, about 10 minutes. Skim off excess fat, and stir in the onions and garlic. Cook and stir the meat mixture until the onions are translucent, about 8-10 more minutes.

Stir in water, tomato sauce, diced tomatoes, soy sauce, Italian seasoning, bay leaves, and seasoned salt, and bring the mixture to a boil over medium heat. Reduce the heat to low, cover, and simmer 20 minutes, stirring occasionally.

Stir in the macaroni, cover, and simmer over low heat until the pasta is tender, about 15 minutes, stirring occasionally. Remove from heat, discard bay leaves, and serve.

Buttery Egg Noodles with Poppy Seeds

Sometimes simple is best. These buttery noodles are a wonderful alternative to mashed potatoes as a side. They go well with just about any pork recipe. The pasta looks pretty along side breaded chicken breasts or baked fish, too. You can even drizzle the noodles with a little gravy or pan drippings to bring out more flavor. Depending upon the “main” star, adding a little crushed garlic is also a nice touch. For added color, sprinkle finished pasta with a little chopped parsley.

Not only are these noodles easy to make, they can become the base for a wide variety of dishes, such as meatballs or baked chicken tenders.

Buttery Egg Noodles with Poppy Seeds
1 lb Wide Egg Noodles
2 Tablespoons Butter, melted
1 Teaspoon Poppy Seeds

Bring a large pot of well-salted water to a full boil. Add pasta, stir and cook until just cooked through, about 10 minutes.

Drain and reserve about 1-2 tablespoons pasta cooking water.

Melt butter, pour over noodles and toss to coat. Moisten pasta with pasta water.

Sprinkle with poppy seeds. If desired, add chopped parsley for a splash of color.

Here’s to simple ideas!

Beefy Corn Rice-A-Roni – When “Quick” is All That Matters

I know, it’s hard to fathom that someone can sing the praises of Filet Mignon and wine reduction sauces one minute, then open a box of Rice-A-Roni the next. What can I say – I’m a woman of many tastes.

This really isn’t a recipe. Nothing “original” here – more along the lines of a suggestion.

Sometimes we need to eat quick, as in under 30 minutes quick. Sometimes we need to eat quick, as in not a lot of fuss, and very little clean up. At times like this, I reach for something that is not very healthy but sure is filling. I start with the stuff in a box better known as Rice-A-Roni. Add some meat and a vegetable – presto it’s dinnertime. You can serve it up straight from the pan, or use it as a great stuffing for Bell Peppers.

Beefy Corn Rice-A-Roni
1 ½ lb ground beef
2 tablespoons Butter
2 Boxes Beef Rice-A-Roni
1 Can Corn, drained well
4 ½ Cups Water

Brown ground beef in a large skillet, breaking it apart as it cooks. Drain well in a colander placed over a large bow.

While meat is draining, add 2 tablespoons of butter to the same skillet the meat was cooked in. Empty contents of Rice into the skillet and cook until golden, about 3-4 minutes, stirring constantly.

Return meat to the skillet. Sprinkle contents of seasoning package over meat. Add corn and water to the skillet. Bring to a boil, cover and reduce heat to medium-low.

Simmer for 15 minutes or until rice is tender.

This goes well with tomato wedges or a simple salad.

**********

Stuff Bell Peppers
1 ½ lb ground beef
2 tablespoons Butter
2 Boxes Beef Rice-A-Roni
1 Can Corn, drained well
4 ½ Cups Water
4 Large or 6 Small Yellow or Orange Bell Peppers

Stuffed Bell Pepper (1)Prepare Beefy Rice-A-Roni as above. While Rice-A-Roni is cooking, cut the tops from bell peppers and core. Place peppers in a pot of boiling water for about 5 minutes to help soften. Remove peppers from water, drain well.

Heat oven to 350 degrees. Arrange bell peppers on a glass baking dish with about a 2-inch rim.

Spoon rice mixture into peppers. Top with a little cheese. Place in the oven and bake for about 20 minutes.

I like to use orange bell peppers at Halloween and carve little faces into the peppers before filling. It makes for a simple dinner that is perfect for Halloween, when dinner is filled with cute interruptions of “Trick Or Treat”.

Red Wine French Beef Stew over Mashed Potatoes

What sets this French Beef Stew served over mashed potatoes apart from all the others? The wine – an entire bottle of your favorite wine! (And by that I don’t mean your favorite cooking wine, but the stuff you like to sip by the glassful). The whole house will smell like a winery as the stew simmers on the stove top.

Continue reading “Red Wine French Beef Stew over Mashed Potatoes”

French Vanilla Cake with Blueberry Filling and Fresh Berry Basket

Mom at ThanksgivingToday is Mom’s birthday. She would have been 85 years old today, may she rest in peace. Mom was born in Manila, across the International Date Line, so in the Philippines, yesterday was her birthday. I remember there was a time when Mom tried to convince Dad that she needed two birthday celebrations – one for her birthday in the Philippines, one for her birthday in America. Right now, it’s tomorrow morning there. Wrap your head around that one for a moment . . .

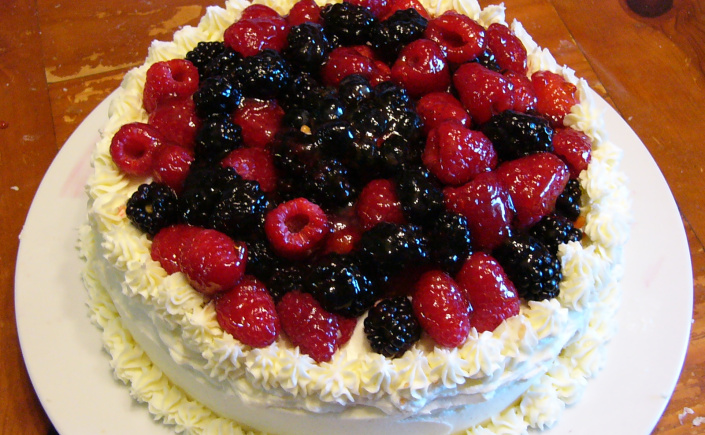
Of all the cakes I’ve baked over the years, this one is by far the prettiest. As cakes go, it’s not overly sweet. I love the presentation, and the blueberry filling is delicious. You would never guess that it isn’t a completely from scratch cake.

Sometimes we need to cheat a little – just a little.  For this cake, I use a box mix for the base, then altered the directions just a little to make a richer, more butter cake. It’s a short cut to scratch cake that still gives a wonderful texture and moist finish.

This cake is actually a combination of several recipes that I had been dying to try all rolled into one. The filling is from one recipe, the topping from another, the “doctored” cake base and almond kissed frosting are mine.

The end result is a beautiful cake. It’s not too sweet, more along the lines of an adult desserts. Yet sweet enough for the little ones without too much of a sugar rush.

Before we get to baking, I want to give you a few pointer I learned the hard way.

First, the filling – the original recipe said to mash the blueberries with a fork. This turned out to be far too tedious, so I decided to “squish” them with my hands. Almost immediately into the squashing process, I realized it was a mistake. While the berries were mushing up nicely, my hands were becoming a beautiful shade of color me purple. A potato masher works well without staining your hands.

Next – the piping along the top of the finished cake. Don’t get too close to the edge or the pretty stars might just shift off the cake when you start spreading the berries on top.

Finally, you’ll want to make your cake in the morning so everything has time to set up nicely. Then keep it refrigerated until about 30 minutes before serving.

Hope you enjoy!

French Vanilla Cake with Blueberry Filling and Fresh Berry Basket
Cake:
1 Box French Vanilla White Cake
3 Eggs
1/4 Cup Vegetable Oil
1/4 Cup Melted butter
1 Cup Water

Preheat oven to 325 degrees.

Place eggs in a mixing bowl. Beat with paddle until pale, about 2 minutes.

Melt butter in a microwave safe dish. Add to eggs. With paddle running, slowly add vegetable oil and water until light and frothy.

Add cake mix, blend for 30 seconds on low, then 2 minutes on medium high.

Prepare 2 round cake pans with Wilton’s Cake Release. (I swear by the stuff!)

Divide batter between pans. Tap gently to release any air bubbles.

Bake in oven for about 20 minutes, check for doneness. If necessary, bake an additional 10 minutes, checking every 5 minutes. Cake should be “just done” since it will continue to cook in the pans after being removed from the oven.

Place cake while still in the pan onto cooling racks. Let cool 10 minutes.

Remove from pans, and allow to cool completely on racks, about 2 hours.

Blueberry Filling:
2 1/2-pint baskets blueberries
1/2 cup sugar
1 teaspoon fresh lemon juice

Mash BlueberriesIn a large bowl, mash blueberries. Combine berries, sugar, and lemon juice in heavy small saucepan and heat over high heat, stirring until the sugar dissolves.

Reduce heat to medium to maintain a rolling boil and continue to cook, stirring constantly until berries are reduced to about 3/4 cup. This should take about 15 minutes.

Pour mixture into a bowl and allow to cool, stirring occasionally. Once cooled to the touch, mash berries with a potato masher. Cover with plastic wrap to prevent “skin” from forming on top. Refrigerate until ready to use.

Almond Buttercream Frosting:
1/4 Cup Solid Butter-Flavored Vegetable Shortening
3/4 Cup Butter, Softened
1 teaspoon Almond extract (or to taste)
4 Cups sifted powdered Sugar
3 tablespoons heavy cream (approximately)

Cream butter and shortening with electric mixer. Add almond extract. Beat to blend.

Gradually add sifted powdered sugar, one cup at a time, beating well on medium speed. Scrape sides and bottom of bowl between additions and after the last of the sugar has been added.

When all sugar has been mixed in, the frosting will appear to be dry. Add cream one tablespoon at a time and beat a medium speed until light and fluffy. You are looking for a consistency that is both easy to spread and can be used for piping. (Think mashed potatoes without the lumps). Keep frosting covered with a damp cloth until ready to use.

Sift Powdered SugarSifted Powdered SugarTIP: The best way to sift powdered sugar is to use a strainer, a large bowl and a wooden spoon. Sift about 2 cups at a time through the strainer. Use the spoon to “stir” the sugar through the strainer and into the bowl. It makes quick work of sifting the sugar. This method can also be used for flour or baking cocoa.

Spread BlueberriesTo Assemble Cake: Trim “dome” from one cake round to make cake even. Place cut-side down on serving platter. Generously spoon filling over cake, and spread to within 1/4 inch of edge.

Trim “dome” from remaining cake. Place on top, cut side down. Press down slightly. Let cake rest a few minutes for filling to settle.

Frost sides of cake, pressing frosting into join between cakes to fill in any gaps. Lightly frost top of cake.

Using a star tip, pipe border around top edge to create a “rim”. Pipe matching stars along base of cake. Let the frosted cake sit for about 30 minutes for the stars to firm up. Finish with the fresh fruit topping

Finished CakeFruit Basket:
1 Basket Blackberries
1 Basket Raspberries
1/2 Jar Current Jelly for Glaze (see note)

Rinse berries, let drain well and pat dry if necessary. (It’s a good idea to let the berries drain while the frosted cake is firming up).

Heat jelly in a saucepan over low heat until melted. Arrange berries on top of cake, brush with glaze.

Refrigerate finished cake up to 6 hours.  Remove from refrigerator about 30 minutes before serving.

Note: While the recipe calls for Current Jelly, any “clear” jelly such as apple will do.
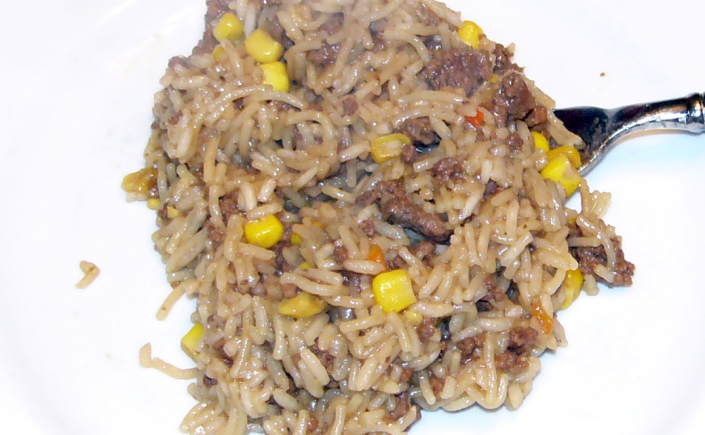
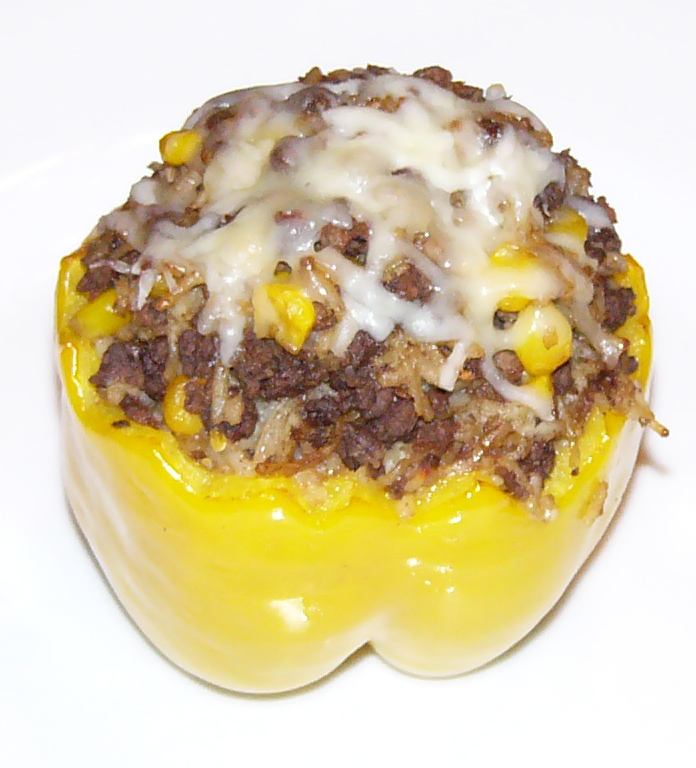
Hobo Skillet Potatoes

For Mother’s Day a few years back, we decided to do a breakfast brunch. Typically, gatherings are held at my youngest sister’s house. However; that year we were leaning toward a gathering at the family farm.

Continue reading “Hobo Skillet Potatoes”

Ranch Chicken with Butter-Cream Sauce

If this recipe looks familiar, you are right. It’s a variation on my Super Moist Breaded Ranch Chicken. These yummy, moist breasts cook up in no time at all. Served with a quick rice dish, with steamed green beans or a toss salad and it’s a delicious supper in a flash after a long day. My guys really enjoy the chicken dish just as it was.

While preparing the original recipe, it struck me that I could introduce a little diversity to the plate simply by creating some sort of sauce for the breasts – something to complement the chicken while elevating the presentation just a little. The result was something between “comfort” and “fancy”. I was feeling both particularly lazy and creative at the same time.

Wow! It was delicious. Not quite a scampi, but close. Not quite a Piccata, but close. Best of all, it was a hit with my guys.

Ranch Chicken with Butter-Cream Sauce
Breaded Ranch Chicken
1/2 Cup Ranch Dressing
1 cup Italian Bread Crumbs
2 Tablespoons butter
2 Tablespoons Olive Oil
4 boneless chicken breasts

Filet chicken breast lengthwise to create 2 thin breasts from each larger breast. (Or use thin sliced breasts from the market).

Pat breasts dry with paper towels.

Brush breast with Ranch Dressing, then roll in bread crumbs.

Melt butter with olive oil in a large frying pan over medium high heat. Once melted, lower heat to medium, place breaded chicken into pan.

Cook for about 5-8  minutes or until golden brown. Turn and cook for an additional 3-5 minutes.

Transfer breasts to an oven proof platter, tent and place in a warm oven to “hold”. Make Butter-Cream Sauce

Butter-Cream Sauce
1/4 Cup Dry White Wine
2 Tablespoons Lemon Juice
1/4 Cup Heavy Cream
2 Tablespoons Butter
White Pepper to taste
1 Tablespoon Capers (Optional) 

Pour white to the now empty skillet, scraping up any browned bits in the pan. Add lemon juice, cream and butter. Reduce heat to low and allow sauce to reduce and thicken. Taste and season with a little white pepper.

Return chicken to pan. Sprinkle with capers (if desired), cover and cook until everything is heated through.

Transfer chicken to serving platter or individual plates. Spoon sauce over chicken and serve.

***************

Note: To reheat any left over breasts, simply make more sauce, place breast in sauce, cover and simmer for about 20 minutes, turning mid-way through. Just as delicious as the first time around!

Filet Mignon in Red Wine Reduction Sauce with Tarragon-Garlic Butter

When Hubby and I were first married, back in the stone age, he was (and still is) a big fan of Porterhouse steak. I adored Filet Mignon. What Hubby didn’t realize was that his beloved “tender side” of a Porterhouse is, in reality, a small sampling of beef tenderloin. And steaks cut strictly from the tip of the tenderloin are sold as Filet Mignon.

Continue reading “Filet Mignon in Red Wine Reduction Sauce with Tarragon-Garlic Butter”

Pesto-Alfredo Pasta Chicken Bake

This beautiful recipe is inspired by The Cooking Jar. Farah has a wonderful approach to her blog – everyday cooking for everyday cooks. While I love experimenting with recipes. Sometimes I’ll find a recipe that forces me to google some of the ingredients as I wonder “What the heck is that?” With The Cooking Jar, you will recognize every ingredient – most of those “real” ingredients are probably already in you kitchen.

Continue reading “Pesto-Alfredo Pasta Chicken Bake”

Any Way You Spell it, Omelettes Don’t Scare Me!

What I know about omelette making techniques you could fit into a thimble. I hadn’t even eaten an omelette until I was in my early thirties – and that was on a flight to Los Angeles for a little weekend get away with Hubby. What I knew about omelettes was that my mother never made them. It was something fancy people ate at a fancy brunch. What I have since learned about omelettes has been self-taught. I know what I like and what I don’t like, so I don’t order omelettes very often when dining out.

Continue reading “Any Way You Spell it, Omelettes Don’t Scare Me!”

Picadillo – Filipino-American Style

1950s-cover-3My love for cooking came from my parents. They knew their way around the kitchen, and Mom loved to entertain. Our home was always filled with people – extended family, neighbors, friends. Ours was the house with the door open to everyone and plenty of good food to share. Many of the recipes I like to share come from those warm memories.

Continue reading “Picadillo – Filipino-American Style”

Haricots verts à l’étouffée (Stewed Green Beans)

A few years back, I was searching for a recipe for Green Beans with a French Twist. That’s when I came upon this recipe on easy-french-food.com. Since then, I’ve made one very small adjustment – the introduction of a clove of pressed garlic. I couldn’t resist. I love garlic in just about everything, especially with stewed or sautéed vegetables.

Continue reading “Haricots verts à l’étouffée (Stewed Green Beans)”

Meatballs and Mushroom Sauce over Buttery Egg Noodles

One night for dinner, I decided to see what else I could whip up using frozen prepackaged meatballs. My Teriyaki Meatballs had been such a huge hit, I was anxious to see what else these frozen shortcut gems could become. So off to the kitchen I went.

Continue reading “Meatballs and Mushroom Sauce over Buttery Egg Noodles”

Avocado BLT Sandwich with Basil Mayonnaise

Did you know that April is BLT month? That means tomorrow, April 1st, is April Fools Day, Easter Sunday and the start of BLT month.

The BLT has been around for ages, taking its time to emerge into a roadside diner favorite.  The early makings for a BLT have been around since the Egyptians first  began baking bread and cultivating lettuce. Pigs were domesticated by 500 BCE.  Tomatoes traveled from the new world to Europe in the 16th century. Around 1756  the French came up with a sauce that would later evolve into what we now know as Mayonnaise. Still, no sandwich. It took the Fourth Earl of Sandwich, John Montagu, to come up with the concept of placing meats between two slices of bread and thus giving birth to the sandwich in 1762. Had the Earl of Sandwich been a pious man, it may have taken longer. However; he was a gambling man. Not even hunger could move him from the gaming tables. With the invention of the sandwich, he could play cards with one hand while eating with the other. And they say nothing good ever comes from gambling! How combination of the bacon, lettuce and tomato sandwich came into existence isn’t clear. All evidence indicates that BLTs weren’t available until sometime around 1900, at least not in printed references. The BLT grew in fame and was widely popular after World War II, with the expansion of supermarkets and the ingredients readily available to the masses. As for the catchy name – BLT – many believe it was diner shorthand. While Bacon, Lettuce and Tomato Sandwich appeared on the menu, when sending an order back to the cook it was easier to write BLT.

Topping a BLT sandwich with avocado is nothing new – not even all that “fancy”. Living in California, avocados are found on nearly everything from hamburgers to tacos to grilled cheese sandwiches. What makes these sandwiches absolutely glorious is the Basil Mayonnaise. You will end up with far more mayonnaise than you can use for the BLTs. However; this spread will keep for several days in the refrigerator without loosing its beautiful color and it is awesome on smoked turkey sandwiches. Yum!!! So it’s safe to say this is two recipes in one.

The original recipe can be found at http://www.thekitchn.com/recipe-california-blt-with-avocado-and-basil-mayonnaise-173957 (Yeah, I made a few changes – but it’s fairly close to the original). Even the “original” recipe is an adaptation from another recipe – as part of that lovely evolution in cooking.

Avocado BLT Sandwich with Basil Mayonnaise
Avocado BLT Sandwich
12 Thick slices of smoked bacon

8 slices good-quality bread (Italian sliced or sourdough)
2 tomato, large – heirloom if you can get them
1 ripe avocado
Green Leaf Lettuce
Basil Mayonnaise (recipe follows)

In a large skillet, fry the bacon until crisp. Drain on a plate lined with paper towels. Toast the bread. (For BLTs using sliced bread, I like to put two slices of bread into each toaster slot – it will toast nicely on the outside, while the inside slice stays soft. For sourdough, grilled is the only way to go).

While the bread is toasting; slice the tomatoes and avocado.

Spread one piece of bread with the basil mayonnaise. Top with the lettuce, tomato, bacon and as many avocado slices as you are happy to eat.

Spread basil mayonnaise on the other slice of bread, top sandwich and cut in half if desired.

Basil Mayonnaise
1/2 cup packed basil leaves
4 tablespoons olive oil
1 teaspoon lemon juice
2 medium garlic clove, chopped
Zest of one lemon
1 cup mayonnaise

For the Basil Mayonnaise: In a blender or small food processor, combine the basil, olive oil, lemon juice, garlic and lemon zest. Process until finely chopped and relatively smooth, scraping down the sides of the bowl occasionally. (For smooth mayonnaise, use the young tender leaves; for chunkier mayonnaise, add the larger leaves as they won’t process down completely).

Place the mayonnaise in a small bowl and whisk in the basil mixture until thoroughly combined.

Store in the refrigerator, where it will keep for up to a week, though the color will dull after 2 days.

Enjoy!

NOTE: Try these served on grilled sourdough bread. The crisp, buttery sourdough brings yet another dimension to the sandwich and the bread is the perfect size for long strips of bacon!


The Importance of Sunny Pepperoni Pie

Not that long ago, Hubby asked if I were in the mood for pizza. He knows I’m not a huge pizza fan. For him to ask meant he was the one craving a slice. Naturally, I said yes. Hubby came home with the most incredible take out pizza pie I’ve ever seen. It was one of those take and bake jobs from Papa Murphy’s – their Five-Meat Stuffed Pizza. Have you seen that monster of a pizza? It’s two meaty pizzas stacked one on top of the other with a braided edge holding the two together. I swear, it weights a ton. As I said, I’m not a huge fan of pizza, but this pizza was awesome. It reminded me of another “pizza pie” – one of my own creations. While the two pies look nothing alike, the concept is the same.

Continue reading “The Importance of Sunny Pepperoni Pie”