
Did you know that the French Dip Sandwich isn’t French? No surprise there. About the only thing French is the use of Au Jus. Strictly speaking, Au Jus is a French culinary term meaning “with juice”. It refers to meat dishes prepared or served together with a light gravy, or broth, made from the juices given off by the meat as it is cooked. Today we think of Au Jus as simply a beef juice served on the side of a sandwich, not necessarily coming from a particular hunk of beef as it cooks. Look in your local markets, and you can find premade Au Jus in jugs, cans, dried mixes – just about any form. Just heat if in a liquid form, or mix with liquid for the dry form before heating.
A Summer Birthday Bistro Style

Next week is my birthday. Traditionally, we’ve gone to the same wonderful Italian Restaurant for dinner. The food is delicious. While not a “fancy” place, we’ve always enjoyed the atmosphere, the service and the people. Unfortunately, our little place closed a few years back. So much for traditions.
The Ultimate Chocolate Lover’s Chocolate Malt

Years ago, one of our favorite “drinks” to have with fresh off the grill burgers were yummy chocolate malts. Our kids loved them – especially the ones ordered at those little Mom and Pop nostalgic diners so popular along the highway. One of the things I noticed whenever we sat at counter-service malt shops is that most restaurants shakes are made using whole milk and vanilla ice cream. Chocolate syrup was added to transform a vanilla shake into a chocolate one. From a purely economical standpoint, this made good business sense. Whole milk and vanilla ice cream blended together provided the bases for just about any flavor “shake”. It was a blank canvas.
Continue reading “The Ultimate Chocolate Lover’s Chocolate Malt”
In-N-Out Style Double-Double Burger


For those of you living outside California, parts of Utah, Oregon, Nevada or Texas, you might not be familiar with In-N-Out Burgers. These are simple burgers, grilled up with fresh ingredients and topped with a whole slice of raw onion, their “signature”.
Parsley, Sage, Rosemary and Thyme Roasted Chicken

Are you going to Scarborough Fair:
Parsley, sage, rosemary and thyme.
Remember me to one who lives there.
She once was a true love of mine.


Continue reading “Parsley, Sage, Rosemary and Thyme Roasted Chicken”
Garlic-Rubbed New York Steaks with Savory Tarragon Butter
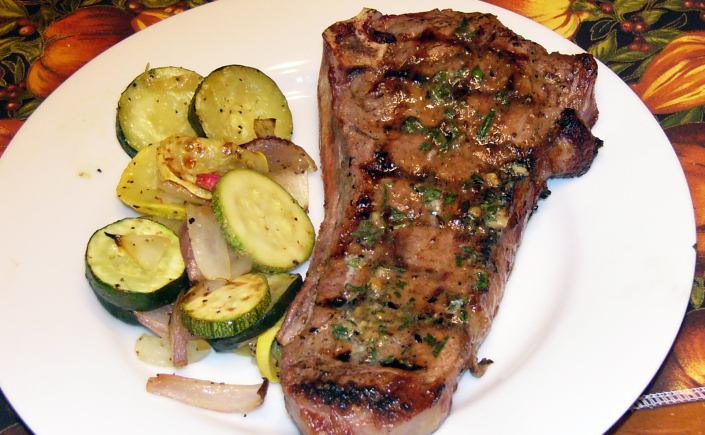
Okay, so the unofficial official start to the summer grilling season is Memorial Day, who says we can’t start grilling sooner? After all, Memorial Day is the unofficial start. Anytime the weather is right, it’s grilling season!
Continue reading “Garlic-Rubbed New York Steaks with Savory Tarragon Butter”
Snow Crab Leg Clusters in Garlic Butter
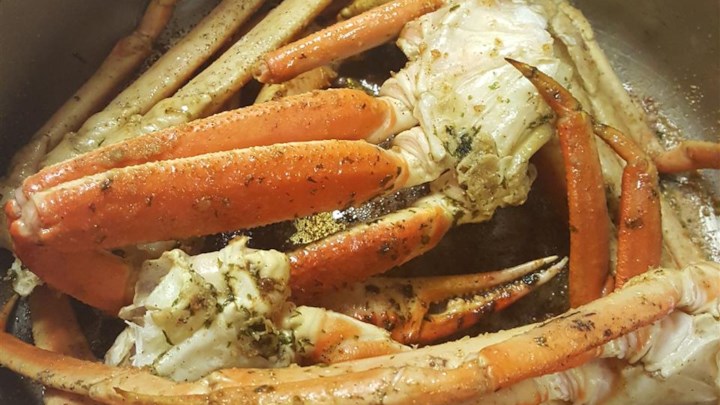
Snow Crab. While not as meaty as our favorite, the King Crab, Snow Crab is sweeter and less expensive. I adore the added garlic-butter flavor that seeps into the meat during the warming process. Unless you live in a coastal town, or get your crab from a large fish tank, all crabs are cooked when they’re caught then quickly flash frozen for transport. You’re basically just heating them up, whether that be with steam, on a grill or in a large pan with lots of butter. Once killed, crab has a very short shelf life and can be dangerous to consume. It’s how you choose to warm the crab that makes a difference in flavor.
Classic Ragù Bolognese with Beef, Veal and Pancetta

So you’ve decided to have a few friends over for a mid-week Italian supper. Great! Pick out a nice bottle of wine, some bread from your favorite bakery and toss a simple salad. All easy stuff. However; a true Ragù Bolognese takes time. Do you leave work early? Not necessarily. This Ragù Bolognese can be cooked up on a Sunday, to be served up on a Wednesday without diluting the rich flavor. If anything, a delay between cooking and eating only increases the elevation of savory goodness.
Continue reading “Classic Ragù Bolognese with Beef, Veal and Pancetta”
Oklahoma Onion Burger
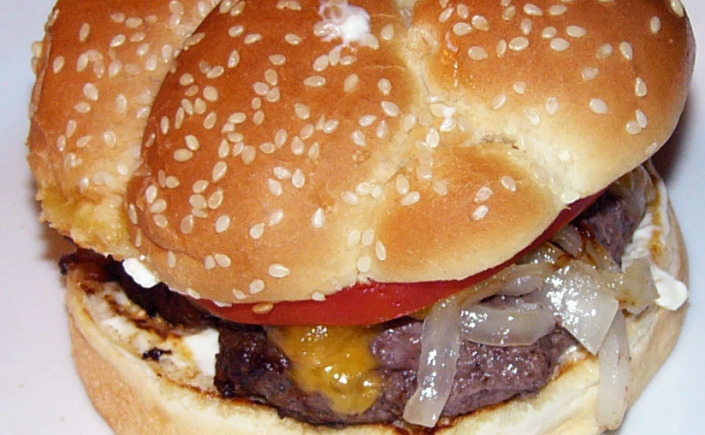
Onions and burgers go hand in hand. Take Patty Melts with Grilled Onions on Sourdough, the onions are caramelized, and placed on top of a rectangular patty between two slices of grilled bread – a diner staple. At backyard barbecues, plates of lettuce, tomatoes and sliced onions are offered up to accompany all those juicy burgers fresh off the grill. Onions are worked into the raw meat for added flavor before the patties are grilled. No double about it – onions and burgers are a marriage made in heaven. Yum – perfect for a Saturday Burger Night.
Super Easy Chorizo Tacos – The Perfect Food

Who doesn’t like tacos? Just about everyone, right? Tacos are the perfect food. Think about it – all the major food groups are found in a taco. Fruit (tomatoes and avocados), vegetable (lettuce), grain (taco shell – okay, that might be a stretch, but work with me here), dairy (cheese and sour cream) and protein (filling) – yep – it’s all there. There are chicken tacos, beef tacos, fish tacos, shrimp tacos – even bean tacos. Just about anything folded into a warm corn shell can be called “taco”. (Hey, I’ve even seen Ice Cream Tacos – like a drumstick, only the “stick” is shaped like a taco shell). One of my all time favorites are Chorizo Tacos.
Continue reading “Super Easy Chorizo Tacos – The Perfect Food”
Tropical Cocktails by the Pitcher

Have you ever noticed that nearly all “tropical” cocktails have a common ingredient – rum. Be it Coconut Rum, or Light Rum or Dark Rum – there’s a bottle of rum in there somewhere. It makes sense since rum is made from molasses (a byproduct of sugarcane harvests) that is mixed with cane juice and allowed to ferment.
Hawaiian Macaroni Salad with Spam
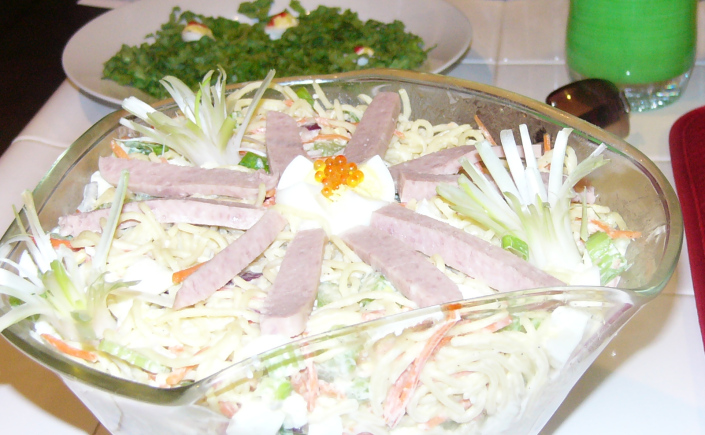
Whenever I tell people I’m making a Hawaiian Macaroni Salad with spaghetti and spam, I always see that same puzzled expression on their faces, usually followed by a very slow, unsure “okay.” I will admit, it is a little different and yet it is usually a big hit. You will always have those hold outs who refuse to see cold spaghetti noodles as anything else except cold spaghetti noodles, not very appealing. The Spam isn’t so much a part of the dish itself as it is a decorative garnish.
Slow Roasted Kahlua Pig without the Pit
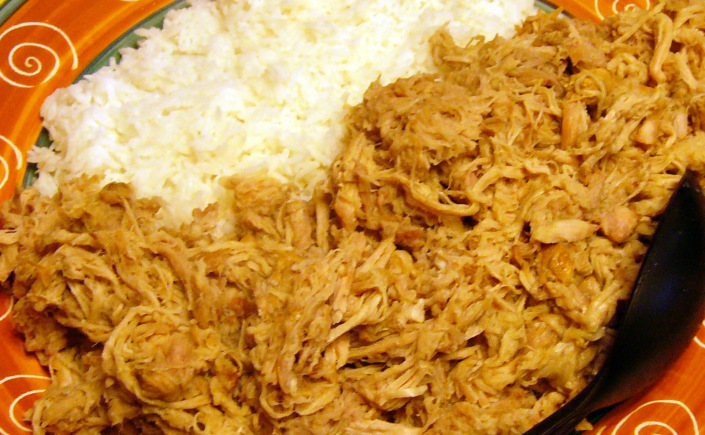
 Years ago, some friends opened a restaurant called “The Teriyaki Hut”. My friends were from Hawaii. Naturally their menu included some island favorites such as Kahlua Pig. I loved the stuff – it was about as close as you can get to the pit-roasted pig without roasted an entire pig beneath a bed of banana leaves and hot coals. I first fell in love with Kahlua Pig at a luau in Maui and then again in Moorea. Traditionally, a pig is roasted for as much as twelve hours in an underground oven called a imu. A fire made from mesquite wood is build in the pit. Rocks are placed in the pit to retain the heat long after the flames of wood has burned down. Once the rocks are heated, the pit is lined in banana leaves, just as the meat is wrapped in the same leaves. Wet burlap buries everything in the ground, allowing the smoke to circulate while the leaves help keep everything moist. While this dish is a tourist favorite at luaus throughout Hawaii and the South Pacific, it is no less delicious and well worth a taste.
Memorial Day – A Simple Backyard Barbecue

Oh my goodness, where has the time gone? Next weekend is Memorial Day – the unofficial “official” start of the grilling season! It’s time to get busy. I’ve got menus to prepare, recipes to try out. Love it when the creative juices start to flow.
Continue reading “Memorial Day – A Simple Backyard Barbecue”
Memorial Day Menu – A Feast for a Crowd

If you want to go all out this Memorial Day and put on a spread that is out of this world – have I got some ideas to share with you!
