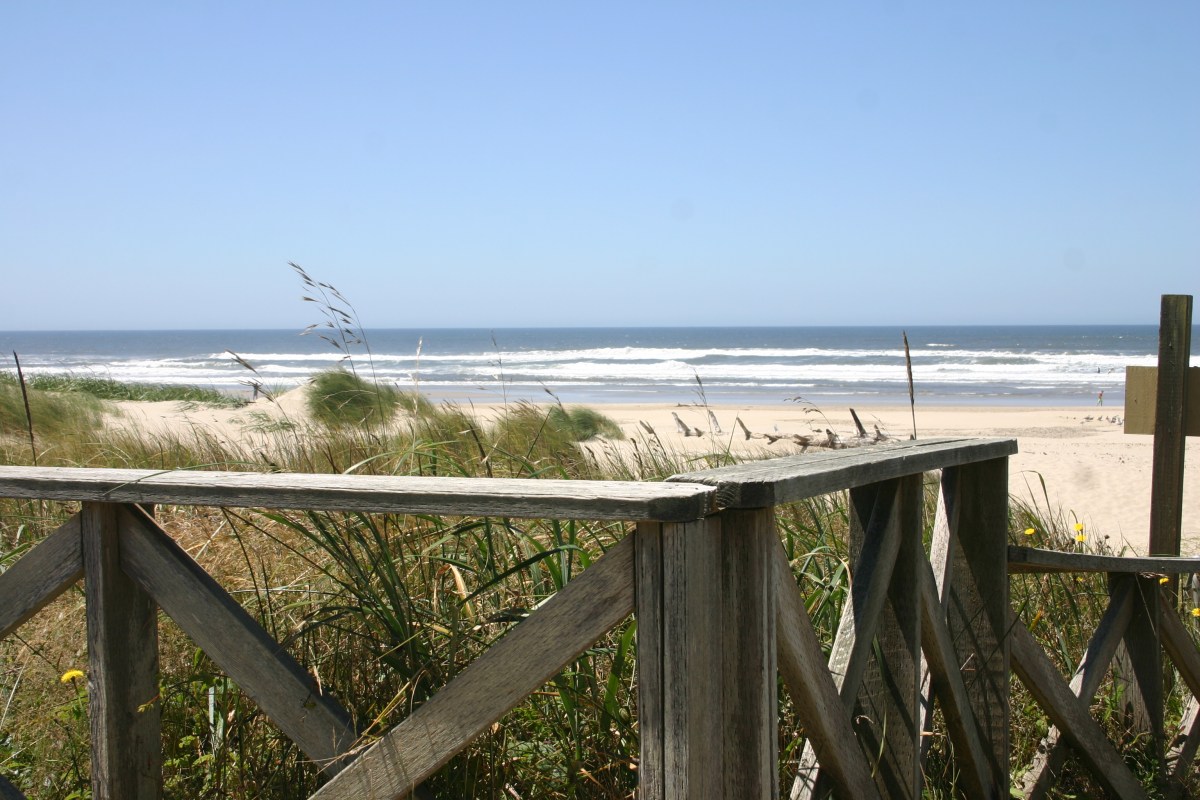
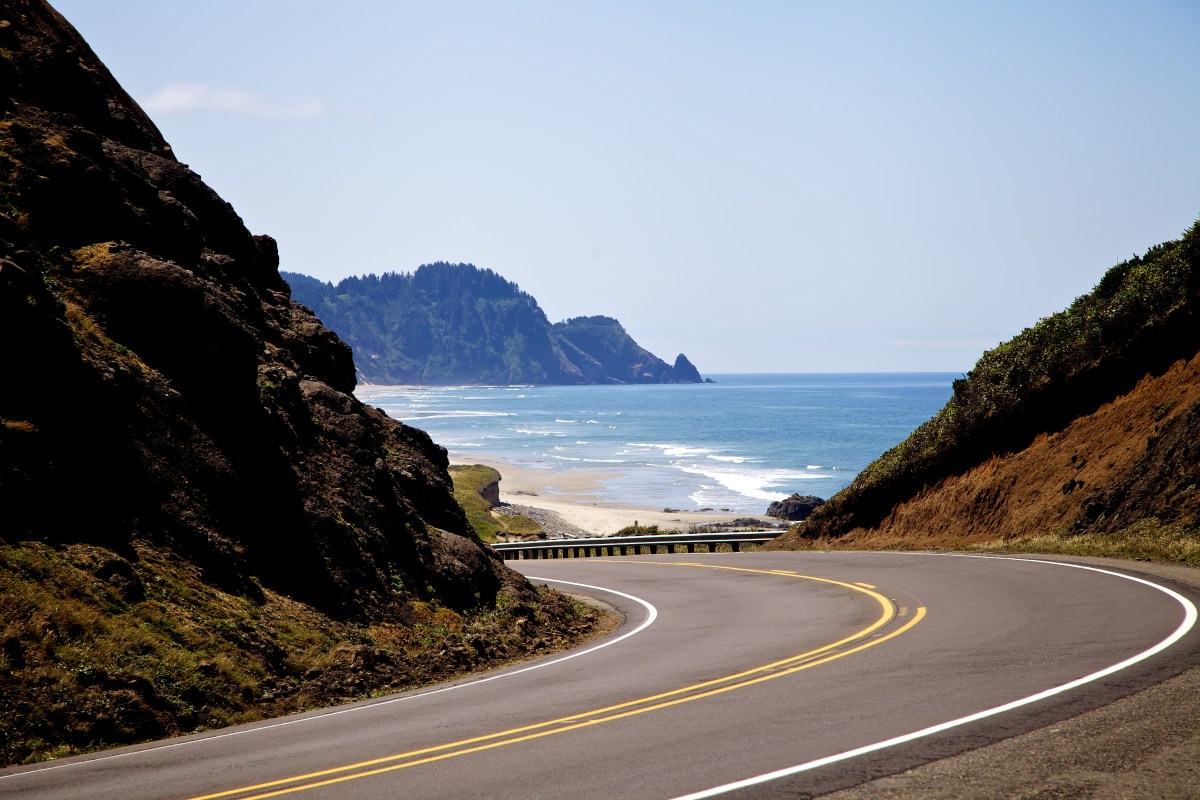
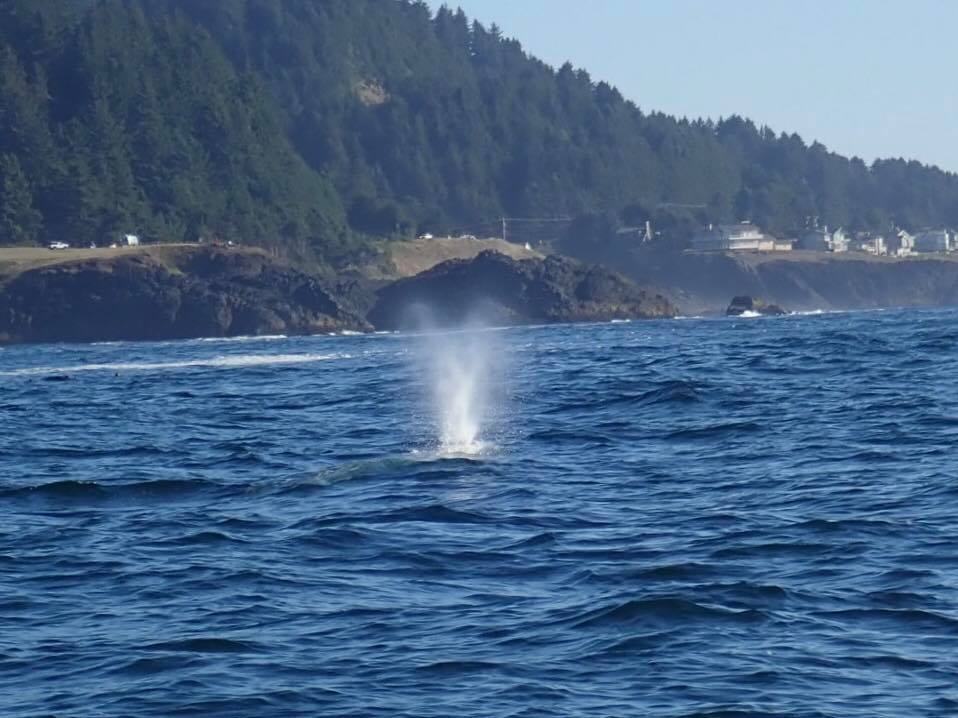
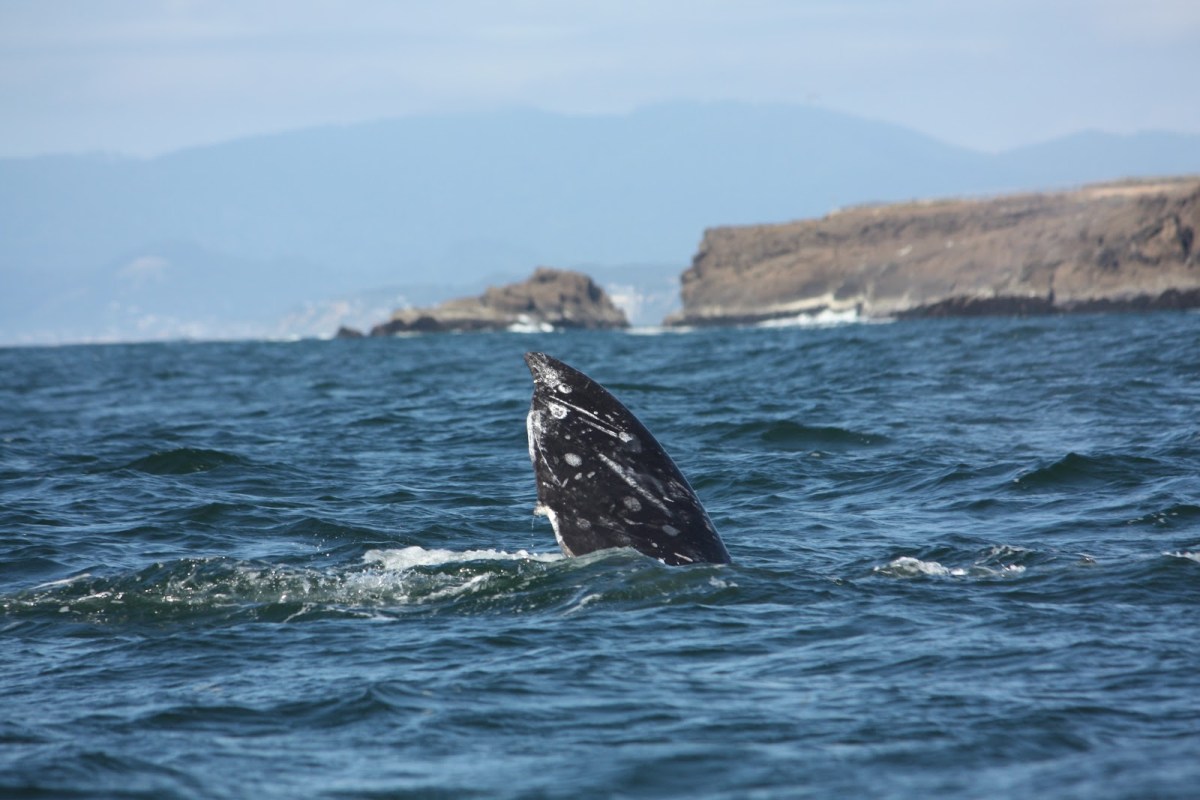
Down Home Chicken-Fried Steak with Creamy Gravy

Maybe it’s because all the winter holidays (Thanksgiving, Christmas, New Year’s Eve spent at home surrounded by loved ones) are behind us, leaving thoughts that are filled with fond memories of family that I’ve had a craving for all things “down home”. All I know is that I have been yearning for some good, old fashion home-spun cooking and nothing screams home-spun louder than simple Southern suppers. (And this from a Yankee no less). It could also be because today is Ash Wednesday, and cravings naturally rear their ugly head whenever something is “forbidden” – like meat for instance. Or a big, filling meal.

Which brings me to the burning question – is it Chicken-Fried or Country-Fried Steak? Are the two interchangeable names for the same dish? Are the differences a “Southern” thing, depending upon which part of the south you hail from or is there really a difference? As it turns out, the answer to all these questions is yes, depending upon who you ask. Some food historians claim the names are a regional thing – “Chicken-Fried” steak as it is commonly called in Texas, Arkansas, Missouri and Oklahoma, is a pan-fried steak served with gravy. While in Alabama, Kentucky, Mississippi, and the Carolinas, “Country-Fried” steak is on the menu.  And that much is correct – be it Chicken-Fried or Country-Fried, it’s generally a cheap cut of meat that has been pounded, coated and pan-fried. Above all else, the pan-fried steak is always served with gravy.  The concept of Country-Fried Steak is thought to have been brought to the Southern United States by German immigrants in the mid-1800’s. The name “country-fried steak” goes back at least that long, while the name “chicken-fried steak” has only been around since around the mid-20th century.

Besides the names, it turns out that there are other subtle difference between the two. Country-Fried Steak is moistened with milk, dredged in seasoned flour and then pan-fried. When the steaks are finished, a brown gravy is created in the skillet, and the steaks are returned to the pan cook a bit longer in the gravy. Sometimes caramelized onions are included as part of the gravy – similar to Salisbury Steak gravy. Chicken-Fried Steak on the other hand is double-dipped in seasoned flour, with the use of egg as part of the breading process. The peppery gravy accompanying Chicken-Fried Steak is creamy, made with milk rather than beef broth, and can be served over the steaks or on the side. Personally, I like my Chicken-Fried Steak smothered in gravy, with more on the side. And a big helping of mashed potatoes and buttery corn. Oh, and maybe some biscuits with honey butter or a big pan of cornbread. Now we’re talking . . .

Chicken-Fried Steak with Creamy Gravy
1 1⁄2 lbs cube steaks (about 4 steaks)
1 cup all-purpose flour, plus 4 tablespoons all-purpose flour, divided
1 1⁄2 teaspoons salt, divided
1 1⁄4 teaspoons pepper, divided
1 teaspoon paprika
3 1⁄2 cups milk, divided
3 eggs, beaten
2 tablespoons olive oil
4 tablespoons butter, chopped

Place 1 cup flour, 1/2 cup milk, and eggs in 3 separate shallow bowls on your work area or counter. Pie pans work great for this purpose.

To the flour, add 1 teaspoon each salt, pepper and paprika. Mix well.

Season both sides of cube steaks with additional salt and pepper, if desired.

Dip cube steaks in milk, then dredge in seasoned flour.

Dip floured steaks in egg wash, then again in the seasoned flour.

Heat 2 tablespoon of olive oil in a large cast iron skillet on medium heat.

Brown the cube steaks on each side, about 8-10 minutes total cooking time; remove from heat and set the steaks aside. (A platter in a warm oven works well).

If skillet is oily, drain oil without removing the brown bits left behind from the steaks. Add butter to the skillet and allow the butter to melt without browning. Sprinkle 3 tablespoons of flour over the melted butter to make a roux, and cook for a few minutes on low heat. Do not allow roux to burn.

Increase heat to medium-low and slowly add the remaining 3 cups milk, and stir or whisk constantly until mixture comes to a boil and thickens. Lower heat and continue to cook for a few minutes longer, until the desired gravy consistency is reach. Season well with pepper.

Remove steaks from oven, smother with about half of the gravy, reserving the other half for the potatoes.

Olive-Oil Braised Red Onions with Bay Leaves

Have you ever considered a side of onions? Sure you have – as in onion rings. Yum. But what about braised onion? What about onions that are seasoned with bay leaves and cooked in white wine until they are so tender that you could spread them on bread? Sounds a little nuts, I know. The first time I made this “side” dish, Hubby looked at me as though I had completely lost my mind.

Follow the thought process here and you’ll see that I wasn’t completely nuts. On the menu was one of my favorite “finger” foods – French Country Forty-Clove Garlic Chicken.

While Forty-Clove Garlic Chicken isn’t your typical “finger” food, for the most part you eat it with your hands rather than cutlery.  Isn’t that fun? The chicken falls off the bone. It is served with soft garlic and slices of olive-oil kissed baguette rounds. When you eat the chicken, you spread the soft garlic on the warm baguette, top with the wonderful, amazing chicken, pick it up and eat it. Yum! I wanted to serve a side that would go well with the whole finger-eating concept. And that’s when I remembered a recipe for braised onions that was also served on a baguette. Add some soft French cheese and a simple salad of tender green with ripe tomato wedges and you’ve got heaven on a plate. Simple French Country Comfort Foods – can’t get any better. A bottle of wine, and you’ve got a little romance, too.

Olive-Oil Braised Red Onions with Bay Leaves
1 1/2 lbs Red onions (about 3 medium)
3 fresh or dried bay leaves, each torn into 3 pieces
3 Tablespoons extra-virgin olive oil
1-1/2 Tablespoons red wine vinegar
1 Tablespoon dry white wine (a nice Pinot Grigio or Sauvignon Blanc)
Kosher salt

Position oven rack in center, preheat oven to 375-degrees.

Tear bay leaves into thirds, set aside until ready to use.

Peel red onions, cut in half vertically, then cut into 2/3-inch wedges.

Arrange the onion wedges in an overlapping single layer in a shallow 10×15-inch baking dish. Nestle the bay leaves among the onions. In a small bowl, mix the olive oil, vinegar, white wine, and 1-1/2 tablespoon water and drizzle over the onions. Sprinkle evenly with 1 teaspoon salt. Cover the baking dish tightly with aluminum foil.

Braise the onions in the oven until completely tender when pierced close to the root ends with a fork, about 45 minutes.

Uncover the dish and continue to braise until all of the liquid has evaporated and the onions are darkly roasted and glossy, about 20 minutes. Remove the bay leaves and serve the onions warm or at room temperature.

To Serve as a Crostini: Serve with toasted baguette slices and a soft French cheese such as Camembert or Brie. Spread soft cheese on toasted baguette slices and top with the onions.

Awesome Homemade Chicken Noodle Soup

This is one of those wonderful soups that can be made from left over stewed chicken or started completely from scratch, whatever you happen to have on hand that works best for you. The chicken stock filled with tender carrots, onions and celery can be made several days in advance or the night before, whatever your busy schedule will allow. Although you could make the stock in the morning for the soup that night, it’s really best to let it sit in the refrigerator overnight to skim off the layer of fat that will rise to the top as the stock cools.

I like to make my chicken and its soup broth on a lazy Sunday afternoon while puttering about the house, then finish the soup later in the week for a quick yet satisfying mid-week supper. By making the base for the soup in advance, in the time it takes to boil a pot of water and cook up the egg noodles, I can serve up piping hot bowls of soup to warm our weary bones at the end of a long day. I love soup weather and try to make a different soup at least one night each week throughout the fall and winter months. It’s especially nice to finally be able to put one of my beautiful soup tureens to good use. After months of hunting, Hubby and I found two wonderful tureens over the summer at our favorite monthly antique fair. They are both beautiful, one with a matching ladle and platter, the other without. Fortunately, I found the perfect silver soup ladle at another fair that fits the tureen like a glove. You would think they were made for each other. Up until recently, I alternated between the two tureens. Now I have only the one, with the platter. The other (featured here) I gave to my sister, another avid soup maker.

The fact that the chicken for this yummy homemade soup is slow cooked for several hours, skin, bones and all, only amplifies the wonderful flavors of the stock itself. It’s the same basic recipe I use for making my Chicken and Herb Dumplings (another chilly night favorite – a recipe for sharing on another day). The only real difference here is that my soup is made with a little more celery and carrots.

Chicken Soup
1 Chicken, 3 ½ – 4 lbs
3 Celery Stocks, Chopped
1 1/2 Cup Baby Carrots
1 Red, Orange or Yellow Bell Pepper, cored and cut into strips
1 Yellow Onion, chopped
3 Garlic Cloves, minced
2 Bay Leaf
2 Teaspoons Salt
1 Teaspoon Dried Thyme
½ Teaspoon Ground Pepper
2 Cups Chicken broth (or stock for really intense flavor) + water
2 Cups Wide Egg Noodles

Chop celery, carrots, bell pepper, onion and garlic according to recipe. Set aside until ready to use.

Place whole chicken, breast side up, in a large pot. Distribute vegetables and seasonings evenly around and over chicken. Add Chicken broth or stock and enough water to cover chicken three-quarters of the way up. Bring to a boil over high heat.

Reduce heat to medium-low, cover and simmer until chicken is cooked through and juices run clear, about 2 hours. Midway through, turn chicken breast side down to allow juices to flavor the meat.

Remove chicken from pot. With a large fork and tongs, remove all the skin from the chicken and discard. Cut the meat from bones, discard carcass. Cut chicken meat in to large chunks. Set aside.

With a slotted spoon, remove all the vegetables from the pot, leaving only the broth. Fish bay leaf from vegetables, then mix with chicken meat and place in a gallon food storage bag. Lay flat in the refrigerator.

Pour broth into a large container fitted with a lid. Place in the refrigerator over night. As the broth cools, the fat from the chicken will float to the surface and harden. Skim off this layer of fat as much as possible before proceeding.

In a large pot over medium-high heat, warm broth with chicken and vegetable mixture. While the main “stock” of the soup warms, bring a large pot of salted water to a rapid boil. Cook egg noodles in salted water about 8 minutes, or until tender.

Drain noodles well, add to “stock” and stir. Ladle soup into large bowls and serve with plenty of warm bread.

In Honor of President’s Day

Next Monday, all across America we will celebrate the births of our first and sixteenth Presidents – George Washington and Abraham Lincoln.  We do so by having giant sales – everything from electronics to new cars. I never could figure out why there were all those President’s Day sales. Years ago, in honor of President’s Day and to avoid all the spending hype, I decided to create a special menu to commemorate the day.  It’s been a tradition in our house ever since.

Virginia Ham seemed the obvious choice for George Washington.  (I haven’t a clue if George ever dined on Virginia Ham – especially when you consider his limitation – having painful dentures limited him to soft foods, but President’s Day seemed a good excuse to have a nice ham dinner). Honest Abe was a bit more difficult to nail down. Truth be told, Abraham Lincoln was a man of humble beginnings and simple tastes.  It has been said that Mr. Lincoln liked a good cup of coffee, enjoyed nibbling on fruit throughout the day and was partial to biscuits.  Not much to work with, but it’s enough. And then there’s the rich history of this country – the inspiring as well as the not-so-honorable moments of our past as a nation.  I drew from all these things to create our President’s Day feast.

Our menu consists of Country Ham (another name for Virginia Ham – the difference is not how the ham is cured but rather WHERE the ham is cured), sweet potatoes, warm biscuits and buttery peas.  I am particularly fond of Kahlua-Honey Glazed Sweet Potatoes.  As it turns out Good Ol’ George was also fond of sweet potatoes, especially mashed with a little butter.  However; my guys aren’t sweet potato fans, so for them I added baby peas as an optional side.  Mr. Lincoln’s contribution to the mix are delicious, easy to make Herb Biscuits.  And it wouldn’t be much of a celebration without something wonderful for dessert.  Boston Cream Pie seems just the ticket.   As we all know, Boston Cream Pie isn’t a pie at all, but rather layers of cake with a cream filling and marvelous chocolate Ganache.

yams

Before I get down to the recipes – let’s talk for a moment about sweet potatoes and yams.  In America, we do not eat yams. We might call sweet potatoes yams, but they simply aren’t yams. So why do we do that? The word yam comes from African words njam, nyami, or djambi, meaning “to eat”.  When slaves first saw sweet potatoes, they were reminded of the tuber of a tropical vine found in Africa and the Caribbean.   The name stuck.  In reality, yams and sweet potatoes aren’t even in the same family.   Yams, true yams can grow to be five-feet long.  I don’t know about you, but I’ve never seen anything five-feet long in the produce section of my local grocery store.  That is not to say we can’t find true yams in the US.  The smaller yams have managed to work their way into some of the International Specialty Markets, particularly those that stock Latin or Caribbean foods.   One of these days, I just might experiment with true yams – which will be a post for another day . . .

President’s Day Menu
Country Baked Ham with Brown Sugar Glaze
Kahlúa-Honey Glazed Sweet Potatoes
Honest Abe’s Buttermilk Herb Biscuits
Buttery Le Sueur Peas with Shallots and Garlic
Boston Cream Pie


The Boston Cream Pie can be made a day ahead of time, then kept in the refrigerator.  Just take it out of the fridge about 30 minutes before serving. Or you could always cheat a little, and buy one from a good bakery.

Boston Cream Pie
Cake:
1 Yellow Cake (from box or favorite recipe)

Bake cake according to recipe or mix. Allow cake to cool fully. Wrap and store at room temperature until ready to assemble.

Cream Filling:
1 ½ Cups Whole Milk
2 teaspoons Vanilla Extract
2 Large Eggs, whole
4 Large Egg Yolks
½ Cup Sugar
¼ Flour
Pinch of Salt

Heat the milk and vanilla in a medium saucepan over medium heat (do not boil). Whisk the whole eggs, egg yolks and sugar in a large bowl until light and fluffy. Add the cornstarch and salt and whisk vigorously until no lumps remain. Whisk about 1/4 cup of the hot milk mixture into the egg mixture, then gradually whisk in the remaining hot milk mixture.

Pour the egg-milk mixture into the saucepan and cook over low heat, whisking constantly, until thick and pudding-like, 10 to 15 minutes. Strain through a fine-mesh sieve into a bowl, using a rubber spatula to push the pudding through.

Let cool slightly, stirring occasionally. Press plastic wrap directly onto the surface of the pudding and refrigerate at least 2 hours.

Chocolate Ganache:
4 oz semi-sweet chocolate, finely chopped
½ cup Heavy Cream
1 Teaspoon Vanilla Extract
Pinch of Salt

Heat the chocolate, cream, vanilla and salt in a saucepan over medium-low heat, stirring, until melted and smooth, about 2 minutes. Let cool about 5 minutes before using.

To Assemble: Slice cake in half. Place on serving plate, cut side up. Top with cream filling, to ¼ inch from edge. Carefully top with top half of cake. Press down slightly. Pour Ganache over the cake and smooth with an offset spatula.

Refrigerate at least 30 minutes or up to 24 hours before serving.

**********

Country Baked Ham
6-7 lb Smoke Cured Ham, bone-in
1 20-ounce can pineapple slices, juice reserved
15 whole cloves (Optional)
1 small jar maraschino cherries

Preheat oven to 325-degrees. Remove ham from refrigerator and let rest on counter 20 minutes.

Score ham to create diamond pattern in skin. At each intersection, insert whole clove. Decoratively arrange pineapple rings with cherry in center of each ring. Secure with a toothpick. Place ham in shallow baking pan, tent with foil and place in the oven to bake.

Place ham in shallow baking pan, tent with foil and place in the oven to bake, 25 minutes per pound, about 2 1/2 – 3 hours.

Ingredients – Glaze
3/4 cup packed light brown sugar
2 tablespoons yellow mustard
Reserved Pineapple Juice

In a small bowl, combine the brown sugar, mustard and just enough of the reserved pineapple juice to make a thick glaze. Spoon the glaze over the ham and bake for the remaining 30 minutes. Remove the ham from the oven, transfer to a cutting board and carve.

**********

Kahlua-Honey Glazed Sweet Potatoes
4 Sweet Potatoes, cooked
12 Tablespoons butter (1 ½ sticks)
¼ Cup Kahlua
1 Cup Honey
¼ Teaspoon Cinnamon
¼ Teaspoon Nutmeg

Place Sweet Potatoes in a large pot, cover with water. Bring to a boil and continue to cook at a rolling boil until Sweet Potatoes are tender but firm. Remove from pan, cool slightly.

Peel and cut Sweet Potatoes into serving-size pieces.

In a large, high-sided skillet over medium-high heat, melt butter. Add Sweet Potatoes, Kahlua, and honey. Season with cinnamon and nutmeg. Bring to a boil. Lower heat to simmer, gently toss Sweet Potatoes to coat in mixture. Cover and simmer until Sweet Potatoes are heated through and sauce has thickened, about 15-20 minutes.

**********


Honest Abe’s Buttermilk Herb Biscuits
2 Cups Self-Rising Flour
¼ Teaspoon Dried Sage
¼ Teaspoon Dried Thyme
¼ Teaspoon Crushed Rosemary
¼ Cup Mayonnaise
1 Cup Buttermilk
Cooking Spray

Heat oven to 400-degrees. Spray 12-muffin tin with cooking spray. Set aside until ready to use.

Whisk herbs into flour. Use a dinner knife to mix in mayonnaise and buttermilk. DO NOT over mix.

Divide biscuit batter into muffin tins and bake 15-20 minutes.

**********

Remember those peas I talked about?  This is oh so simple, and oh so delicious!

Buttery Le Sueur Peas with Shallots and Garlic
1 Shallot, minced
2 Garlic Cloves, minced
1 Tablespoon Butter
1 Can Le Sueur Peas, drained

In a small food processor or hand-held chopper, mince shallot and garlic together. Set aside until ready to use.

In a sauce pan, melt butter over medium heat until just beginning to brown. Dump shallot-garlic mixture into pan and stir with a wooden spoon until shallots are tender, about 2-3 minutes.

Add drained Le Sueur Peas and GENTLY stir to blend the peas, shallots, garlic and butter together. (Take care not to “mash” the tender peas).

Lower heat and continue to warm until heated through, about 5 minutes.

Transfer peas to a warm serving bowl, serve table-side and enjoy.

Chicken Francese – An American Dish

If it’s Sunday, it must be chicken . . . Growing up, Sunday Supper usually meant chicken – be it roasted, barbecued, or fried (especially in the summer months), you could bet chicken was on the menu. My parents weren’t “fancy” cooks – home-cooked meals were usually simple. With a house full of children (siblings, cousins and a multitude of extended family), the meals were always “kid friendly”. For us, Sundays involved attending church, then everyone would gather at our house for an early supper. As a cradle Catholic of the pre-Vatican II era, we didn’t eat before Mass, so supper needed to be as early as possible since everyone was starving. Often, we didn’t arrive at Church until late in the morning or early afternoon. I can’t blame my parents for attending a later Mass. You try herding a bunch of kids out the door in their Sunday best at 7:00 am and see how far you get.

As an adult, I strive to keep the Sunday Chicken tradition alive. Traditions are an important part of my life. They keep me grounded and in touch with my roots.

I don’t know about you, but I’m one of those people who loves to plan. I plan menus – sometimes weeks in advance. While we don’t always stick to the plan, having some idea as to what I plan to cook sure makes shopping a whole lot easier.

While preparing my meal planner for the upcoming weeks, I came across a recipe I had not yet tried; Chicken Francese. As a house filled with lovers of chicken cooked in a lemony-buttery sauce, this simple yet elegant dish seemed right up our alley. I wasn’t sure if the origins of this dish were French (as the name seems to suggest – Francese means “in the French manner”) or Northern Italian as the clean simple ingredients seems to indicate. Naturally, I turned to the internet in search of answers. While there has been some debate on the subject, it turns out neither is correct. Chicken Francese is a native of New York – as in Brooklyn, New York. The first documented mention of Chicken Francese appeared in a restaurant review published in the New York Times back in the 1970s. Prior to that publication, the dish simply did not exist in print. There are those who insist the dish is actually older by some twenty years, at least on a local level in Brooklyn. As the story goes, back in the 1950s the Italian eateries of Brooklyn were loosing patrons to their French bistro counterparts as the lighter, buttery sauces of France gained popularity with the masses. To lure customers back, a buttery-lemon sauce was created to be served over fried chicken cutlets. At least that’s how the story goes. So while the creator of the dish may have been Italian, the dish itself was born in America. Another less intriguing reason this dish is considered “American” is because the chicken is floured, dipped in egg and then pan-fried – all American traits in the culinary world. Some argue that all of this “history” very well may be true for the “Chicken” variety, but that the dish itself was actually inspiration by a dish deeply rooted in Northern Italy, made with breaded veal. Call it whatever you like, so long as you call it delicious.

Chicken Francese
3 Chicken Breasts, split lengthwise
1 cup all-purpose flour; for dredging
1 or 2 pinches of garlic powder
1 or 2 sprinklings of paprika
salt and pepper to taste
3 eggs
3 tablespoons water
1/4 cup olive oil

Lay chicken breast on a cutting board and split breasts lengthwise to create two thin breasts. Set aside until ready to use.

In a shallow platter, season 1/2 cup of flour with paprika, garlic powder, pinch of salt and pepper. Whisk well to distribute seasoning evenly.

In a wide, flat-bottom bowl or small casserole dish, whisk eggs with water to create an egg-wash.

Heat a large, flat-bottom pan over medium heat. Once the pan is hot add 1/4 cup of olive oil and swirl to coat pan. When the oil is hot, dredge chicken cutlet one at a time in the seasoned flour, then dip them into the egg wash coating completely, letting the excess drip off. Dredge one final time to give a nice battered coating to the chicken. Dredge, dip and dredge only enough chicken that will fit into the pan without over crowding it. Work in batches if necessary.

Fry cutlets for 2-3 minutes on each side or until golden brown turning once. Move chicken to a serving platter large enough to hold chicken in a single layer. Place platter into a warm oven and cover with foil to keep warm.

Buttery-Lemon Sauce
3/4 cup chicken broth
2 Lemons (for juicing)
3 tablespoons butter
1 Splash White Wine (slightly less than 1/4 cup)
2 tablespoons Wondra (to thicken sauce)

Once all the chicken has been fried, carefully blot pan with paper towels to remove excess oil white leaving the browned bits at the bottom of the pan.

Pour chicken broth into the empty pan, bring just to a boil. Reduce heat and let simmer until broth is slightly reduced, about 5 minutes or so. Scrape bottom of the pan to bring browned bits into the broth.

Add lemon juice and return to a gentle simmer. Whisk in the butter until fully incorporated. Add a splash or so of wine, whisk again.

Thicken sauce with about a tablespoon or so of Wondra, stir/whisk until thickened and smooth.

Remove pan from heat, return chicken to pan. Turn chicken to coat in sauce.

For Serving
1/2 lb Spaghetti Pasta
1 Tablespoon Butter
1 Lemon
2-3 Tablespoons Italian parsley

Bring a large pot of salted water to a full boil. Start pasta at the same time as the chicken cutlets are added to the pan to fry. Cook pasta al dente, about 8-10 minutes.

Drain pasta well. While pasta is draining, add butter to the pot used to cook pasta. Return pasta to the pot and pull through butter to coat.

To serve; spread pasta out on serving platter. Lay chicken on top of pasta and pour pan sauce over chicken. Garnish with chopped parsley and lemon as desired. Serve immediately.

Tips: Fill large pot with water for pasta and bring to a boil. As water heats, season flour, prepare egg wash and juice lemons. Once skillet is heated for cutlets, begin cooking pasta. While cutlets are frying, chop parsley and slice lemon for garnish. Everything should come together at the same time for serving.


Dijon-Lemon Chicken Vegetable Foil Packs

My husband thinks I’m crazy.  We’ve been married for over thirty years, and in that time I have given him ample reason to think I’m just a little nuts. Recently we made plans for our summer vacation. We’ve decided to return to an old favorite stomping ground – Yellowstone.

Continue reading “Dijon-Lemon Chicken Vegetable Foil Packs”

French Country Forty-Clove Garlic Chicken

I’m thinking ahead to Sunday . . .

If it’s Sunday, it’s gotta be chicken! Sunday is just around the corner, and already my mouth is watering in anticipation.

Continue reading “French Country Forty-Clove Garlic Chicken”

Valentine’s Day: Chicken Marsala and A Dash of Romance

Valentine’s Day 2018 poses some major problems for Catholics. Not since 1945 has Valentine’s Day and Ash Wednesday fallen on the same day. For those of you not familiar with Catholic teachings, Ash Wednesday is the first day of the Lenten Season; a somber day of fasting and abstinence. Simply put, by today’s rules, fasting means small meals and abstinence means “no meat”.  Somber Days are not days for celebration, indulgence and chocolates. A real killer to all the romance of a fancy dinner, champagne and caviar, wouldn’t you say?

Continue reading “Valentine’s Day: Chicken Marsala and A Dash of Romance”

Hamburger Helper Style Chili-Cheese Macaroni

Some call it comfort food; others convenient; while others simply have that warm nostalgic feeling whenever they think of Hamburger Helper – the meal in a box from the early ’70s.  The problem with Hamburger Helper is that its packed with artificial “stuff”. No one wants to feed their family “stuff”. Still, the convenience of it all – some milk and ground meat was all you needed to add to the stuff in the box.  With this recipe, you can have that same convenience, minus the box and the “stuff” inside.

Continue reading “Hamburger Helper Style Chili-Cheese Macaroni”

Autumn Minestrone with Tortellini Pasta

This is the excerpt for your very first post.

I just love the word Autumn. It makes me feel all warm and cozy inside, much like a good bowl of soup. The truth is, Minestrone is awesome no matter the season. There is a wonderful little place in town, Espanol Restaurant, that starts each meal with a big bowl of Minestrone Soup served family style. The price of your meal includes soup, salad and beverage (usually coffee). Yes, it’s a strange name for an Italian Restaurant – but that’s a story for another day. Although Espanol has been in business since 1923, it began serving authentic Italian dishes (including their awesome Minestrone) in 1959. Sometimes I like to pop in for the soup alone – it’s that good. My guys order the entrees, while I eat all the soup they can serve up. In my humble opinion, there is no such thing as too much soup. I could eat hot soups every day in the fall and winter and cold soups the rest of the year. However; Hubby is not a big soup eater – when offered soup or salad, he usually opts for the salad. Kiddo likes cream based soups and chicken soups so long as they aren’t too heavy in vegetables. I adore just about every kind of soup, except borscht or cabbage. I don’t mind a little cabbage in the soup as a minor player. As for borscht – beets are not my thing, no matter how you fix them.

Hands down, a good Minestrone Soup ranks right up there among my all-time favorite soups. But then, I’m a huge fan of all things Italian. The first time Dad had Minestrone Soup was recently when we all had lunch together at Espanol. Dad asked what Minestrone was, to which my brother-in-law responded “Italian for anything leftover in the kitchen.” Food is not something you can joke about with Dad – go too far and he won’t even try it. I find it’s best not to answer his questions directly, but simply encourage him to give it a try. “It’s Italian vegetable soup, Dad. You’ll like it.” And he did.

Traditionally speaking, there is no such thing as a traditional Minestrone Soup. The dish varies from region to region and season to season. Although my brother-in-law said it jokingly, Minestrone was in fact born of leftovers. No one set out to create Minestrone, it was a means of using whatever was left to create a peasant dish that did not let vegetables go to waste. Minestrone has been around since before there was a Roman Empire – and that’s a very long time. What we now know as Minestrone Soup, with a variety of vegetables and usually including some form of pasta, has been around since about 2 BC, when the Romans conquered Italy. It wasn’t long before the Romans monopolized all means of commerce and a vast network of roads. This control (all roads lead to Rome) opened the floodgates of goods to Rome. With this came a broadened available seasonal foods throughout the empire. And so it was that Minestrone grew to include a wider variety of  vegetables and a meat based broth, more closely resembling the soup we know today.

As I begin this post, my pot of Minestrone soup is simmering in the next room. The smells are incredible – and it has my mouth to watering. What a great end to a wet weekend!

Autumn Minestrone with Tortellini
2 tablespoons olive oil
1 medium onion, chopped
4 medium carrots, diced
4 celery stalks, chopped
1 medium zucchini, diced
2 garlic cloves, peeled
1 sprig of rosemary, finely chopped
1 cup of kale, chopped
5 small or 2 large gold potatoes, peeled and cubed
1-15 ounce can Fire-Roasted Italian tomatoes
4 cups beef stock
Fresh Pepper to taste
Cyprus Sea Salt flakes to taste*
15 ounces Cannelloni Beans
1 package Cheese Tortellini

* Cyprus Seas Salt flakes are known for their large pyramid shaped crystals. Light and fluffy with the mild taste characteristic of Mediterranean salts. If you don’t have Cyprus Sea Salt flakes, coarse sea salt is fine.

Use a fine grater to grate the garlic, set aside. Finely chop rosemary, set aside. (If you have small cups, this works really well to hold the garlic and rosemary until ready to add to the soup).

Chop kale and set aside. Peel and chop potatoes. Cover potatoes with cold water until ready to use.

Cut onions, carrots, celery and zucchini into nice chunks. Set aside.

In a 12-inch heavy bottom sautée pan, heat the olive oil over medium heat. Once hot, add the onions, carrots, celery, zucchini and sauté until the vegetables are softened, about 10 minutes.

Add the grated garlic and rosemary, cook for another 2 minutes, stirring constantly to prevent the garlic from burning and becoming bitter. Transfer contents of sautée pan to a large soup stock pot.

Drain potatoes, add to the now empty sautée pan. Add kale and Italian Tomatoes including liquid. Over medium heat, bring to a simmer and cook until the kale is wilted, about 5 or 6 minutes. Empty potato mixture into stock pot.

Add the beef stock and fresh ground pepper to stock pot. Stir well and taste. Add salt as needed. Bring to a steady simmer and cook for about 25-30 minutes until potatoes are tender. While soup simmers, drain beans and set aside.

Add tortellini and beans, return to a low boil and continue to cook for about 6 minutes, until pasta and beans are nicely warmed.

Taste and adjust seasonings. If not salty enough, add a pinch or so of salt.

Serve hot with freshly shaved Parmesan cheese.

%d bloggers like this: