Vegetable Beef Burgundy over Mashed Potatoes

Let me start off with an apology – there are no step by step photos for today’s blog. The intentions were good. This awesome, hardy and oh so delicious supper cooked in the my slow cooker all day and the aroma that greeted us as the end of the day had our mouths watering. I really really wanted to document each step of preparation process for you.

Continue reading “Vegetable Beef Burgundy over Mashed Potatoes”

Quick Cassoulet American Style

Supper’s ready, I announced to no one in particular. Please get your drinks while I dish it up. This is a regular, one-sided conversation that we have in our house every evening. Hubby did what he usually does, he stood in front of the refrigerator to check our meal planner. Some meals require a tall glass of soda, others milk and others still sweet southern tea. He made a face. What is a French Cassoulet?

Continue reading “Quick Cassoulet American Style”

A Blue Plate Special of Buttery Whipped Potatoes

Before you start, yeah the plate is white. Just about everything I own is either clear or white since a lack of color makes life so much easier. Besides, A Blue Plate Special today has more to do with comfort diner food than the plate itself, right?

Continue reading “A Blue Plate Special of Buttery Whipped Potatoes”

Mexican Pepper Steak – Taste the Sizzle!

My family adores spicy foods. Now that the colder weather is settling in for a long winter’s nap, it’s time to dust off some of those old family favorites. You know what I’m talking about – those dishes that warm you to your toes from the inside out.

Continue reading “Mexican Pepper Steak – Taste the Sizzle!”

Tri-Tip Barbecue with a Gourmet Rub

A little over four years ago, in honor of Father’s Day, Kiddo wanted to be the Grill Master. So we let him run with it. Kiddo decided to ignore my planned menu  for Tri-Tip using a spicy dry rub. We had agreed to his offer to be in charge of the grill, and that meant letting him teat his skills from beginning to end. That included everything from picking the rub to building the fire.

Kiddo flipped through our various rub recipes for his Tri-Tip before electing to use a Gourmet Rub recipe. (I think it was the red wine that clinched it for him – he’s been on a red wine kick lately). I must say, Kiddo did a marvelous job with the rub and the grilling. The results were a Tri-Tip that was nicely charred on the outside, tender and juicy on the inside.  If Kiddo can pull it off on his very first try, anyone can.

I know, here it is October already. But with a little luck, we can squeeze a few more grilling days in before the season is behind us. So what do you say, are you up to taking a chance and doing a little grilling this weekend? Alrighthen!

Tri-Tip Barbecue with a Gourmet Rub
1 Tri-Tip Brisket, about 3 lbs
1/2 Tablespoon Fresh Ground Black Pepper
1 ½ Teaspoons Sea Salt
½ Tablespoon Smoked Paprika
¼ Teaspoon Cayenne Pepper
½ Teaspoon Dijon Style Mustard
¼ Cup Red Wine
¼ Cup Olive Oil
6-8 Garlic Cloves, crushed
1 Teaspoon Onion Powder
1 Teaspoon Dried Rosemary, crushed

Mix all ingredients for gourmet rub. Rub into the Tri-Tip brisket. Wrap brisket in plastic wrap, refrigerate for 2 or 3 hours minimum – the longer the better. Remove from refrigerator, let stand on counter for 45 minutes prior to grilling.

While the Tri-Tip comes to room temperature, build nice bed of hot coals. Open the bottom and top vents half way, place grate over coals and close lid to heat, about 5 minutes. Clean grate and oil paper towels dipped in vegetable oil.

Raise coals to high position (or lower grate, depending upon grill). Grill meat, fat side up, for 3-5 minutes or until nicely seared. Turn using meat tongs (NEVER stick a fork into it – the juices will run out, and that just makes for a dry hunk of meat) and sear other side. Lower coals (or raise the grate, depending upon grill), cover and continue to cook meat 7-10 minutes longer. Check for doneness using an instant read thermometer. You’ll want the thickest part at the center to be about 140 degrees. A thick Tri-Tip might need to be turned for a final time and grilled 5-8 minutes longer.

The key to a juicy piece of meat is to let the meat rest 10-15 minutes after grilling to allow the juices to soak back into the meat rather than run all over the cutting board. Keep in mind that while the meat rests, it will continue to cook, raising the internal temperature as much as ten degrees.

When carving, go ahead and slice on the serving platter. That way, any juices that escape can be spooned over the sliced meat when serving for extra flavor.

Happy Grilling!

Meatloaf Muffins

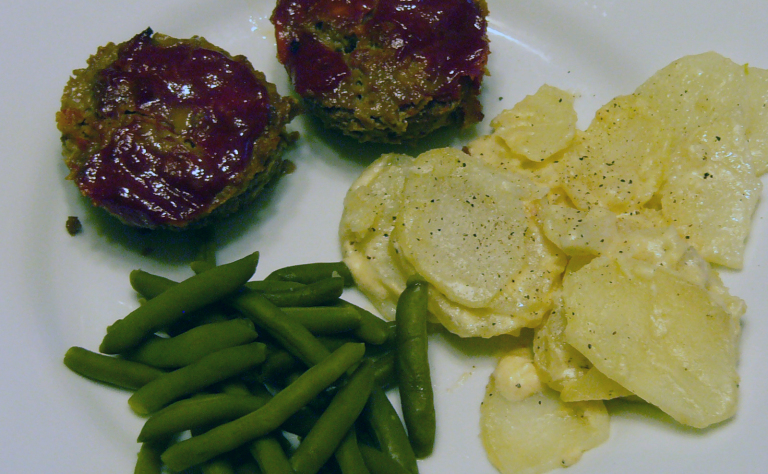
For the record, I’m not a fan of meatloaf. That said, I do like the cute little meatloaf muffins. Maybe it’s because they are so small and . . . well . . . cute that gets to me. Maybe because they are easy to make and cook up much faster than a traditional meatloaf, making them a good choice for a weeknight meal. Hubby likes his with creamy Au Gratin potatoes, and those take time, which defeats the “quick” weeknight meat thing, unless you use a boxed potato and cook them on the stove top rather than baked in the oven.

I will confess, I’ve used the boxed Au Gratin potatoes. With the right amount of tweaking, they aren’t bad. Add sautéed onions and grated cheddar cheese to the box mix and top with breadcrumbs for a nice finish to the top – not quite “homemade” but not half-bad for a quick side dish.

Using lean meat is very important, otherwise the muffin tins fill up with meat drippings and the meatloaf inside won’t brown well. If you happen to have an old muffin tin, you could punch a hole in the center of each tin, then elevate it on cooking racks over a shallow baking pan to allow the excess fat to drain away. Or you could use good quality meat. Personally, I vote for lean meat.

Meatloaf Muffins
1 Teaspoon Olive Oil
1 Cup Onion, finely chopped
½ Cup Carrots, finely chopped
1 Teaspoon dried Oregano
3 Garlic Cloves, minced
1 Cup Ketchup, divided
1 ½ Lbs Ground Beef (or ¾ lbs ground beef, ¾ lbs bulk sausage)
1 Cup Saltine Crackers, finely crushed
2 Tablespoons Mustard
1 Teaspoon Worcestershire sauce
¼ Teaspoon Pepper
2 Large Eggs
Cooking Spray

Preheat oven to 400-degrees.

Peel and chop onions. Set aside. Peel and chop carrots. Set aside.

Heat oil in a large nonstick skillet over medium-high heat. Add onions, carrots, oregano and garlic.

Sauté for 2 minutes. Remove from heat and allow to cool.

In a large bowl, combine ½ cup ketchup, ground beef, crackers, mustard, Worcestershire sauce, pepper, eggs and onion mixture. Mix well.

Spray a 12-cup muffin tin with cooking spray. Divide meat mixture evenly between tins. Top each meat loaf muffin with 2 teaspoons of ketchup.

Bake meat loaf muffins in preheated oven for 25-30 minutes or until meat registers 160-degrees.

Let rest for 5 minutes before serving.

Here’s to simple meals and family dinners!

The Virtues of Home Cooking

parking-orchard-1024x768Last fall, we drove up to Apple Hill. Nestled in the Sierra foothills of El Dorado County, Apple Hill was born of necessity. The rich soil around the tiny community of Camino was a major producer of California pears. Some sixteen or so orchards flourished in the area around the turn of the century. But by the early 1960s the pear farmers were struggling – their crops depleting and toiling a living from the soil was nearly impossible.

Continue reading “The Virtues of Home Cooking”

Dirty Scrambled Eggs with Chives and Green Onions

Believe me I know, chives and green onions seems like an over-kill, doesn’t it? I’m here to tell you it isn’t. Chives are delicate and add pretty color to the eggs, while the onion “kick” comes from the chopped white part of a green onion.

Continue reading “Dirty Scrambled Eggs with Chives and Green Onions”

Go Packers – It’s Bratwurst Burger Time!

1998-01-04
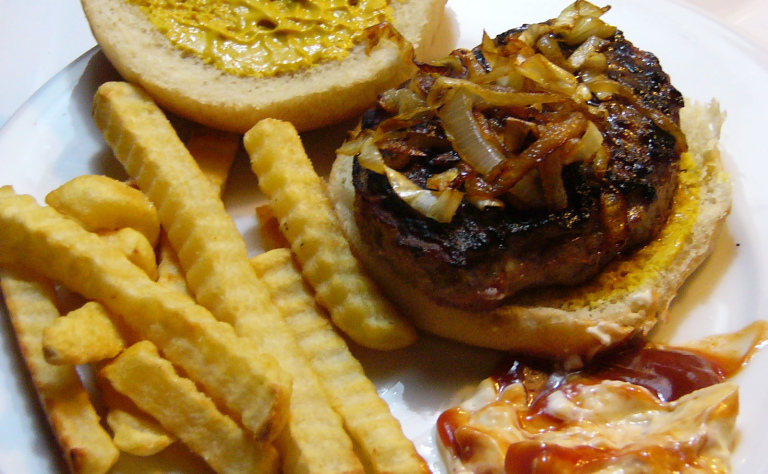
The official Bratwurst Season is now in full swing. That means a lot of yelling and swearing at the TV. It means Hubby’s blood pressure is sure to rise – and that the veins in his forehead are popping up.

Continue reading “Go Packers – It’s Bratwurst Burger Time!”

Chicken El Paso Spicy Buffalo Ranch Chicken Strips

Today is one of those pack as much activities as possible into a single day. It’s Saturday – and as with all our Saturdays, that means a morning trip to the market to pickup all the makings for this week’s planned meals. Notice how I stress planned, because what I plan and what I make aren’t necessarily the same thing – life and all it brings often have a field day with well-laid plans.

Continue reading “Chicken El Paso Spicy Buffalo Ranch Chicken Strips”

Traveling Dinner Party – Part 6 – Red Meat Course

A great deal of debate went into this next post. We have reached the 6th, 4th or 3rd Course of the night, depending upon how many courses total are to be served. This is the 1st Entrée in both the ten and eight course supper; the main Entrée in a six-course dinner party.  It is the larger of the Entrée courses; typically meat, fish or foul is served with one or two vegetable selections. (The exception to serving a vegetable with the 1st Entrée would be if the 2nd Entrée is a vegetable only course). Rather than offer up a few meat; a few fish and a few foul recipes only to repeat meat, fish or foul again later, I’ve decided to break things up.

Continue reading “Traveling Dinner Party – Part 6 – Red Meat Course”

Mapleine Flavored Maple Syrup and Childhood Memories

Growing up, we did not have store-bought syrups in the house. Dad made syrup on the top of the stove with a few basic ingredients that were always at hand. I can picture him now, kitchen towel draped over one shoulder, a small Revere Ware copper bottom pot on the burner, and a wooden spoon in his thick hand. The smell was incredible, distinct and inviting. It meant big stacks of pancakes were soon to follow. Mind you, I could be wrong, but I think he might use that same pan all these years later when he makes his simple Maple Flavored Syrup. The recipe Dad uses can be found on the bottle of Crescent Food’s Mapleine. While the imitation Maple flavoring has been around since 1908, the recipe became popular during the Great Depression – when Dad was a very young boy. It was the syrup he knew from his childhood, the syrup he passed on to his children as part of their childhood.

Fast forward from Dad’s country kitchen to my own kitchen in the first home Hubby and I owned. Hubby had never had “home-made” syrup for his pancakes, waffles and French Toast until he met me. One taste, and he was hooked. For the longest time, we didn’t buy syrup – I made a batch of Mapleine syrup whenever the need arose. This was back in the day when neighbors were friendly with one another, and “borrowed” things like a cup of sugar. One morning there was a knock on our door. A young girl who lived across the street was standing on our porch. Her mother had sent her on an errand.

“We’re making pancakes and mom forgot to get syrup. Do you have some we could borrow?” She asked.

“Unfortunately, I don’t.” I answered. “We make our own.”

The girl stood there for a moment, digesting what I had just told her. “Can you make us some?”

I asked her to come back in about twenty minutes. She did, and they loved Dad’s easy to make syrup.

I haven’t made Dad’s syrup in a while. I’ve been wanting to, and have even looked at a few markets for an old-fashioned syrup dispenser, but no luck. I’ve looked at the new ones, and can tell in an instant a few uses and that tab that slides back and forth on the top is going to break. Maybe next time I’m in my favorite restaurant supply store, I might just need to take a look at a commercial grade syrup dispenser. When Kiddo was a little Kiddo, he loved this syrup recipe. I’m not sure he remembers it today – and that would be sad.

Mapleine Flavored Maple Syrup
2 Tablespoons water
¼ cup sugar
1 ½ cups light corn syrup
½ Tablespoons Mapleine Immigration Maple Flavoring

Combine all ingredients in a sauce pan over medium heat.

Stirring constantly, heat until sugar dissolves and syrup just begins to boil. Cook at a low rolling boil for 2 minutes.

Remove from heat. Syrup will thicken as it cools. Store any unused syrup in the refrigerator and reheat over low heat when ready to use again.

Note: Crescent Mapleine still exists, in the same trademark blue packaging, now a part of McCormick Foods.

Mapleine Flavoring

Warm Individual Baker’s Molten Chocolate Cakes

LavaWhen Kiddo was younger, he was fascinated by all things “volcanic”, and a molten cake was right up his alley of favorite desserts. Kiddo is a walking encyclopedia when it comes to volcanoes. We even took a trip to Hawaii a while back just so that Kiddo could explore a lava tube and take a helicopter ride over an active volcano. Wow – it was something! Especially when the lava met the sea. When Kiddo was a really little Kiddo, he got a book all about Hawaiian volcanoes and learned that during one of the eruptions, an entire town was swallowed by the slow-moving flow. He was so upset by the prospect of children loosing everything that he wanted to donate all his toys to the children of Hawaii. Gotta love that kid, he has so much heart!

Just as a side note, according to the original recipe this cake can be prepared in advance, held in the refrigerator and brought to room temperature before baking. I tried that once, just to see if it would make a difference. The finished result is a denser, heavier cake. Since there isn’t a great deal of work in the preparation, I see no point in “holding” the batter and would not recommend doing so.

When I do have fruit for the garnish, I like to bake the cakes on a Friday or Saturday evening, then utilize the leftover fruit with breakfast the next morning. I love fresh berries as a garnish, especially raspberries that are so luscious with chocolate.

Baker’s Molten Chocolate Cake
4 Squares Baker’s Semi-Sweet Chocolate
½ Cup Butter
1 Cup Powdered Sugar, Sifted
2 Whole Eggs
2 Egg Yolks
6 Tablespoons Flour
Optional Garnish: Mint leaves and Fresh Fruit – raspberries, blackberries and/or blueberries

Preheat oven to 425 degrees. Butter 4 small custard cups or ramekin; place on a baking sheet and set aside.

Microwave chocolate squares and butter in a large microwaveable bowl on high for approximate 1 minute or until butter is melted. Whisk until chocolate is completely melted.

Sift powdered sugar into chocolate mixture. Add whole eggs and whisk until blended. Add egg yolks and mix well. Stir flour into batter. Spoon batter into prepared cups or ramekins.

Bake 13-14 minutes or until sides of cake are firm but centers are still soft.

Let stand 1 to 2 minutes.

Carefully run thin knife around cake to loosen; invert onto dessert plates.

Dust with additional powdered sugar. Garnish each dish with a sprig of fresh mint leaves and fresh fruit such as raspberries, blackberries and/or blueberries.

Serve with a dessert spoon and enjoy!

dessert spoon


Irish Roasted Salmon

One fine day a few years back, Saint Patrick’s Day fell on a Friday. While the Church has grated special dispensation for Irish Catholics during Lent so as to indulge in Corned Beef, I had decided to hold true to the abstinence of Church tradition.

Continue reading “Irish Roasted Salmon”

Roasted Asparagus with Bursting Tomatoes and Feta

I know, asparagus are a spring crop. I know, tomatoes come to us in the summer. But hey, we live in a modern world with crops from all parts of the globe. And just look at this stunning combination – ruby-red tomatoes, the deep green of asparagus and the snowy sprinkling of crumbled feta. Come on, you’ve got to admit, this is a beautiful Christmas platter. This is so pretty, I might just need to create an entire menu around it. Suggestions anyone?

Roasted Asparagus with Bursting Tomatoes and Feta
1 bunch asparagus, trimmed
3 tablespoons extra-virgin olive oil
Kosher salt and freshly ground black pepper
Handful Small Tomatoes
3 tablespoons chopped fresh thyme leaves
1/2 cup crumbled feta

Snap woody ends from each asparagus spear. Set aside.

Heat broiler to high.

Cover a baking sheet with foil. Spread trimmed asparagus evenly on the sheet pan. Drizzle with oil. Season with salt and pepper. Toss to coat evenly.

Place baking sheet under the broiler about 4 inches from heat and broil for 3 minutes. Remove pan and give it a quick shake to rotate the asparagus. Add small tomatoes and sprinkle everything with fresh thyme leaves. Place under the broiler until tomatoes beginning to blister, about 3 minutes longer.

Arrange asparagus and tomatoes on a serving platter. Sprinkle with feta and enjoy.