Grilled Flat Iron Steak with Chimichurri Sauce

Today we are going to be “world travelers” at the supper table by heading off to Argentina. Before venturing off, I thought it would be fun to give you a little background on the sauce for our Flat Iron Steaks.

Chimichurri Sauce in a condiment sauce from Argentina that is used on grilled meats, much like the way Americans use A-1 Steak sauce except with more versatility. Chimichurri Sauce is not just reserved for steaks or grilled red meats. It can also accompany grilled chicken, pork or even as a side to grilled fish such as Sword Fish Steaks.

Typically Chimichurri is made from finely chopped parsley, oregano, minced garlic, olive oil and white vinegar. In Latin Countries outside Argentina, Paraguay and Uruguay, the dominant flavor comes from the use of chopped coriander leaves, more commonly known as Cilantro. Although usually served in its green form, like Enchilada Sauce, it does have a red version. This is accomplished with the introduction of tomatoes and red bell peppers to the mix. However; tonight’s rendition of Chimichurri Sauce is green.

The origins of the name for this sauce is unclear, although there are two schools of popular thought. Both are amusing, steeped more in folklore than fact. The first is that the word dates back to the early 1800, when the British were captured after a series of failed invasions to capture the Spanish colonies in and around South America’s la Plala Basin. British prisoners used a mixture of English, aboriginal and Spanish words to form the word che-mi-salsa or chi-mi-curry. Roughly translated, the prisoners were saying “give me condiments” or “give me curry” to have with their food. The word eventually became “Chimichurri”. Another popular tale is that the word hails from the Basque settlers of Argentina, and their term tximitxurri, loosely translated as “a mixture of several things in no particular order.” Personally, I like the latter theory if for no other reason than the randomness of preparing a sauce “in no particular order”. What fun – a little of this, a little of that, whipped it up and there you go.

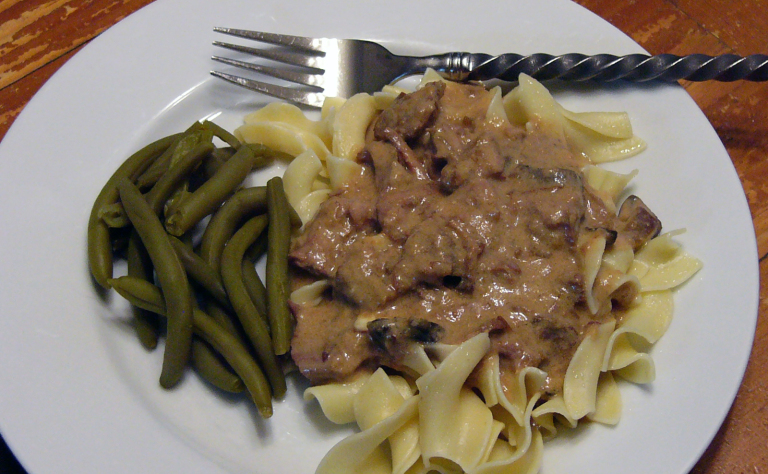
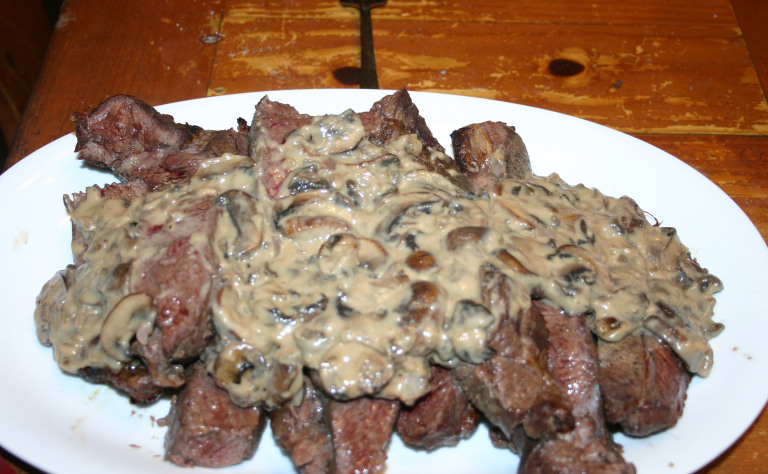
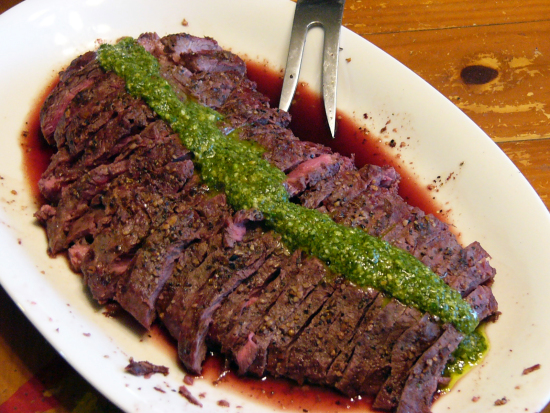
The Flat Iron Steak, when grilled to a nice, warm medium rare is tender and filled with flavors. A light sprinkling of Montreal Steak Seasoning only adds to the beautiful, beefy flavor of this wonderful cut of meat.

The Chimichurri Sauce is a Latin Pesto of sorts for all things grilled. The wonderful texture, bright color and blend of flavors is delight for the senses. The cilantro and lemon complement one another beautifully, neither taking center stage while allowing their distinct differences to come bursting through.

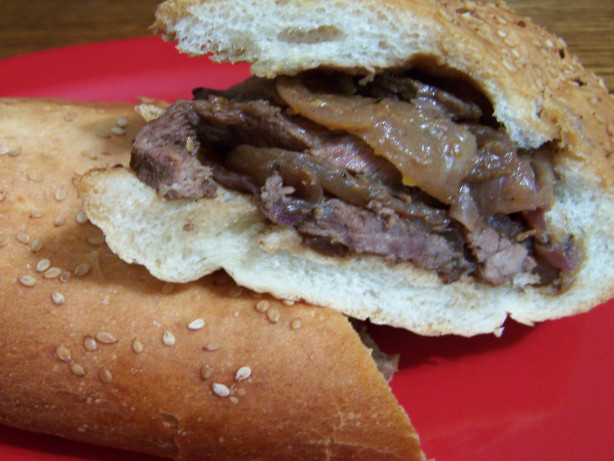
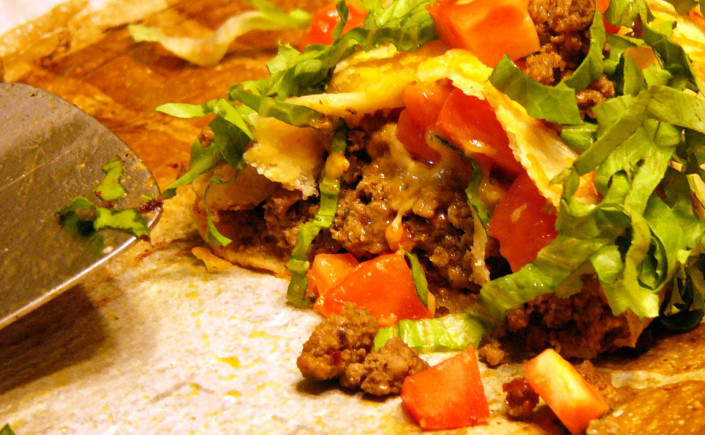
While I enjoyed mine as a thinly sliced steak, Hubby and Kiddo wrapped theirs in warm tortillas, with more sauce and a dash of sour cream. Bottom line is that this dish is easy to make and a joy to eat.

Are you ready to start cooking? Then let’s get busy. You’ll want to season the steak, whip up the Chimichurri Sauce and build a nice bed of coals for grilling. Oh how I love nights like this, when Hubby and I spend quality time together preparing a meal. I hope you enjoy this dish as much as we did.

Grilled Flat Iron Steak with Chimichurri Sauce
Ingredients: Flat Iron Steak
1 Flat Iron Steak, about 1 1/2 – 2 pounds
1 Tablespoon Montreal Steak Seasoning

Ingredients – Chimichurri Sauce
1/2 cup finely chopped cilantro leaves (about 1 cup before chopping)
1/2 cup finely chopped flat leaf parsley leaves (about 1 cup before chopping)
2 Tablespoons Roasted minced garlic
3 Tablespoons fresh lemon juice
2 Teaspoons White or Red wine vinegar
1/4 Teaspoon Cayenne Pepper
1 teaspoon ground cumin
1/4 cup olive oil

Take the steak out of the refrigerator at least 30 minutes before cooking, rub with steak rub, and let it come to room temperature.

Wash cilantro leaves and parsley leaves and dry with paper towel or spin dry in salad spinner. In a food processor fitted with a steel blade, finely chop the cilantro, parsley, and garlic.  Transfer mixture to a glass bowl.

Add lemon juice, wine vinegar, and seasonings. Whisk to combine.  Slowly whisk in olive oil. Let sauce stand at room temperature for a minimum of 30 minutes for flavors to marry. Taste and adjust seasonings as desired.

Build a fire in the charcoal grill, heating grill to medium-high heat. Clean grate and wipe with a little oil to prevent steak from sticking.

Place Flat Iron Steak on the grill at an angle. After about 3-4 minutes, or when nice grill marks start to form, rotate steak 45 degrees using tongs and continue to grill for about 3-4 minutes more on first side.

Flip steak over, again at angle and repeat grilling on second side. Continue to grill until cooked to your liking. Flat Iron Steak should be cooked no more than medium rare, for about 12 minutes, depending upon thickness of the cut.

When steak is done to your liking, remove from grill, tend and let rest for 5 minutes to allow juices to settle. Slice steak thinly across the grain. Serve hot, with Chimichurri sauce drizzled down the center. Serve remaining sauce on the side to add as desired.

************

grilled-flat-iron-steak-with-chimichurri-sauce-2
Season Flat Iron Steak and allow to rest for about 30 minutes prior to grilling.
grilled-flat-iron-steak-with-chimichurri-sauce-3
While steak is resting, gather ingredients for the Chimichurri Sauce. Having everything at the ready makes it a snap to whip up the sauce.
grilled-flat-iron-steak-with-chimichurri-sauce-4
Process parsley, cilantro, oregano and garlic in a food processor until finely chopped and well blended.
grilled-flat-iron-steak-with-chimichurri-sauce-6
Once finely chopped, transfer mixture to a small bowl. Add fresh lemon juice and wine vinegar.
grilled-flat-iron-steak-with-chimichurri-sauce-7
Add spices to the mixture and whip to blend well.
grilled-flat-iron-steak-with-chimichurri-sauce-8
Slowly add olive oil. Whisk to blend. Set sauce aside to allow flavors to marry and mature. After about 30 minutes, taste and adjust seasonings as needed.
grilled-flat-iron-steak-with-chimichurri-sauce-9
Grill Flat Iron Steak over a bed of medium-hot coals until desired doneness is achieved. Flat Iron Steak is best cooked medium-rare.
grilled-flat-iron-steak-with-chimichurri-sauce-11
Remove steak from grill, tent and allow to rest for about 5-10 minutes to let juices settle. Slice thinly, drizzle with Chimichurri Sauce and serve.
grilled-flat-iron-steak-with-chimichurri-sauce-13
Flat Iron Steak goes well with warm tortillas and Mexican Rice for a quick, easy supper. Perfect for casual entertaining or spending time around the table with those we love.

Happy Travels!

One Last Drive Through Yellowstone – Day 7

As the first rays of light enter our cabin, I am seated at the dining room table, sipping my second cup of coffee. The coyotes had been howling last night, spooking the horses and pack mule in the corral. They moved about uneasily, their voices raised in frightened protest.

Continue reading “One Last Drive Through Yellowstone – Day 7”

Happy Day Marble Cake with Chocolate Buttercream Frosting

For Hubby’s birthday, I am baking up his favorite cake – a marble cake. This cake can be made with your favorite yellow cake recipe as a base (traditional); a white cake (for a tuxedo marbled cake) or even a strawberry. Marbling a cake is so easy. It’s simply a matter of putting chocolate into some of your cake batter to create a marbling effect. While this cake is a traditional Birthday Cake, it’s easy to bake and would be welcome anytime. The cake is moist and the frosting is wonderfully creamy, the real highlight to the cake. Not a baker? That’s okay. A boxed cake can be transformed into a marble cake just as easily as a scratch cake. Simply make the batter according to the box, reserve 1 cup and add chocolate to the reserved batter. It’s as easy as that.

Whenever I bake a cake, people are always asking me the same question (it doesn’t seem to matter if I’ve baked from scratch or from a box) – how do you get your cakes to come out so moist? I’ve given this question a lot of thought. The answer is simple – under-cook the cake. Not to the point that the center is doughy, that wouldn’t be good. I simply reduce the cooking time on every recipe – if the recipe says bake for 22-28 minutes, I set my timer for 20. Sometimes, when checking, I might need to bake the cake a minute or two longer, but usually it’s perfectly baked. After all, once pulled from the oven your cake will remain in the hot pan another 10 minutes before moving to a wire rack for cooling. During those 10 minutes, the cake continues to bake and dry out. This is especially true for light-colored cakes such as yellow or white cakes.

The first thing to a marble cake is to make your favorite batter, then reserve 1 cup of batter for the chocolate. I have two favorite Yellow Cake Recipes for the base. One requires cake flour, the other does not.


This recipe is perfect for when you don’t happen to have cake flour on hand.

Basic All-Purpose Yellow Marble Cake
1/2 Cup Butter-Flavored Shortening
1/2 Cup Butter, softened
2 Cups Baker’s Ultra-Fine Sugar
4 Eggs
2 Teaspoons Vanilla Extract
3 Teaspoons Baking Powder
2 ¾ Cups All-Purpose flour
1 Teaspoon Salt
1 ¾ Cups Whole Milk
1/2 Cup Quality Baking Cocoa (see recipe)

Preheat oven to 350-degrees (325 for dark pans).

Prepare cake pans with grease and flour, parchment paper lightly greased or brushing pans with Wilton’s Cake Release (best!). Set pans aside. Cream shortening, butter and sugar together.

Beat in eggs, one at a time and then add vanilla.

In a separate bowl, sift together flour, baking powder and salt. Stir until well incorporated.

Add flour mixture and milk to creamed shortening in alternating batches, starting and ending with the flour mixture. Blend gently between additions.

Reserve 1 cup of cake batter and set aside. Pour remaining cake batter into prepared pans (this will fill a 9×13 inch pan or 2 round 8″ or 9″ pans).

To the reserved batter, add 1/2 cup of good quality unsweetened baking cocoa. Whisk well, breaking up the cocoa until the batter is smooth and lump-free. Spoon equal amounts of the chocolate batter onto the batter in the pan(s), then swirl with a knife and bake.

Bake 9×13 pan for 35-45 minutes or until cake is just done.
Bake 9″ pans for 22-28 minutes or until cake is just is done.
Bake 8″ pans 25-30 minutes or until cake is just done.

Cool for 10 minutes in pan, invert onto cooling rack and cool completely.


This recipe uses cake flour – for the baker with a well-stocked pantry or when you’ve thought ahead.

Basic Cake Flour Yellow Marble Cake
1 cup unsalted butter, softened, room temperature
2 cups white sugar
2 eggs, separated, room temperature
3 teaspoons pure vanilla extract
2 cups cake flour
1 tablespoon baking powder
1 teaspoon salt
1 cup Buttermilk, room temperature
1/2 Cup Good Quality Baking Cocoa

Preheat oven to 325.

Grease and flour two 9-inch cake pans. Set aside.

In a large bowl, cream together butter and sugar.

Add in egg yolks and vanilla, mixing until fully incorporated. Set aside.

In a separate bowl combine flour, baking powder and salt.

Gradually add dry ingredients into wet ingredients, alternating with the buttermilk.
Mix until batter is fluffy.

Beat egg whites until foamy and thick.

Fold egg whites into batter and mix until incorporated. 

Reserve 1 cup of cake batter and set aside. Pour remaining cake batter into prepared pans and set aside.

To the reserved batter, add 1/2 cup of good quality unsweetened baking cocoa. Whisk well, breaking up the cocoa until the batter is smooth and lump-free. Spoon equal amounts of the chocolate batter onto the batter in the pan(s), then swirl with a knife and bake.

Bake for 30-35 minutes.

Remove from oven and let cake cool in pans until pans are warm to the touch.

Carefully remove cakes from pan and place on a cooling rack to finish cooling.


Chocolate Buttercream Frosting
½ Cup Solid Butter-Flavored Vegetable Shortening
½ Cup Butter, Softened
1 Oz Semi-Sweet Chocolate, Melted
1 teaspoon Vanilla extract
3 Tablespoons Powdered Dutch Chocolate
4 Cups sifted powdered Sugar
3 tablespoons milk**

Melt Semi-Sweet Chocolate in the microwave on HIGH 45 seconds or until almost melted. Whisk to melt completely. Let cool.

Cream butter and shortening with electric mixer.

Add vanilla and blend. Add cooled chocolate, beat until a nice, chocolate butter is formed.

Sift Powdered Sugar and Dutch Chocolate together.

Gradually add chocolate-powdered sugar, one cup at a time to creamed butter mixture. With each addition, beat on low until incorporated, gradually increasing speed to medium high. Scrape sides and bottom of bowl between additions and after the last of the sugar has been added.

When all Coco-sugar has been mixed in, the frosting will appear to be dry. Add milk one tablespoon at a time and beat a medium speed until light and fluffy. For thinner frosting, add 3-4 tablespoons light corn syrup. Corn Syrup will also create a frosting that is smoother. Keep frosting covered with a damp cloth until ready to use.

To frost, first trim any “crown” from one cake round to allow cake to sit flat on serving platter. Place trimmed cake round on a serving platter, trimmed side down, bottom side up. Spread frosting over the top and down the sides. Place next layer on top of first, bottom side down. Frost top and down the sides, pressing in slightly where the two layers come together. Frost sides and top a second time to frost completely.

Yields approximately 3 Cups of frosting, enough to frost a two-layer cake or about 24 cupcakes. Double recipe for large, full size cakes.


Happy baking everyone!

Pan-Seared Scallops with Browned Butter Tarragon Sauce

One of my favorite herbs has to be tarragon. I love all the complex flavors of this herb. Slightly sweet yet subtlety bitter with hint of pepper and a dash of licorice. I love it in butter both as a spread for warm bread and to pat over a perfectly grilled steak. Tarragon is great in sauces, too. It goes with just about anything – from beef to seafood. Sweet, mild scallops seared in butter just scream for a white wine tarragon sauce. This is one wonderful dish that won’t disappoint.

I especially love how quickly the seared scallops comes together for a spectacular supper after a long day. From beginning to end, we are talking twenty-minutes at most. Wow, that’s what I call quick!

While these scallops would do justice to just about any bed of rice, I served my scallops with Uncle Ben’s Ready Rice Pilaf. It’s flavorful, fluffy and cooks up in under two minutes. Hey, every shortcut in the kitchen adds up to more relaxation time with my family.

Pan-Seared Scallops with Browned Butter Tarragon Sauce
Sea Scallops
1 lb Sea Scallops (about 15 large scallops_
1/4 teaspoon Sea Salt or to taste
1/8 teaspoon white pepper or to taste
1 tablespoon Butter
1 tablespoon Olive Oil

Rinse scallops and place on paper towels to drain. Pat dry. Sprinkle scallops on both sides with salt and pepper.

Heat  large non-stick skillet over medium heat for 1 to 2 minutes. Add the oil and butter. Swirl pan to blend oil with butter. Heat until bubbling and the butter is just beginning to brown.

Pat the scallops dry once more. Add scallops to the pan and sear 2 minutes or until golden. With tongs, turn scallops over and sear other side about 2 minutes longer, until golden. When done, scallops should feel firm to the touch.

Remove scallops from pan and place on serving platter. Hold in a warm oven while the sauce is made.

Browned Butter Herb Sauce
3 tablespoons butter, divided
1 medium shallot finely diced
1/4 cup dry white wine
1/8 cup finely chopped fresh chopped tarragon
1/8 cup finely chopped fresh chopped chives
1 Lemon, Zested
2 to 3 lemon wedges reserved for serving

To the now empty skillet over medium heat, melt 1/2 tablespoon butter. Add shallots and sauté for about a minute, scrapping up any browned bits left behind in the skillet.

Add the wine, reduce heat to medium-low and simmer until the mixture is reduced by half.

Add the herbs and lemon zest, stir to blend.

Reduce the heat to low. Add the remaining butter, and whisk constantly until all the butter is melted.

Return the scallops to the skillet and roll gently in the sauce to coat. Taste sauce and adjust seasoning as needed with more salt and pepper to taste.

Place scallops with sauce on serving platter. Garnish with slices of lemon if desired.

For a nice presentation with awesome flavor, surround scallops with Rice Pilaf.

NOTE: Uncle Ben’s Ready Rice Pilaf cooks up in the micro wave in 90 seconds for a quick finish to the meal.

rice pilaf

Traveling Along a Giant Loop – Day 6

Yellowstone Map (2)
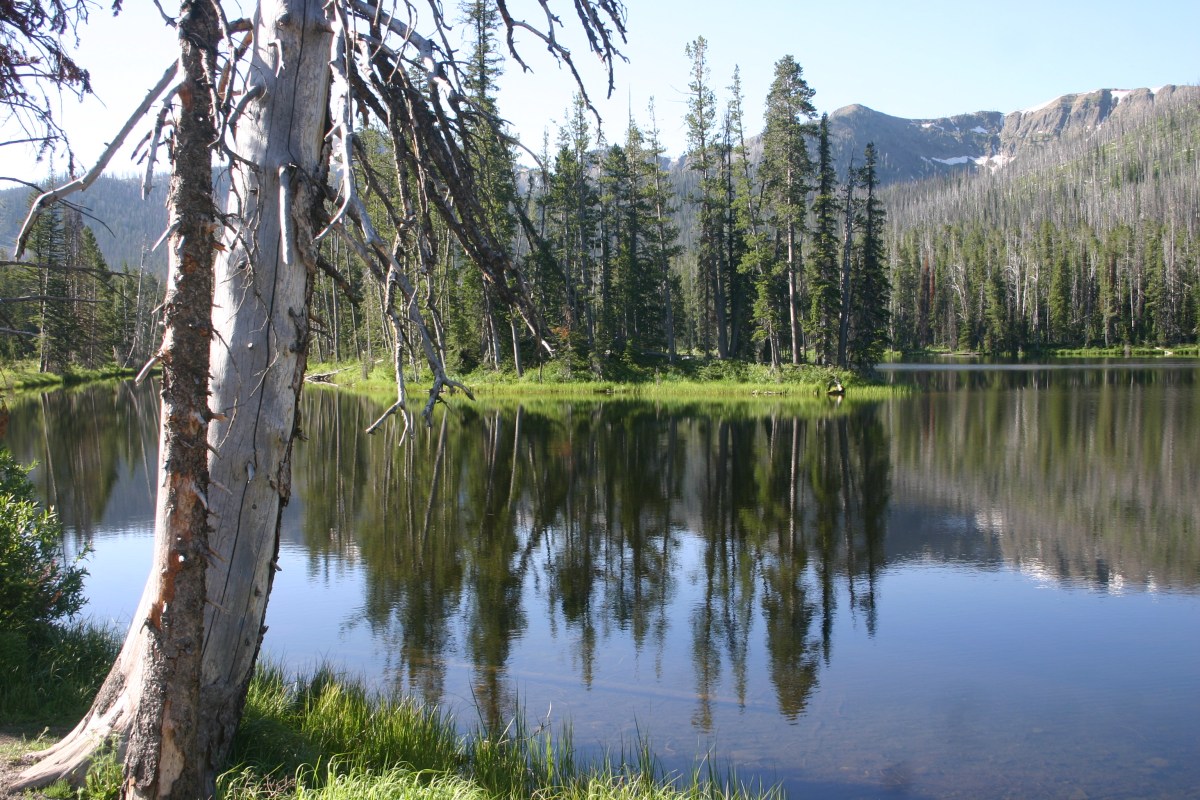
Today we are going to make a giant loop – skirting along Lamar Valley, then up to Roosevelt Lodge for breakfast before back-tracking to Tower Falls, and around the top to Mammoth Hot Springs. From there, we’ll make our way south to Norris Geyser Basin via Sheepeaters Cliff and Roaring Mountain. This last stretch of road is going to be slow-going.
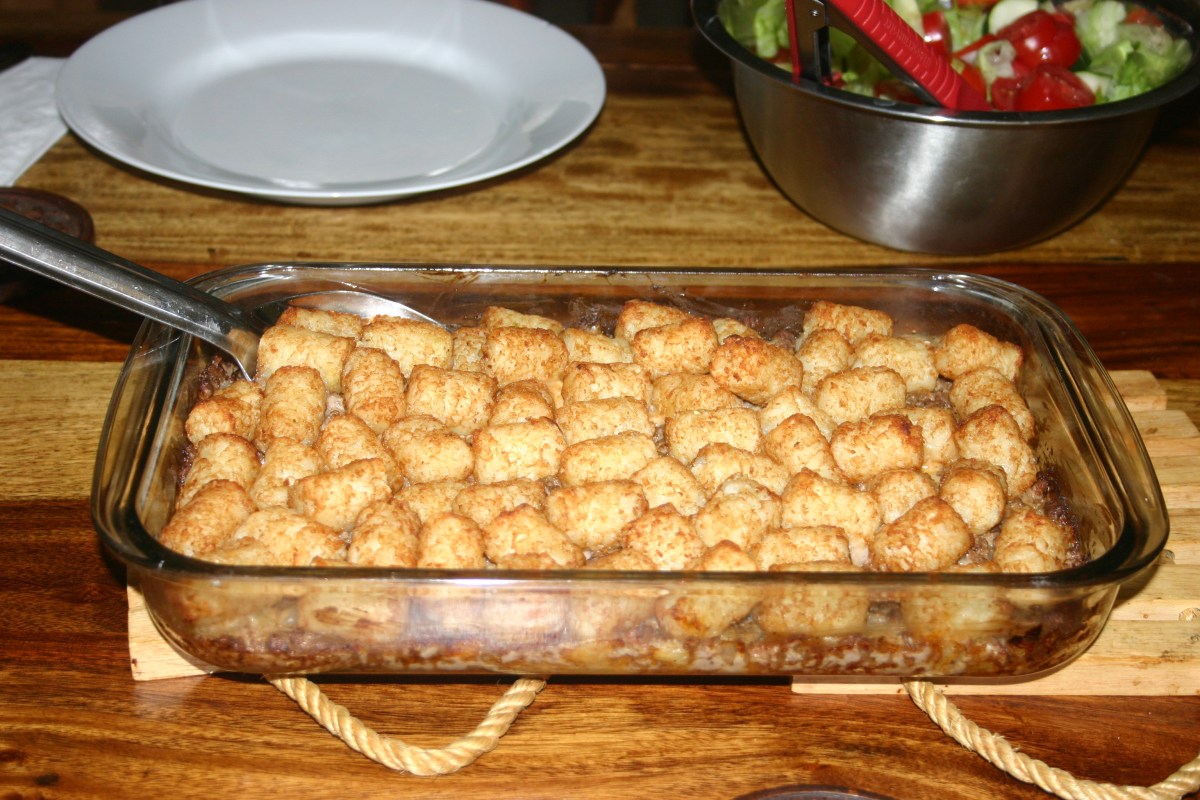
Continue reading “Traveling Along a Giant Loop – Day 6”

Super Easy Tater Tot Casserole

One afternoon I was watching Worst Cooks in America Celebrity Edition. The celebrities were asked to name their signature dish. One gal said she was from the mid-west, a real meat and potatoes part of the country, and hers was a Tater Tot Casserole. Tater what? Sounded crazy to me. But then, I’ve never understood tater tots in the first place. When I mentioned this to Hubby, he said that sounded about right. I filed the idea away and forgot all about the idea. That is until a few night ago. For whatever reason, I thought what the heck. My guys like ground beef. My guys like tater tots.

Tater Tot Casserole
1/2 Cup Chopped Onion
1 pound ground beef
1 can Cream of Mushroom Soup
1 tablespoon ketchup
1 tablespoon Worcestershire sauce
3 cups frozen fried potato nuggets

Heat oven to 425 degrees.

Chop onions into bite-size pieced. Set aside.

Tater Tot Casserole (2)

Crumble beef into a large skillet over medium-high heat.Cook the beef until nicely browned, breaking up any chunks as it cooks. Drain off excess grease.

Add onions to beef and continue to cook about 5 minutes or until onions are tender and translucent.


Stir the soup, ketchup and Worcestershire in the skillet.  Continue to cook until heated through.

Tater Tot Casserole (5)

Spoon the beef mixture into a 2-quart shallow baking dish. Arrange the potatoes around the inside edge of the baking dish.


Bake for 25 minutes or until the potatoes are golden brown.

Tater Tot Casserole (9)

Serve with a nice salad and enjoy.


French Onion Beef Stroganoff

This morning I was up early. I needed to get dinner into the crock pot before the family woke up and starter their day. I’ve made my Stroganoff in a crock pot many times before. Usually, I thinly slice an onion and brown it in a skillet. Usually, the base is a combination of beef broth and mushroom soup. Usually.

Continue reading “French Onion Beef Stroganoff”

Good Ol’ Boy Southern Style Cornbread

Like most cooks, I have several cornbread recipes at my disposal.  This particular recipe is truly rooted in the South. Start with the fact that it is baked in a cast iron skillet.  So often it seems that in Southern cooking, a cake pan or baking dish equates to “cast iron skillet” – be it up-side-down cakes, breads or biscuits.

Then there’s the use of bacon grease both to season the skillet and flavor the bread.  I don’t know of many Northerners that keep a tin of bacon grease handy, but no self-respecting Southern kitchen would be without it. Okay, so I was born and raised in California, but my dad is an Okie through and through.  He does a lot of things the “Southern” way. He passed those on to me, and I to my children and grandchildren.

What’s the difference between Northern and Southern Cornbread?  That’s easy – Northern Cornbread is moist, sweet and more cake-like.  It is usually cooked in a cake pan or square glass dish. While not always the case, generally speaking Northern Cornbread uses more flour than corn meal, giving it a more cake-like finish.  Northern Cornbread uses butter or oil as the fat, Southern cornbread uses bacon grease. Northern Cornbread is especially delicious when served alongside a big bowl of spicy chili where the sweetness is a welcome contrast to the fiery bowl of beans. Southern Cornbread usually isn’t sweetened (although I like mine sweet, so I add some sugar to the mix). Southern Cornbread uses more corn meal than flour and is usually cooked in a very hot skillet, making the crust crisp and the bread more gritty. Southern Cornbread is great with grilled foods such as barbecued chicken or ribs.

If you don’t have any bacon grease handy, fry up some bacon for breakfast or BLTs for lunch and save the grease.

Southern Skillet Cornbread
4 teaspoons bacon drippings
1 1/2 cup yellow corn meal, preferably stone ground
1/2 cup all-purpose flour
2 tablespoons sugar (or to taste)
1/2 teaspoon salt
2 tablespoons baking powder
1 tablespoon baking soda
1/2 cup rapidly boiling water
1 cup buttermilk
1 large egg, beaten lightly

A “must” for this bread is a hot cast-iron skillet. Although the bread can be made in a cake pan or square casserole dish, that would just be too “Yankee” to do the bread justice. Adjust oven rack to lower middle position and heat oven to 450 degrees. Set 8-inch cast iron skillet with bacon fat in it to heat oven.

Measure 1/2 cup cornmeal into medium bowl. Set aside.

Mix remaining 1 cup cornmeal, flour, sugar, salt, baking powder, and baking soda in small bowl; set aside.

Pour boiling water all at once into the 1/2 cup cornmeal; stir to make a stiff mush. Whisk in buttermilk gradually, breaking up lumps until smooth. Cornmeal mush of just the right texture is essential to this bread. The mush must be smooth without overworking the batter. Don’t rush the buttermilk and you’ll have less lumps to break up. Once the mush is ready, add the egg.

When oven is preheated and skillet very hot, stir dry ingredients into mush mixture until just moistened. Carefully remove skillet from oven. Pour hot bacon fat into batter and stir to incorporate, then quickly pour batter into heated skillet.

Place skillet back into the oven, then immediately lower the temperature of the oven to 425 degrees.

Bake until golden brown, about 15-20 minutes. Remove from oven and instantly turn corn bread onto wire rack; cool for 5 minutes, then serve immediately.

If serving the cornbread with a spicy barbecued dish, poke a few holes in the top of the bread with a fork. Spread a little honey butter over the top of the cornbread and let it seep in just before serving.  The honey will help to off-set the heat.

Our Holiday Vacation to the Wilds of Wyoming – Day 5

Day 5 and it’s back into the park. As usual, traveling into the park from the East Gate and you are met with a minor morning traffic jam. Every day of our visit, the same bison bull seems to want to take a stroll down the highway. He causes quite the scene. This day is particularly cold, and the difference in air temperatures and the steam has created its own fog bank, especially around the lake. As we make our way to the Midway Geyser Basin, we keep an eye out for wildlife. We were lucky enough to spot an eagle perched in a dead pine tree. We watched the bird for a few minutes, until he flew away.

Continue reading “Our Holiday Vacation to the Wilds of Wyoming – Day 5”

Birthday Breakfast Cupcakes with Potatoes and Scrambled Eggs

Who doesn’t like a birthday breakfast in bed? Who doesn’t like a cupcake with a cherry on top? Okay, so this isn’t a “real” cupcake as in cake – it’s still just as adorable.

Continue reading “Birthday Breakfast Cupcakes with Potatoes and Scrambled Eggs”

Portuguese Garlic Nailed Steak Sandwich

This is a popular pub sandwich. The name is derived from the fact that the steak is “nailed” with garlic – the garlic is actually pounded with a mallet into the slices of steak. While the recipe calls for 6 cloves of garlic, feel free to add as much garlic as you like. The garlic-nailed slices of beef are finished in a wine reduction sauce with onions. How often can you say that a sandwich should be served with a nice bottle of wine? Not an expensive French import, but a good, robust Portuguese red such as Casa Ferreirinha’s Vinha Grande 2002. At about $20.00 a bottle, this is a great example of Portuguese reds. It is similar to a Port, with a nice bouquet and fruity blackberry finish. I’m a wine drinker by nature, but I suppose a pub-style sandwich would also be nice with a tall, cold bottle of beer.

Continue reading “Portuguese Garlic Nailed Steak Sandwich”

Marinated London Broil with Mushroom Sauce

Let’s get one thing clear right from the start – there is no such cut of meat commonly known as a London Broil. The name isn’t for a cut of meat but rather a way of cooking that particular hunk of beef. Make no mistake about it – London Broil is nothing more than a thick cut of top round, and as such is an easy cut of meat to turn into something akin to shoe leather. If you don’t like your meat bloody, avoid – I repeat – AVOID this hunk of beef.

Continue reading “Marinated London Broil with Mushroom Sauce”

Our Holiday Vacation to the Wilds of Wyoming – Day 4

Our fourth day in the park was spent concentrating on the various thermal features of the Upper, Lower and Mid Basins of the park. Naturally, no visit to Yellowstone would be complete without a few hours at Old Faithful. There is the famous geyser to explore, and the awesome Inn that is unlike any other resort in the park.

Continue reading “Our Holiday Vacation to the Wilds of Wyoming – Day 4”

Cuban Grilled Pork Chops

Pork, the other white meat, is a favorite in our house. It’s great on a grill. Delicious when marinated, rubbed or barbecued. So versatile.  The mild flavor of pork surrenders well to smoke. It’s just a great meat to work with. I adore pork. If you cannot find chops in the market to your liking, it’s really easy to buy a nice tenderloin and cut your own. For larger chops, use a loin roast. (And no, that’s not a mistake – tenderloin and loin are NOT the same cut of the animals. The tenderloin is long and narrow, while the loin is short and wide).

comparing cuts of pork

The rub of this recipe gives a nice outer layer of flavor. The sliced mangoes on the side gives color and a tropical feel to the plate. Can’t you just hear the steel drums?  Makes me want to serve cold beverages with slices of pineapple and little umbrellas.

Cuban Grilled Pork Chops
Ingredients – Cuban Rub
2 tablespoons grated lime peel
1 tablespoon cumin seeds
1 tablespoon cracked black pepper
1/2 teaspoon salt
2 tablespoons olive oil
1 Garlic Clove, finely chopped

In small bowl, mix all Cuban Rub ingredients. Set aside until ready to use.

Ingredients – Pork Chops
4 Boneless Pork Loin or Rib Chops, 1″ thick (2 lbs)
1 Mango, sliced
3 Cups Cooked White Rice or Rice Pilaf

Trim excess fat from pork. Work rub into pork chops. Let sit on counter while a fire is built. The chops should sit for about 30 to 40 minutes for the rub to do its thing.

Heat coals for direct grilling. While fire is being built, steam rice.

Place pork 4-6 inches from medium ash coals. Cover and grill 8-10 minutes, turning frequently using barbecue tongs until pork is no longer pink and meat thermometer inserted in center reads 160-degrees. DO NOT over-grill.

Remove from grill, tent and let rest 5-10 minutes.

Serve rice with a pork chop on top. Garnish the plates with mango slices.

This dish would go well with Mango and Jicama Salad

mango-jamica-salad


Taco Braid

Just when you thought we were done with Taco Rings, Taco Pies and all things Taco in Crescent Rolls – along comes another in the long line of takes on the Taco. Oh, but this one is just a little different. While Taco Braid is very similar it is made with pizza dough rather than Crescent Rolls, with the addition of sautéed onions and chopped tomatoes baked right into the Braid. Besides, I’ve got to admit – I really like the look of just about anything served inside braided bread. The outside all golden and delicious. Slice into that braid and everything just looks so yummy.

Continue reading “Taco Braid”