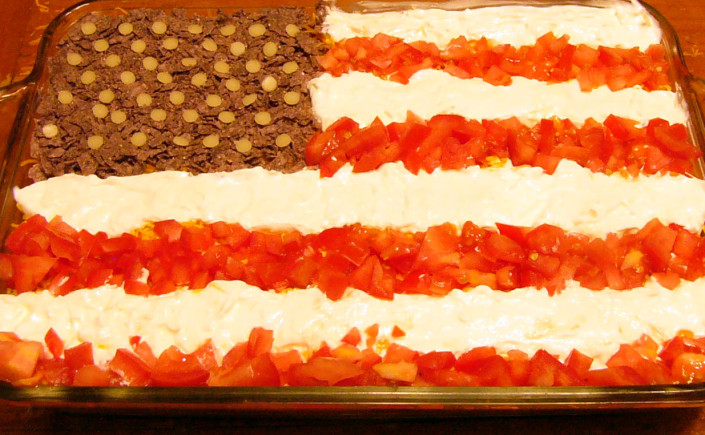
When I saw this awesome American Flag Bean Dip over at kitchenfunwithmy3sons.com; I could not resist. While the bean dip recipe is mine, the arrangement is completely her inspiration. How utterly cleaver!
Author: Rosemarie's Kitchen
I'm a wife, mother, grandmother and avid home cook.I believe in eating healthy whenever possible, while still managing to indulge in life's pleasures.
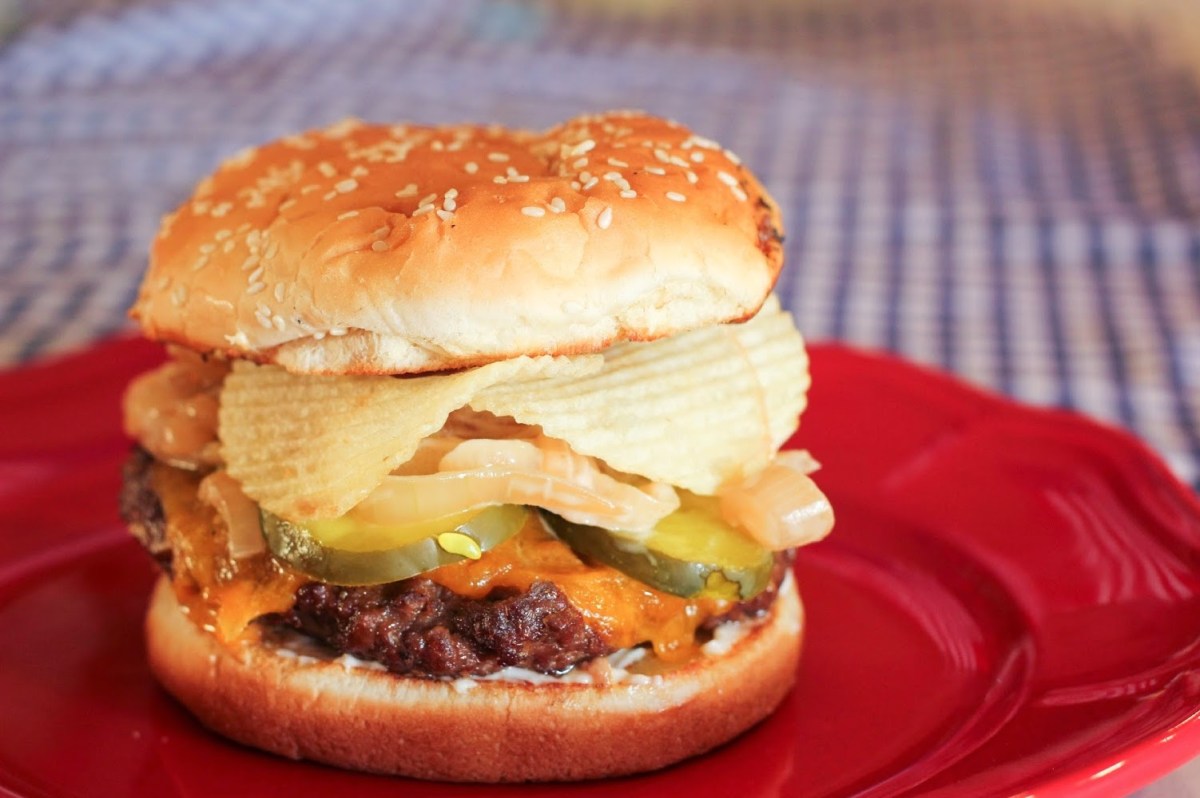
French Onion Burger with Chips
I’ve been collecting and tweaking recipes for years. I have bookshelf after bookshelf stuffed full of cookbook, some over a hundred years old. The reality is, I will never be able to sample every recipe I’ve tucked away over the years.
Mexican Taco Ring and Family Game Night

I’ve made this Mexican Taco Ring several times now. I can’t believe I haven’t shared this fun recipe before.
The Pride of the South – Tomato Sandwiches
Each morning, after my first cup of coffee for the day, I tend to our garden before it gets too hot. We’ve enjoyed the fruits of our labor in herbs, peppers and small bright tomatoes. The only plant that has yet to release its bounty are the beefsteak tomatoes. They are big and beautiful and very, very green. In a few days, I’ll be picking a couple of big green tomatoes to take up to the farm.  My people have a hankering for Fried Green Tomatoes lately. I feel obliged to pick some of my big tomatoes while are still a beautiful shade of green. Did you know that the tomato originated with the Aztec people of South America? While tomatoes are grown around the globe thanks to explorers, sailors and trade merchants, tomatoes have always been a “Southern” thing. No people on the planet have a greater love affair with the tomato than Southern Folk. Think about it. Have you seen a greater sense of pride than a southerner for their vegetable gardens? And the heart of any respectable southern garden are the tomatoes – especially those of the beefsteak and heirloom variety. Fried Green Tomatoes?
  Make it a beefsteak. No wimpy tomato will do. Tomato Sandwich? Again, big, beefy tomatoes are a must. While I adore my Cherry tomatoes, Roma and grape tomatoes, my absolute favorite are of the giant variety with deep color and intense tomato flavor. These are the tomatoes that stand on their own, refusing to be a supporting role in a leafy green salad. These are tomatoes to be eaten like a bright red apple. When I’m working in our garden, eating tomatoes straight off the vine is such a wonderful treat – all warm and delicious dripping down my chin. How I love our tomatoes. Oh sure, we grow other things, but the tomatoes are the focal point of the garden. Yeah, I know – I’m not a southerner. The furthest south I have ever lived is Southern Nevada. Being southern isn’t just a matter of where you were born, it’s a question of true heritage. Southerners are born southern or “have people” of the south. For me, it is my Dad. He is an Okie born. While we don’t typically think of Oklahoma as a Southern State, the settlement of the Oklahoma territory began as a direct result of the Civil war, with southerners escaping the Northern invasion of reconstruction. So while I’ve never been to the south, I feel a connection.
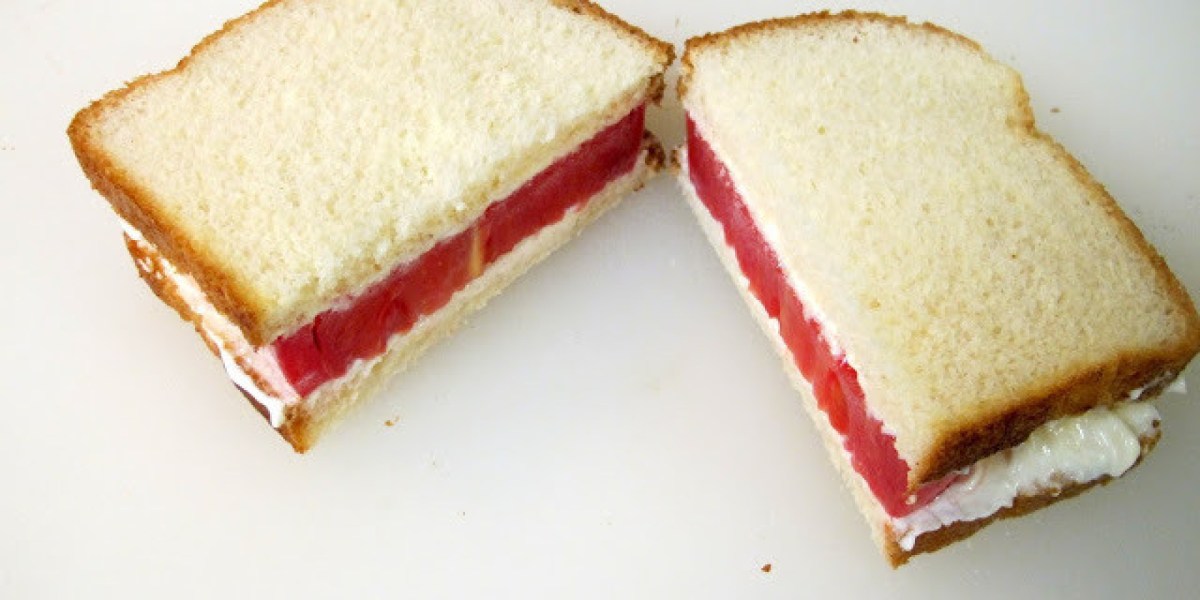
There isn’t so much a recipe for Southern Tomato Sandwich as there are rules. Or more accurately, the one rule. For a tomato sandwich to be a true southern sandwich there can be no – I repeat – NO deviations to the set ingredients. There are only five ingredients found in a Southern Tomato Sandwich. The most important ingredient, surprisingly enough, isn’t the tomato. It’s the bread – cheap, store-bought white bread. No fancy breads, no whole wheat or Artisan breads. And absolutely no toasted breads. A tomato sandwich must be made with soft, white bread, It is a rule. Next comes the mayonnaise. Real Mayonnaise – nothing lite or fat-free. Best Foods west of the Rockies, Hellmann’s to the east and Dukes in the south. No exceptions and no excuses for using anything else. Don’t be stingy with the mayonnaise – lay it on thick. You can’t have a tomato sandwich without the tomato. It has to be big, beefy, beautiful and most of all ripened on the vine. Farmer’s Market or home-grown. The best are those still warm from picking. Never, ever refrigerate a tomato. While there have been those who suggest peeling the tomato, that is another big no-no. Slice your tomatoes thick. The only seasoning necessary would be a light sprinkling of salt and a good helping of fresh black pepper.
Southern Tomato Sandwich
8 Slices thick White Bread
½ cup whole Mayonnaise
2 large beefsteak or heirloom tomatoes, cut into ½-inch-thick slices
Salt to taste
Fresh Ground Black Pepper to taste
Lay four slices of bread on your work surface. Spread a good helping of mayonnaise over the bread.
Cut tomatoes into rounds. Place 2 thick slices of tomato on each slice of bread. Season tomatoes lightly with salt and fresh ground pepper to taste. (It’s okay, even preferred, if the salt and pepper season the bread at the same time so don’t worry about being neat).
Spread remaining four slices of bread with tomatoes. Place bread on top of tomatoes and press down lightly.
Slice sandwiches in half and serve with plenty of napkins or enjoy standing over the kitchen sink.

Deviations from the Classic Southern Tomato Sandwich:
- Use Buttermilk Ranch Dressing instead of Mayonnaise
- Garnish the sandwich with shredded basil
- Serve as “Tea” sandwiches with the crusts removed, bread spread with cream cheese and tomatoes topped with thin slices of cucumber.
- Add sliced avocado to the tomato sandwich
While no self-respecting Southerner would openly tolerated these “Yankee” deviations, then are none the less delicious.
Enjoy!
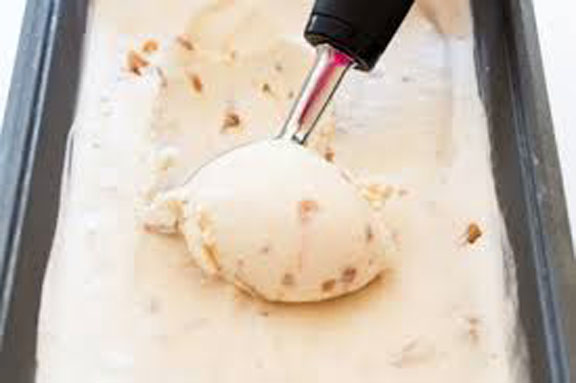
Old Fashioned Butter Brickle Ice Cream with Home-Made Toffee
Okay; so now I am putting the cart before the horse so to speak. I’m getting ahead of myself – sharing a recipe that I have yet had the pleasure of playing around with. However; this is so straight forward, it’s almost fool-proof. I am so excited about the prospects of having Butter Brickle Ice Cream whenever I want that I could not wait to share.
 Up until a year ago, we lived just south of Sacramento. That meant we could have a cone on a warm summer’s night at Gunther’s Ice Cream parlor. If it isn’t “world-famous” it should be. Gunther’s has been around since 1940. Their ice cream is the absolute best. End of discussion. Patrons line up around the block – you stand in line for what seems to be forever!
Don’t like lines? Me either. When we lived further north, we could take a beautiful drive along the Sacramento Delta to a little hole in the wall town – Locke. In Locke, there was a little hole in the wall joint called Mel’s Mocha and Ice Cream that served up cones, shakes and malts all featuring Gunther’s Ice Cream. Needless to say, Hubby, Kiddo and I routinely made an afternoon of heading out to Locke. I always got the Butter Brickle Ice Cream in a sugar cone. Yum! I don’t know about your neck of the woods, but here if you want Butter Brickle Ice Cream you have one of two choices – Gunther’s or homemade.

The delta drive is not as convenient now that we’re living further south. No connection to the river I love so much. And no Butter Brickle Ice Cream – oh my! You can imagine how thrilled I was to find a recipe for my favorite Ice Cream from Chef Savvy. She makes it all look so delicious and oh so easy at her site with beautiful step-by-step pictures. (http://chefsavvy.com/recipes/butter-brickle-ice-cream-made-with-homemade-toffee/)
Old Fashioned Butter Brickle Ice Cream with Homemade Toffee
Homemade Toffee
1/3 cup Light Brown Sugar
5 tablespoons unsalted Butter
Add brown sugar and butter to a small saucepan. Bring to a boil over medium-high heat. Continue to cook until a candy thermometer reaches 300 degrees. If the mixture is getting too brown turn down the heat.
Pour mixture onto a silicon baking sheet and allow to cool.
Once cooled, shatter the toffee into small pieces and set aside. (Smacking the brickle with a small hammer works well. Just be sure to cover the toffee first to keep the pieces from flying about the kitchen).
Butter Brickle Ice Cream
2 Cups half and half
1½ cups heavy whipping cream
¾ cup light brown sugar
½ teaspoon vanilla extract
2 tablespoons unsalted butter
Place all of the ingredients in a medium saucepan over low heat. Cook until sugar dissolves, stirring occasionally.
Remove from the heat and allow the mixture to cool to room temperature. Transfer to a bowl and refrigerate for at lease 4 hours or overnight. (This helps get the ice cream really cold before churning mixture). While mixture cools, make toffee (recipe below).
Take chilled ice cream mixture out of the refrigerator and add to your ice cream maker. Follow manufactures instructions.
Once the ice cream mixture has finished, place in a freezer-safe container with a good cover. The ice cream will be soft-serve at this point. Add broken bits of Toffee and mix well with a spoon to incorporate the brickle into the ice cream. Cover and freeze for several hours until firm. Serve and enjoy.

I must admit there were certain advantages to taking a drive along the river for some ice cream. There’s the delta itself with all its different draw bridges, old river towns and the standard detour to the Delta Farmer’s market just a little further downriver. Nothing like locally grown fruits and vegetables. Now that we’ve moved from the area, a trip to the farmer’s market is an 80-mile drive. We have a lovely garden for vegetables, still I miss the fresh fruits of the delta.


Hamburg Helper Style Cheesy Jambalaya

Well folks, it’s been a while since we’ve made a Hamburger Helper Style supper – not since April have I shared a Hamburger Helper Style meal. Think of this as installment number three in the Hamburger Helper Style renditions
I know my family loves the whole Hamburger Helper concept, I like the fact that I know what is going into the pot so to speak. All around it’s a win-win for everyone. Rarely do I need to make a special trip to the market since most if not all the ingredients are things I have on-hand anyway. Who doesn’t have a few pounds of ground beef in the freezer at any given time – and the spices are your usual in-the-pantry items.
Don’t forget; putting together the dry ingredients; the seasoning package and instructions in a nice little gift bag or pretty little box makes for a great gift for new moms, college students or care givers – it shows a personal touch. You could even box up a few meals up to keep in your pantry for those “I’m too bushed to even think about cooking” night. We’re talking brown, simmer, eat. What can be easier?


Hamburger Helper Style Cheesy Jambalaya
Ingredients – Cheesy Jambalaya
1 lb Lean Ground Beef (or Turkey)
¾ Cup HOT water
2 Cups Milk
1 Cup Converted Rice
1 Cup Stewed or Diced Tomatoes, plain
1 Cup Cheddar Cheese, shredded
In a large skillet, brown the ground beef. Drain well.
Add tomatoes, water, milk and rice. Bring to a boil. Stir in seasoning package.
Cover and simmer, stirring occasionally, 15-20 minutes or until liquid has evaporated and rice is tender.
Stir in 1 cup of cheese, cover and simmer a few minutes more to allow cheese to melt.
Remove from heat, uncover, and allow to sit for 5 minutes for sauce to thicken.
Ingredients – Seasoning Package:
1 Tablespoon Arrowroot or other tasteless thickening agent
2 Tablespoons Chili Powder
1 Teaspoon Basil
1 Teaspoon Onion Powder
1 Teaspoon Garlic Powder
½ Teaspoon Salt
¼ Teaspoon Sugar (optional)
½ Teaspoon Paprika
In a small bowl or sandwich bag, mix all the ingredients to make a seasoning package. Blend well and set aside until ready to use.
Other Hamburger Helper Style Favorites for your consideration:
Hamburger Helper Style Chili-Cheese Macaroni
Hamburger Helper Style Skillet Lasagna
Angle Food Cake with Luscious Glazed Berries

Okay – confession time. I really don’t have much in the way of a recipe. I mean, how much of a recipe do you need? Store bought Angle Food Cake, store-bought glaze. Whipped cream – okay maybe a recipe for whipped cream would be a good idea. Strawberries? Fresh is best.
Continue reading “Angle Food Cake with Luscious Glazed Berries”Italian Mushroom Asiago Chicken over Simple Garlic Linguine

I love all things Italian, especially the foods. The herbs, the mushrooms, the aromas of garlic filling the kitchen. I adore warm breads dipped in olive oil, pastas with little or no sauce and the clean beauty of a colorful Caprese Salad. When I saw this recipe at bakeatmidnite.com, I knew I had to give it a try. It just seemed to go perfectly over a bed of simple garlic linguine. This is a wonderful meal for the whole family. Add a Caprese Salad and a bottle or two of Chianti and it’s perfect for a leisurely summer supper to share with friends.
Continue reading “Italian Mushroom Asiago Chicken over Simple Garlic Linguine”
Chicken Marengo with Polenta Stars – Oh to Dine like an Emperor

 It is said that Chicken Marengo was created on the battlefield by Napoleon’s Swiss chef, a fellow named Dunand. Napoleon was of the habit of not eating until the end of a battle, believing that what he ate could affect the outcome of the fight. Rather than eat anything at all and tempt fate, he went hungry. It seems Napoleon wasn’t alone in this strange habit, others likewise believed that food could somehow change the course of history.
Continue reading “Chicken Marengo with Polenta Stars – Oh to Dine like an Emperor”
Foolproof Strawberry Pie

I have said it before, let me say it again – Strawberry pie is summertime magic. Now you can approach the whole strawberry pie thing one of three ways.
- Pick up a pie at your favorite bakery
- Grow your own strawberries (or visit a pick your berry farm), bake your own pie shell completely from scratch, make your own shimmering glaze and whip your own cream.
- Get what you need from your local grocery store, and with just a bit of effort, make strawberry pie.
Only one of these options is utterly and completely foolproof. Can you guess which one? Oh, but what’s the fun of option one. Option two has so many pitfalls, I cannot even begin to list them all. And time – it takes time.
If you are up for a small challenge (that would be the baking blind thing) and want to put your own finishing touches to your pie, option three is your best bet.
Why is this recipe foolproof? Simply – everything is packages, store-bought and all you need to do is bake the pie shell, glaze the berries and put the pie together. The most difficult task is blind baking the shell, and even that is not so difficult – the rest is as easy as pie. Once assembled, simply chill until just before serving. Finish your masterpiece with a few shots of whipped cream, and there you go.


Foolproof Strawberry Pie
1 Refrigerated Pie Crust, Pillsbury
1 Basket Fresh Strawberries, organic
1 Container Strawberry Glaze, Marie’s
1 Can Extra Creamy Whipped Cream, Reddiwip
Remove one pie crust from package. DO NOT unroll. Let the crust stand at room temperature for 15 minutes. Preheat oven to 375 degrees.
CAREFULLY unroll pie dough. Drape pie dough over a rolling-pin and position over pie pan. Lay dough into pan, pressing into place. Mend any cracks or imperfections by wetting your fingers with COLD water and pinching cracks together. To keep the crust from pulling away from the pan during baking, press it firmly against the sides and bottom of the pan. Be careful not to stretch the crust.
To prevent bubbles in an unfilled crust, generously prick the sides and bottom of the crust with a fork before baking. (Also known as “docking” the shell). Another option would be to use pie weights. This will prevent the empty shell from rising up and floating out of the pan. (Okay, so the shell really won’t float away, but it will puff-up. When filled, the crust will crumble if allowed to rise).
Place empty shell in the oven and bake until golden and flaky – about 12 to 15 minutes. Be sure to peek at 12 minutes and go from there.
Remove from oven and place on a cooling rack. If pie weights have been used, remove as soon as possible without burning your fingers or fracturing the crust.
Let pie cool completely before filling.
While shell is cooling, wash berries. Trim green portions from berries and hull. Let berries dry on a paper towel. In a very large bowl, combine berries with glaze. Chill until ready to use.
When it comes time to fill the pie shell, you have one of two options. The first is to spoon all the berries into the shell in a big pile. The second is to fill the shell one berry at a time, beginning at the outer edge and working in a tight spiral to the center. Repeat if possible with a second or even third spiral, each one ring closer to the center.
Chill until ready to serve. When ready to serve, pipe a nice ring of whipped cream all around the outer circle, leaving the inner circle exposed to show off all those lovely berries.
Now you have all the makings for what has to be my favorite summertime meal –Dad’s Kabobs, Summertime Salad and this yummy pie.
Keeping the 4th of July Simple

It’s hard to believe June is over as we look ahead to America’s Independence Day celebrations. All across our land, friends and family will gather, be it in parks, stadiums or backyards. Anytime people gather, for whatever the reason, food is always a part of the festivities. And so it is that I turn my attention to a great American Holiday.
Come Join the Fun – S’Mores Competition

It’s that time of the year – summertime and family reunions. There is nothing more enjoyable at family gatherings than a little competitive “fun”. Be it tug of war over a mud puddle, most creative campfire song, sack races or a refreshing game of water balloon toss. Games are always fun, especially when the outcome has no meaning – when everyone participates for the sake of partaking and there are no losers.
Ode to the Salad – A Great Start or End to a Beautiful Meal
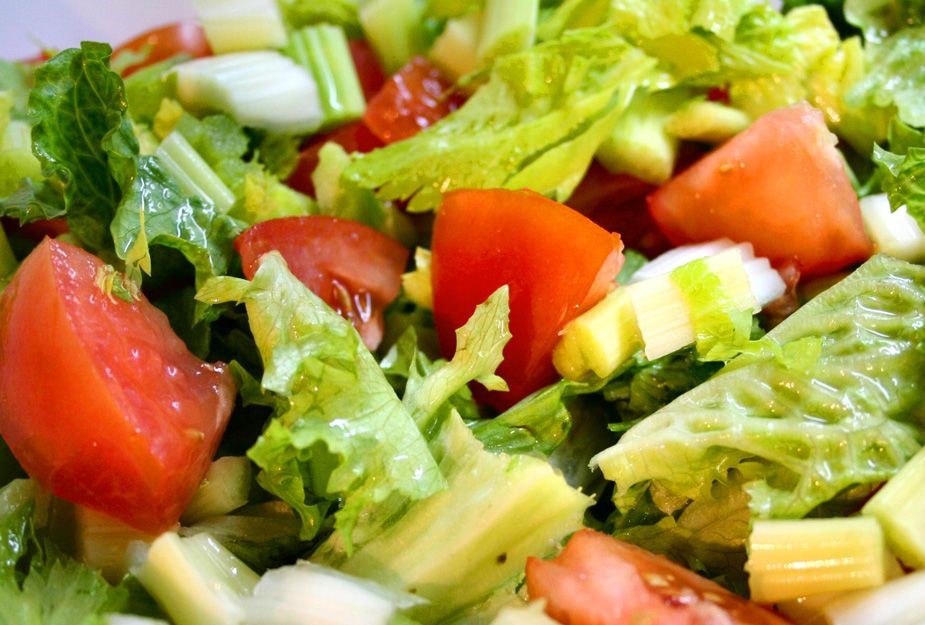
The Salad – be it served as a starter to a multi-course meal (common in America’s restaurants), as an accompaniment to the meal itself (common in American homes) or at the conclusion of a spectacular meal (a European thing), the salad is an often understated and yet important part of the whole dining experience. The Salad could even be the meal itself. Taco salads, Fajita salads, Grilled Whatever Salads, and one of my favorite summertime meals, the Chef Salad.
Continue reading “Ode to the Salad – A Great Start or End to a Beautiful Meal”
Salmon Patties with a Newburg Sauce
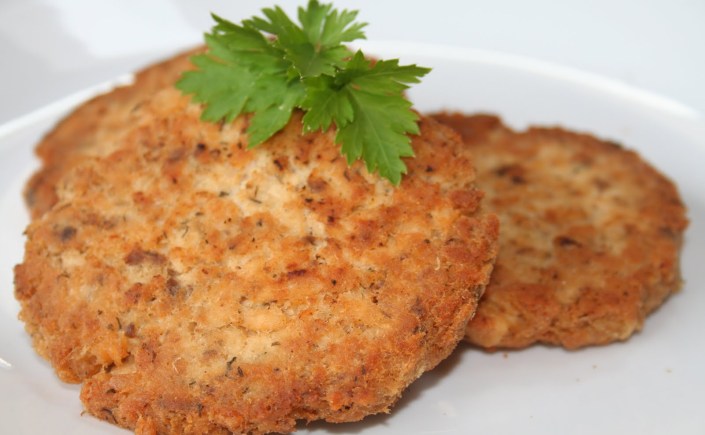
As a kid, I remember my Tita (that’s Aunt) often made Salmon Patties on Fridays. Unlike mine, hers were served like a burger and were very delicious. One of my favorite things about visiting my Tita (besides hanging out with all my cousins) was having Salmon Patties for lunch. Let me tell you, her Salmon Patties beat the heck out of Mom’s Friday Fish Sticks!
Mesquite Chicken Salad Sandwich

One of the drawbacks of being a diabetic is food – and not in the way you would think. For me, the biggest struggle has been taking the time to eat, followed by the need to eat healthy foods. In other words, a cup of coffee for breakfast and a bag of chips for lunch isn’t going to cut it anymore. My body fought back in a big way – and I ended up spending Memorial weekend in Intensive Care.
Most of the time, I prepare a somewhat healthy supper for my family. I like to include salads and plenty of vegetables with whatever we’re having. Most of the time things are grilled, roasted or baked rather than fried. While we do enjoy our red meats, we balance out our diet with plenty of chicken, Bison (the best source for red meat) and fish. I am a firm believer that a hamburger isn’t going to kill you unless hamburgers are the only thing you eat. Just as a slice of cake isn’t going to make you fat unless it’s cake for breakfast, lunch, dinner and that midnight snack. You get the idea.
Taking the time to eat properly during the day was a problem for me. Often, I’m busy – be it writing, caring for our house or puttering in the garden. Years of skipping meals became a habit, a way of life. Breakfast should be the easiest meal of the day not to skip if for no other reason than it’s an early meal, before we get too sidetracked. Lunch – well that’s the real problem. It means we need to stop what we are doing and actually fix something – be it a sandwich or a salad or whatever. I found that the best way to overcome this problem is to make lunch (for later) at the same time I’m making breakfast. Sandwich spreads can be made early and kept in the refrigerator until lunch. Salads can also be made early, then all I need do is add the dressing and enjoy.
For those of you who have been eating healthy all your life, good for you. For the rest of us, it might take time for healthy to become the norm but we will get there. And we don’t have to sacrifice flavor in the process.
Chicken Salad Sandwich on Sandwich Thins
1 Can White Chicken Meat
1 Rib Celery, diced
1/4 Cup Red Onion, diced
2 Tablespoons Miracle Whip
2 Tablespoons Mayonnaise
1 Tablespoon Mesquite Seasoning
Green Lettuce Leaves as needed
2 Small Tomatoes, sliced
4 Multi Grain Sandwich Thins
Open canned chicken, drain well. Crumble chunks of chicken meat into a medium size bowl. Set aside.
Dice celery into small pieces. Add to bowl with chicken meat.
Dice red onion into small pieces. Add to bowl with chicken meat.
Add Miracle Whip and Mayonnaise to the chicken meat. With a spoon, blend mixture until smooth and creamy. If necessary, add a little more Miracle Whip if the mixture appears too dry.
Season with Mesquite Seasoning. This will give the chicken salad a smokey, rotisserie flavor. Set mixture aside. (The chicken salad can be made up to this point in advance. Simply cover and keep in the refrigerator until you are ready to assemble the sandwich).
Slice tomatoes for sandwiches, set aside. Break crisp leaves from a head of green leaf lettuce, set aside.
Open Sandwich thins. On one bun, lay a lettuce leaf and top with tomato slices. On the other bun, spread about 2 or 3 tablespoons of chicken salad mixture. Place chicken bun over the lettuce/tomato bun. Slice and serve.
A small salad of lettuce greens and fresh tomatoes is an excellent side for this sandwich.
")
")
")
