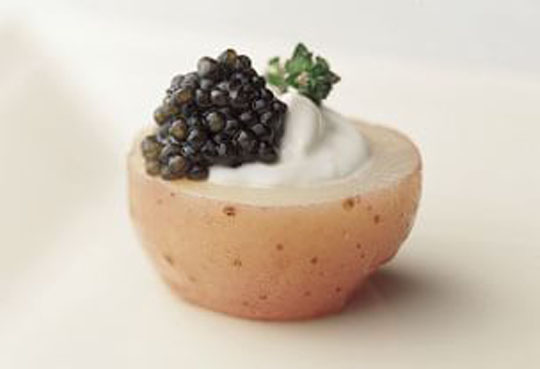
Did you know that July 18th is National Caviar Day? It is – and I could not be more thrilled. National Caviar Day is as good an excuse as any to eat caviar. These tasty potatoes are similar to a twice baked potato, since they are hollowed out, the pulp whipped nicely, then stuffed back into their jackets and baked again. There you go – little two-bite twice-baked new potatoes, how delightful! Add a little dollop of sour cream and a little caviar – now we are talking indulgent! I love these fancy potato bites.
Southern “Fried” Oven Chicken – No Lie!!
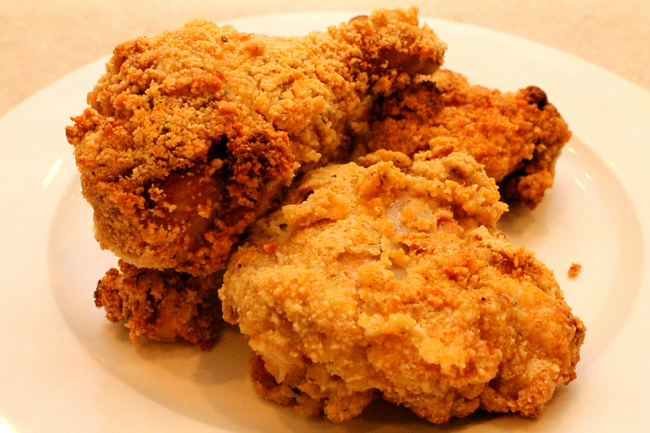
Like most of us, I’ve got my collection of oven “fried” chicken. These are good recipes, but they all seem to fall just a little short of that true “fried” chicken texture. One morning, while I was making my spice rubbed picnic chicken, (Let’s Pack a Picnic!) it occurred to me that the problem with oven fried chicken was the pan.
Continue reading “Southern “Fried” Oven Chicken – No Lie!!”Easy Beef and Chorizo Enchiladas

It seems my crew has been craving a lot of South of the Boarder suppers lately – they love their Mexican food. And it’s okay by me, since many of their favorites aren’t overly complicated to prepare, perfect for weeknight dining. When I asked Hubby if he would like some refried beans or Mexican Salsa Rice with the Enchiladas, he declined, telling me that my Enchiladas are a great meal all by themselves. As flattering as that is, please serve your favorite sides.
Yummy-Sunny Calzones and Beyond!

One of the things I love most about cooking is that you can begin with a basic recipe, make a few alteration and create something new for the family to try. Creative cooking asks very little of us, only that we dare to try, to tape into our imaginations and believe enough to think outside the box. Don’t be afraid to try and fail. It’s a learning process. Simply chalk failures up to what doesn’t work until you come up with something that does. Even a minor set backs can serve as their own form of inspiration.
Continue reading “Yummy-Sunny Calzones and Beyond!”Shepherd’s Pie Style Meatloaf Muffins

Hubby is a big fan of Shepherd’s Pie or Cottage Pie since these are made from Beef and not Lamb. I think that might be a combination of his love for meat and potatoes with his love for foods cooked in a gravy. While the muffin style meatloaf lacks the traditional gravy-like moisture of a traditional Shepherd’s Pie, they do contain carrots and both are topped with a beautiful Mashed Potato “crust”.
Kiddo likes green beans just fine, just not necessarily cooked in with his meat, which might explain why he isn’t a fan of Shepherd’s Pie. By serving the green bean on the side, both my fellows are happy. As for me, I like the look of the muffin and the flavor of the baked mashed potato topping. If you happen to have some leftover mashed potatoes or want to take the time to whip up your favorite mashed potato recipe, by all means please do. If you are looking for an easy short cut, use instant mashed potatoes. My favorite for this recipe is Betty Crocker Butter & Herb.
These Meatloaf Muffins are also great for kids – serving supper that looks like a cupcake can be fun!
Shepherd’s Pie Style Meatloaf Muffins
1 lb ground beef
1/2 lb Ground Sausage (breakfast sausage)
1/2 Cup Finely Chopped Carrots
3 Slices Bread, torn into small pieces
1 envelope Dry Onion Soup Mix (Lipton)
1/4 Cup Ketchup
1/2 Cup Water
1 Egg
Salt & Pepper to taste
2 Cups Mashed Potatoes (Boxed, instant or the real-deal)
Preheat oven to 375 degrees. LIGHTLY spray 12 muffin cups with non-stick spray.
Using a food chopper or small food processor, finely chop carrots to the point of minced. The carrots will add flavor to the loaf while retaining that smooth finish to the muffin.
In a large bowl, mix together everything EXCEPT mashed potatoes.
Divide meat mixture among 12 muffin cups. Push down the center of each “muffin” to create a well (this will help the meat cook through). Smooth tops with the back of a spoon. Set aside.
Make mashed potatoes according to directions. Place mashed potatoes on top of each meatloaf muffin, filling the well and rounding out the top (about 2 tablespoons per muffin).
Bake in the oven for 30 minutes. Remove and let rest muffin tins for 5 minutes. Run a knife around edge of each muffin to loosen. Transfer muffins directly to individual plates and serve with desired vegetable on the side.
My family likes their muffins with a side of green beans or buttery corn.
")

Grilled Flank Steak with Mushrooms
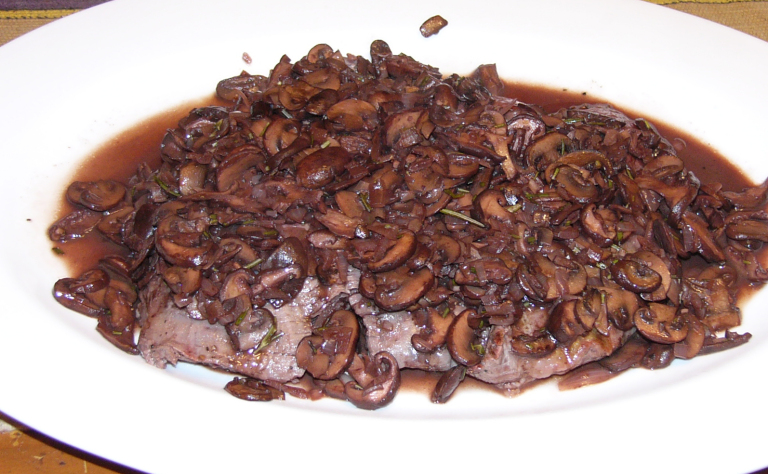
This yummy steak dinner was cooked up for my loving family a year ago – long before I thought about blogs and pictures beyond a snap shot to go with a recipe card. I came across it today while searching for ideas for next week’s meal planner. Hubby and I picked up a nice Flat Iron Steak on sale this week, hence the search. While the original recipe was done with a flank steak, since discovering the yummy tender goodness of Flat Iron Steak a few months back, I’m always checking the meat counter for good deals and snapping them up whenever they go on sale. Hey, that’s what my huge freezer is for, right? Stocking up when the price is right.
Flat Iron Steak can be used in just about any recipe that calls for flank steak, although they are completely different cuts of beef – the Flat Iron is from the forequarter while the flank from the hindquarter. Both cuts have excellent flavor, and take to marinades well. The flank steak can get a bit tough and dried if cooked too long – you ‘ll want to keep it on the medium-rare side while the Flat Iron is a bit more forgiving if over-cooked.
Two things I love about this recipe – the use of red wine (some for the steak, some for me, some for the steak, more for me, some – oh forget the steak, just more for me!) and a variety of mushrooms.


Crimini and shiitake mushrooms are a must – morel if you can get them are also wonderful. If you cannot get a variety of fresh mushrooms, dried mushrooms will do. Re-hydrate your mushrooms before using by soaking them in hot (not boiling) water for about 20 minutes, changing water as needed. Re-hydrated mushrooms have a more intense, concentrated flavor than fresh, so select a blend that will not overpower the flavor of the sauce.
Grilled Flank Steak with Mushrooms
2 pounds flank steak (or Flat Iron)
Salt to taste
Olive oil as needed
Black pepper to taste
2 pounds mixed mushrooms (if possible include shiitake mushrooms, they’re especially flavorful), cleaned, rough chop
2 tablespoons butter
1/2 cup minced shallots
1 cup red wine (or beef broth)
1 tablespoon minced fresh rosemary
Remove steak from the refrigerator. Salt the meat and allow it to come to room temperature.
Dry sauté the mushrooms. Heat a large sauté pan on medium high heat. Add the mushrooms to the pan, as is (no butter or oil). Stir the mushrooms occasionally, and shake the pan a bit. You should hear the mushrooms squeak when they move in the pan. Continue to cook until the mushrooms release their moisture. Add a large pinch of salt and stir to combine.
Add the butter, rosemary and shallots. Stir to combine and sauté over medium-high heat for 2-3 minutes, stirring often. Pour in the red wine (you can substitute beef broth) and boil until the sauce has reduced by half. Turn off the heat.
While the mushrooms are cooking, prepare the grill for high direct heat. The grill is hot enough when you put your hand about an inch over the grill and you can only hold it there for 1 second. When the grill is hot, clean the grill grates with a wire scraper and then moisten a paper towel with vegetable oil. Using tongs, wipe down the grill grates with the oil-soaked towel.
While the grill is heating up, massage olive oil into the steak. You want the steak well coated. When the grill is hot enough, place the steak on the grill. Sear for 4-6 minutes without moving.
Turn the steak over, touch it to test for doneness (see the finger technique for checking for doneness). You might only need a couple of minutes on this side, depending on how thick your steak is. Flank steak is best rare or medium rare; it becomes tough if it gets too well done. Flat Iron steak, being thinner, will require less time on the grill.
Remember to under-cook the steak just a little as it will continue to cook in its own residual internal heat while resting. When the steak is almost done, transfer to cutting board and tent to keep warm. Let rest about 10 minutes. If desired, grind black pepper over steak before tenting.
Finish the mushrooms. Turn the burner on high and boil down to reduce almost to the consistency of a glaze. Add any meat juices that have accumulated with the resting steak. Taste for salt and add any if needed.
For larger steaks, first cut it in half along the grain of the steak fibers. Then slice it thinly, on an angle, against the grain. Thinner steaks such as Flat Iron can be sliced thin just before serving. Pour mushroom sauce over steak and serve immediately.
Happy grilling everyone.

Shredded Chicken Tacos (Crock Pot Style)

I love using my Crock Pot – especially during the summer, when you don’t necessarily want to heat up the house with the oven all day or slave over a hot stove. I especially like crock pot cooking on the weekends in the summer. Beautiful days are spent outdoors. With a crock pot, you can throw things together in the morning, then spend the day doing fun stuff, to return at the end of your adventure to a complete or nearly complete supper. Yeah, that’s always nice!
Entertaining with an Italian Flair – Two Options, No Waiting

Recently I watched one of my favorite movies, “Under a Tuscan Sun”. I adore that movie on so many levels – the adventure, the characters, the relationships and the food – lots and lots of food. That got me to craving an Italian Affair.
Continue reading “Entertaining with an Italian Flair – Two Options, No Waiting”
Wyoming or Bust: Grilled Rib Eye Steak Cut the Cowboy Way

A few years back, Kiddo elected to celebrate his 20th birthday in a big way – by retracing some fond childhood memories “out west”. Yeah, I know, we live in California, can’t get any more American west geographically speaking than California unless we move to Hawaii, but when it comes to a western cowboy attitude, nothing compares to Wyoming. We had such a great time, that we did it again this year.
 I know, I’m all about posting a few memories and a recipe or two, but I’d like to take a moment here and promote a wonderful place to call “home” in Wapiti, Wyoming. Wapiti is situated about half-way between Yellowstone’s east gate and Cody, Wyoming with easy access to both. You can take in all the wonder of Yellowstone by day, and the sights of Cody by night. Cody is home to the Buffalo Bill Museum, a nightly rodeo throughout the summer and the Irma Hotel, built in 1902 by Buffalo Bill. There’s even a shoot ’em up western gunfight right outside the hotel. And let’s not forget about Yellowstone National Park. Yellowstone, with its ever-changing thermal features and abundant wild life is never the same visit from one day to the next. The fresh air (away from the geysers – those do smell like rotten eggs), the beautiful meadows and wide open spaces are spectacular. With any luck, you might even see a wolf or a grizzly feeding. What an adventure! At the end of the day, you’ll want a place to stay that is quiet and relaxing. A place to sit and take in the stars, to ponder and reflect at the end of a perfect day.
 Rand Creek Ranch is just the place – with cozy cabins, the most comfortable beds and friendly owners. Krystal and Joel not only welcome you to their ranch when you arrive, they continue to socialize with their guests in a unique way – with fireside chats each evening around a campfire. Guest gather, share their adventures of the day and get to know one another. Krystal bakes up fresh goodies each morning, leaving her wonderful muffins or coffee cakes on your porch along with fruit and juice to greet you each day. She even has a cookbook, which of course I’ve added to my collection. The recipes all look yummy and the pictures of the ranch are wonderful. If you ever travel to the Yellowstone area, I highly recommend you stay at Rand Creek Ranch for a relaxing get away you won’t soon forget. For more information, here’s a link to the ranch with all the details: http://www.randcreekranch.com/index.html
 Obviously, I’m feeling rather western after such a wonderful vacation from life. It’s only fitting that I share a little cowboy cooking. There are two things that are synonymous with cowboy cooking – grilled meats and a good pot of beans. These are foods that are easy to cook while out on the range. And let’s face it, we all love a good cut of steak sizzling on the grill. Just thinking about it will get my mouth to water.
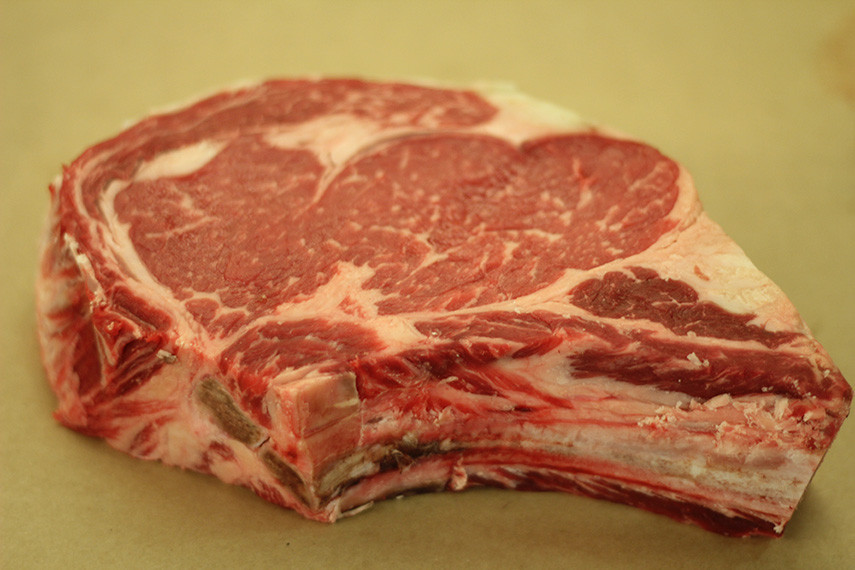
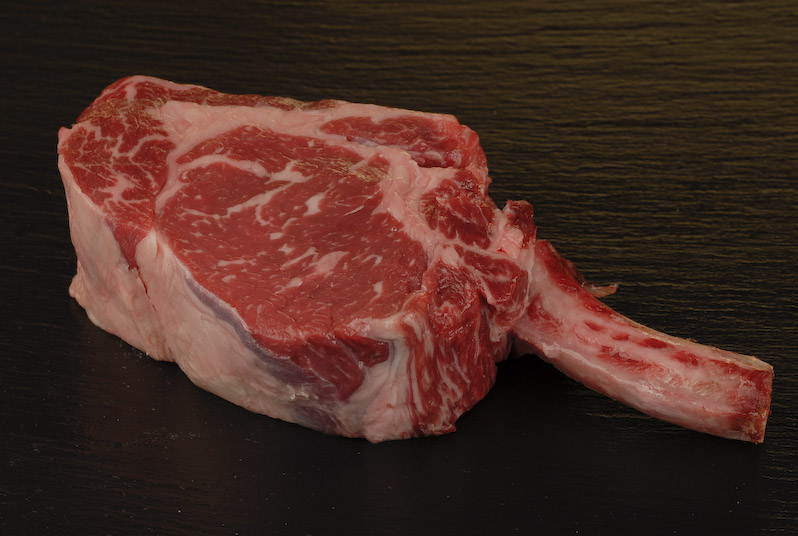 Let’s start with what the heck is Cowboy steak? A true cowboy steak is a rib eye steak with a long section of rib bone still attached, known as the “handle”. It’s said that cowboys of the old west used the rib bone to pick up their steak and eat it right off the bone, hence the name “cowboy cut”. The steak can weight as much as two or three pounds (for a double-cut), and stand as much as three inches thick. A true cowboy cut with the long rib bone isn’t something you can get from your local grocery store, even if it has a butcher’s counter. Most grocery stores receive their meat already cut into sections, with the long-handled rib bone removed. I’ve chatted with a couple of butchers at my grocery stores, and they are all of the opinion that the bone is more a matter of presentation rather than flavor. While bone does add flavor, the “handle” doesn’t actually come in contact with the meat so you will have the same flavor results with a thick cut of bone-in rib eye. While I was disappointed, I reasoned that the extra bone was an additional cost that truly isn’t necessary. If you feel you absolutely need a true cowboy cut rib eye, you can order them online for about $50.00 per 22 oz steak.
Grilling a steak that is this thick is a challenge. First, you’ll want to season and salt the steak well before grilling. A day in advance is great, but at a minimum, give yourself at least an hour or two. The most common mistake when salting meat is to do so just before grilling. As rumored, salt does draw out the moisture when first applied. It also breaks down the proteins and tenderizes the steak. So while the moisture is drawn out initially, allowed to sit, the meat will then reabsorbs its juices, drawing your seasonings deeper into the meat. Secondly, you’ll want to brush the meat itself with olive oil prior to grilling. This will prevent the steak from sticking while aiding the searing process. Thirdly, unlike a typical 1-inch steak, you’ll want to cook the thick cowboy steak in two stages – direct and indirect heat. Direct heat sears the meat, giving it that nice crust and beautiful color. Indirect heat cooks the interior of the meat without burning. A two or three-inch thick steak will take a while to cook – as much as 20 or 30 minutes depending upon thickness and prefered “doneness”. To help in the overall grilling, you should let the steak rest on the counter about an hour or two before grilling, depending upon thickness. This will allow the steak’s temperature to even out before throwing it onto the grill. The best “fuel” for grilling is real wood or coals. Since the coals may need to last a while, be sure to stoke a full chimney. Pile the coals at one end of the grill, with ample room at the other end for indirect cooking. After about 20 minutes, check the internal temperature with an instant read thermometer. The best way to cook a steak is medium-rare, warm in the middle while retaining its natural juices and tenderness. The longer a steak cooks, the tougher the end result. For medium-rare, you’ll be looking for an internal temperature of about 130 degrees. Keep in mind, once the steak is pulled from the grill, covered and allowed to rest, the internal temperature can raise as much as five degrees. Let’s get to grilling . . .
Cowboy Steak with a Dry Spice Rub
1 Double-Cut Rib Eye Steak (about 2 1/2 lbs)
1 tablespoon kosher salt
1 tablespoon ground black pepper
½ tablespoon ground coriander
2 teaspoons mustard powder
2 teaspoons finely ground coffee or instant espresso
½ teaspoon onion powder
½ teaspoon garlic powder
½ teaspoon Ancho chili powder
⅛ teaspoon cayenne pepper
Butter Baste Finishing
4 tablespoons butter,
1 small shallot, minced
1 garlic clove, pressed
leaves from 1 sprig of tarragon
Mix the spices for a dry rub. If you’ve got a jar handy, simply place all the ingredients into the jar, close the lid tightly and shake away. If not, simply whisk until well blended. Spray or LIGHTLY brush steak with olive oil. Sprinkle generously with rub, and massage into the meat. Let rest on the counter at least an hour or two before grilling.
While meat is soaking in the rub, make the finishing butter baste. Place the ingredients for the butter baste into a small sauce pan and heat over low heat until the butter melts, stirring often. Remove from heat and allow flavors to marry nicely. Keep warm and fluid when ready to use.
Build a fire for direct and indirect grilling. Place steak over hot coals, close lid and sear about 7 minutes, turn and sear other side for about 5 or 6 minutes longer.
Move steak to cooler side of the grill. Brush steak with finishing butter. Cook about 8 minutes longer with the lid closed. Turn, brush with finishing butter and continue to grill about 6-8 minutes longer with the lid closed.
Transfer steak to a warm (not hot) serving platter, cover with foil and allow steak to rest about 10 minutes before carving.
For a real, authentic cowboy dinner, serve with ranch beans and plenty of corn bread. Grilled corn on the cob is another nice touch.


The Deviled Egg You Say!

What is it about Deviled Eggs that makes them so popular? I have yet to attend a gathering (office potluck, family gatherings, any social gathering with food) that the Deviled Egg in some form doesn’t make an appearance. Perhaps it’s the versatility of the Deviled Egg – the personal touches that makes each platter as individual as the creator. With an eye to detail, even store-bought deviled eggs can be transformed from ordinary to extraordinary. Just as there are countless ways to make the deviled egg, there are a multitude of platters whose sole purpose is to serve those eggs in style.
Poached Salmon with Mousseline Sauce
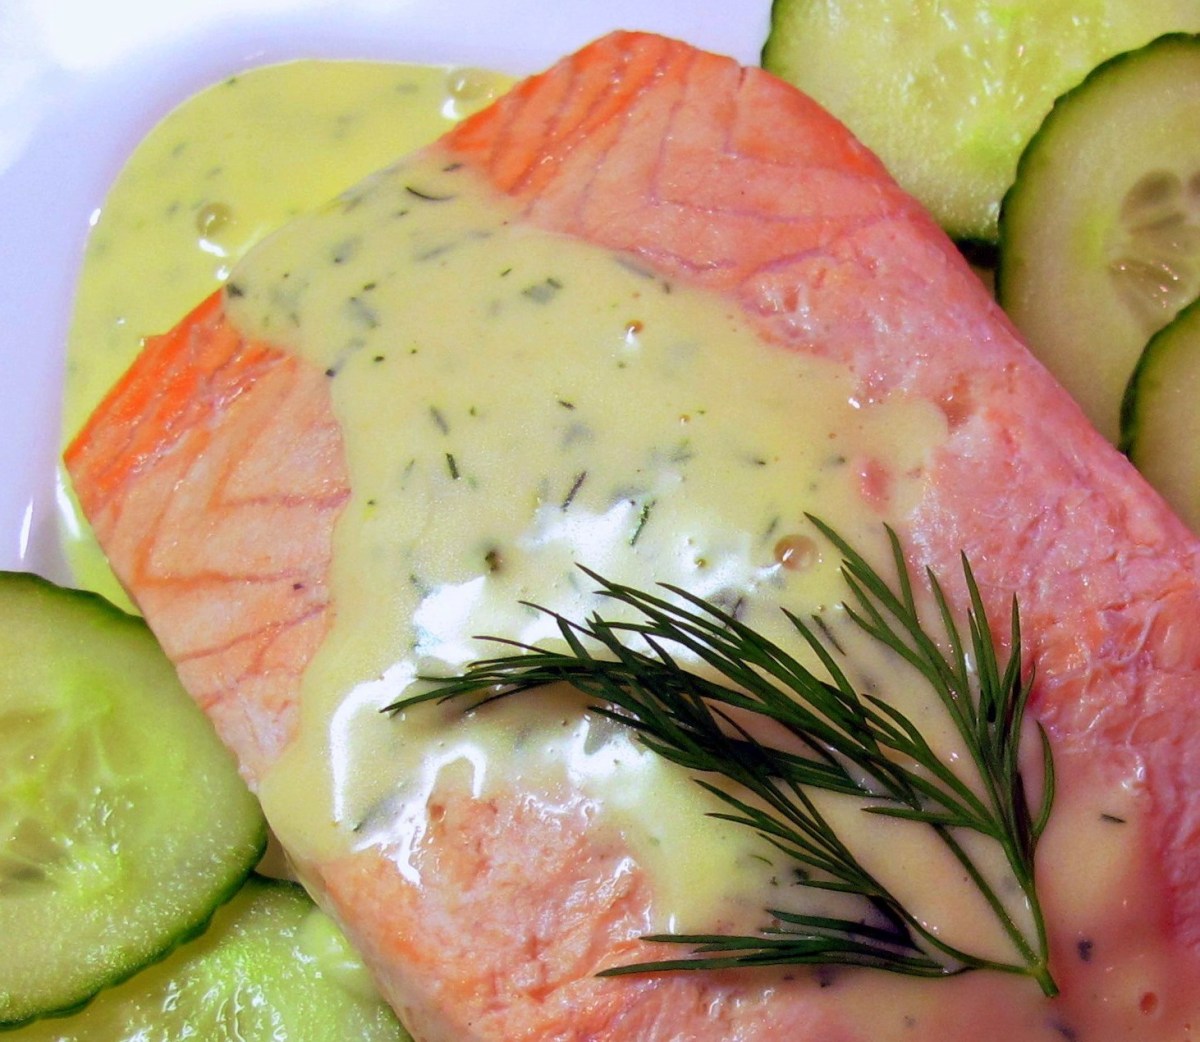
One of the most famous, most recreated menus on the planet has to be the Last Supper aboard the Titanic. I haven’t a clue as to why the sinking of this grand ocean liner holds such a romantically tragic place in the social physic, but it does. The Titanic has been the subject of many books, films and television programs. Immediately following the loss at sea, the public seemed unable to get enough and that appetite carried forward throughout the years. In all there were a total of 19 films and 27 Television productions, including a 1971 episode of Night Gallery entitled Lone Survivor.
Mashed Potato Success

For those of you on Facebook, then you know how FB will show you something you’ve posted from the past and ask you if you want to share it again. Most of those I’ve seen shared by family are photos and cute stories from their past postings. Nearly all my “memories” are recipes and cooking tips – some long before my blogging days. (The biggest reason I started blogging in the first place was because my personal Face Book account was so full of recipes and tips. Everyone I knew was asking for me). This is one of those past posts that popped up, and I thought I’d pass it along . . . good advise.
Del Diavolo Pollo Alla Griglia – The Devil’s Grilled Chicken
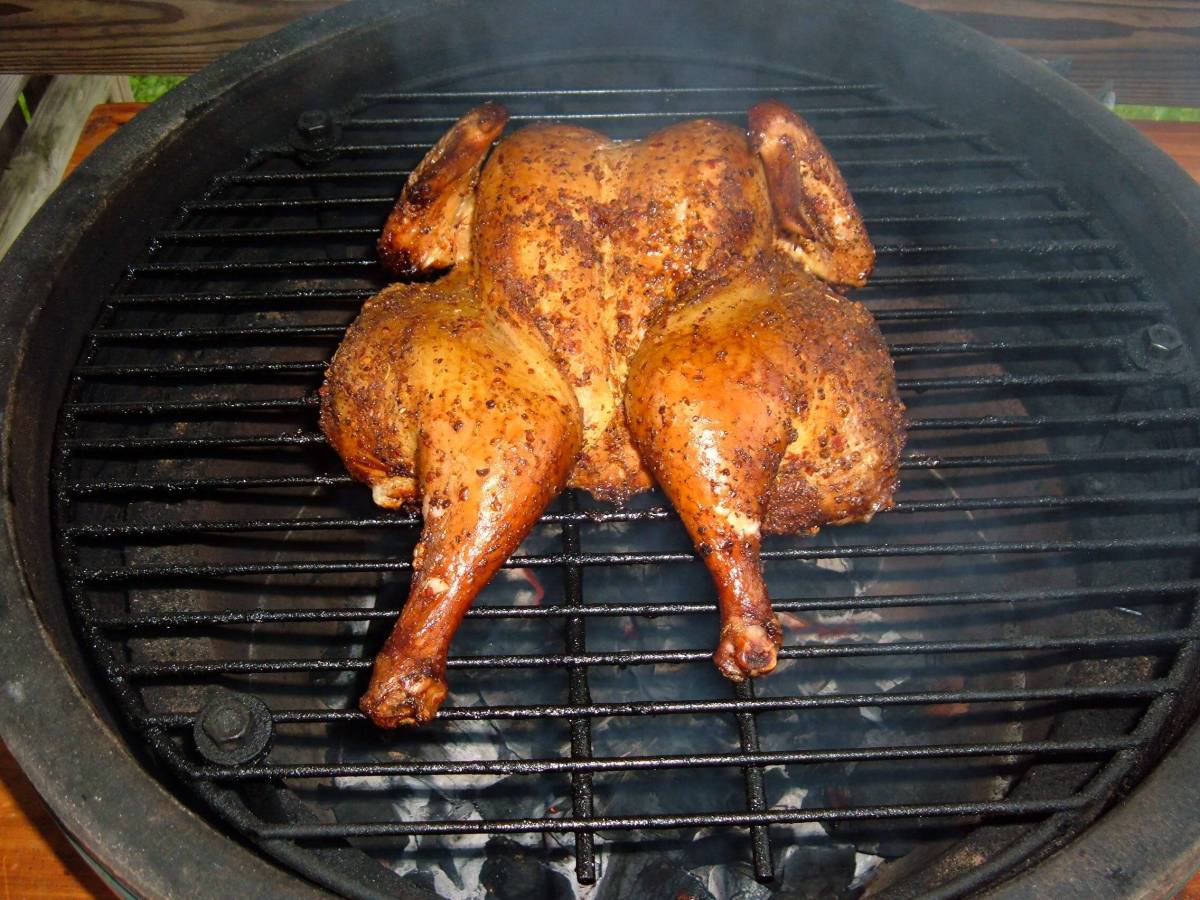
Hi everyone. I wanted to take a moment to share a wonderful grilled chicken dish. This chicken can be cooked on the grill (best) or on rainy days, it can be broiled in the oven.
Continue reading “Del Diavolo Pollo Alla Griglia – The Devil’s Grilled Chicken”
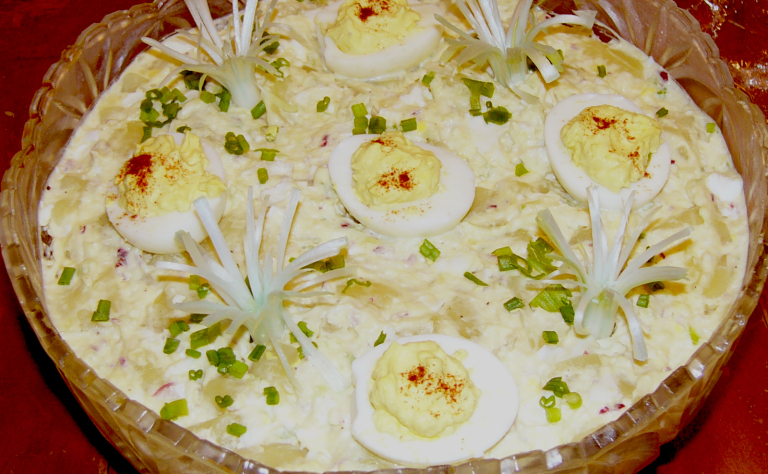
Mema’s Potato Salad by Popular Request
This recipe is one I’ve been using for years, and it never fails to be a crowd pleaser. Even the non-potato salad fans become converts. (Hubby among them). Occasions that naturally call for potato or macaroni salad, I usually make both since Hubby’s favorite is macaroni, while Kiddo and I prefer a potato salad. Up until recently, Hubby hadn’t even tried my potato salad. When he finally did, he let me know it wasn’t like the store-bought kind (dah!) and that he liked it.
I remember my mother’s potato salad – which is almost nothing like the potato salad I make. Hers was pink. Just what all she put into her salad, I don’t know. I do know there were potatoes, eggs, and mayonnaise – but that’s where the similarities end. Mom’s “secret ingredient” was beets, her signature pink potato salad. She garnished the salad with asparagus, the kind that comes in a jar or can. The thing I remember most about Mom’s salad was that the kids all left behind a plates of uneaten beets. When I made potato salad for the first time on my own, two ingredients were intentionally omitted – the beets and the limp asparagus. While I do miss her signature pink color, I don’t miss the beets.
If you want to dress the salad up a bit, as pictured, then simply boil up a few extra eggs, devil them and there ya go. To make the onion blossoms, simply trim the root ends from some green onions, then cut about an inch or so at the base, slit it several times and dip the onion into ice water. The shock of the cold will cause the onion to “curl”. If the onion is very pale, you can add food coloring to the ice water and the onion will soak in a bit of the color. The longer the onion is left in the water, the more color it will absorb.
A nice variation to the basic recipe would be to add chopped bacon, cubes of Cheddar Cheese and increase the amount of sour cream. It easily transforms from a Potato Salad to a Loaded Baked Potato Salad which is equally yummy. The beauty of any basic potato salad recipe is that it is versatile – lending itself to an array of additional ingredients that bring new depth and texture to the plate. Have fun with it – and make it your own, with your personal touches.
Mema’s Potato Salad
3 lbs Yukon Gold Potatoes
4 Eggs, hard-boiled
1 Red Onion, minced
2 Celery Stocks, minced
1 Tablespoon Bacon Drippings, warm (Optional)
1 Cup Mayonnaise
1/4 Cup Sour Cream
1 Tablespoons Mustard
2 Tablespoons Red Wine Vinegar plus a sprinkling for potatoes
Kosher Salt & Fresh Black Pepper to taste
¼ Cup Parsley or green onion for garnish
Peel and slice potatoes into large chunks. Place potatoes in a stockpot and cover with 1-inch of salted water. Bring to a boil, reduce heat to medium-low and simmer until potatoes are just tender but not soft, about 10-15 minutes. Drain well. Sprinkle LIGHTLY with red wine vinegar and set aside in refrigerator to cool.
Place eggs in a saucepan, add cold water to cover eggs. Bring to a boil, remove from heat and cover. Let sit for 12-14 minutes, then plunge eggs into cold water to stop cooking process. Once cooled, roll egg on counter to crack the shell. Return eggs to cold water and let sit for about 15 minutes. This will help to make the eggs easier to peel.
Meanwhile, in a large bowl combine onions, celery, bacon drippings, mayonnaise, mustard, sour cream and red wine vinegar. Whisk to combine. Taste dressing and season with kosher salt and fresh ground black pepper to taste.
Peel and chop 3 eggs. Add to dressing. Cut V marks in 4th egg to create two tulip flowers. Reserve 1 flower, chop other and add to dressing. Taste dressing a second time, adjust seasonings as necessary.
Place potatoes in a large bowl. Pour egg dressing over potatoes and toss to coat. Smooth out top. In the center, using the back of a spoon, create a small indentation. Place Egg flower into indentation. Sprinkle top of salad with parsley or chopped green onion for added color. If desired, sprinkle lightly with paprika. Cover with plastic and refrigerate until well chilled.
Chicken Piccata – Mema Style
Oh my goodness, I am at a complete loss for words! Here I’ve been inviting you into my kitchen since February, I’ve shared over 200 recipes and yet I failed to rave about one of my favorites – Chicken Piccata. Well, that’s going to be set straight right now!
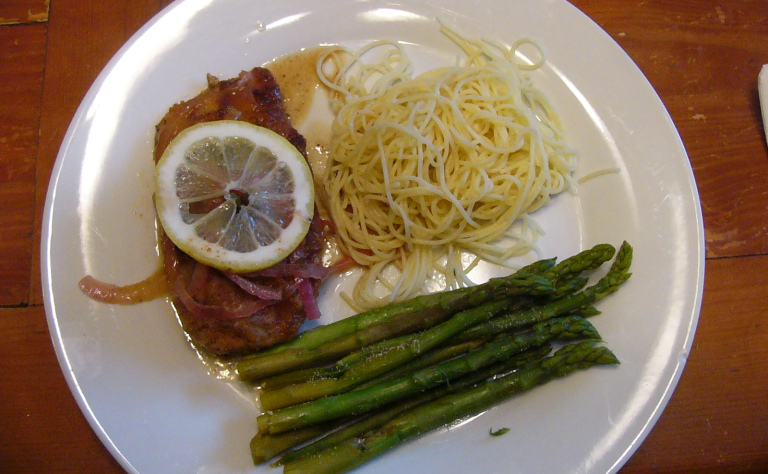
This trusted recipe has been in my collection for more years than I care to count. I found the original recipe in one of those Fundraiser Cookbooks, and immediately set about the task of tweaking it to our liking. The addition of sliced red onions gives the sauce a pink hue that lends a layer of color to the dish. This is one of my favorite recipes for good reason . . . It travels well. It can be increased easily to accommodate large crowds. It’s been a proven success at dinner parties and potlucks alike. And if those aren’t reasons enough, this dish has always been a huge hit with everyone – young – old – picky eaters and those who will eat anything.
Chicken Piccata is the perfect go-to recipe when entertaining because it holds well in a warm oven, giving plenty of time to clean up the kitchen before guests arrive. I like to serve it with steamed asparagus and Angel Hair Pasta tossed with a little garlic-butter. A threesome made in heaven.
Chicken Piccata – Mema Style
6 boneless, skinless THIN-cut chicken breasts
6 tablespoons Dijon Mustard
4 Eggs
2 cups Italian Seasoned Breadcrumbs
6 tablespoons olive oil, divided in batches
½ cup chicken broth
½ cup white wine
2 ½ tablespoons Lemon Juice
1 teaspoon salt
½ teaspoon white pepper
3 tablespoons capers, drained and rinsed
1 large red onion, sliced into rings
1 large lemon, cut into 6 thin slices
¼ cup Butter
Tip: It’s best to use THIN sliced chicken breasts; that way you are good to go and there won’t be the need to take your frustrations out on the chicken. However; if using plump boneless breasts, you’ll need to get them thin – no more than 1/4″ inch thick. This can be accomplished one of three ways – get your butcher to do it. Take the chicken home; freeze it until firm, then slice it yourself (much like a butterfly cut only all the way through. Three breast cut in half will give you the six you need). OR you can beat the heck out of the poor breasts. To do this, place the breasts; one at a time; between two sheets of plastic wrap and pound with the flat end of a meat mallet. Just be careful that the flesh doesn’t tear.
Whisk Dijon mustard and eggs in a glass pie pan. Place bread crumbs in another pie pan. Set pans aside.
Heat 3 tablespoons olive oil in a large skillet over medium-high heat. While pan heats, dip chicken into mustard mixture. Allow any excess to drip back into the pie pan. Then roll breast into bread crumbs. Add chicken to skillet and cook for 3 minutes per side or until browned and cooked through. You will want to cook the chicken in two batches to avoid over-crowding of the pan.
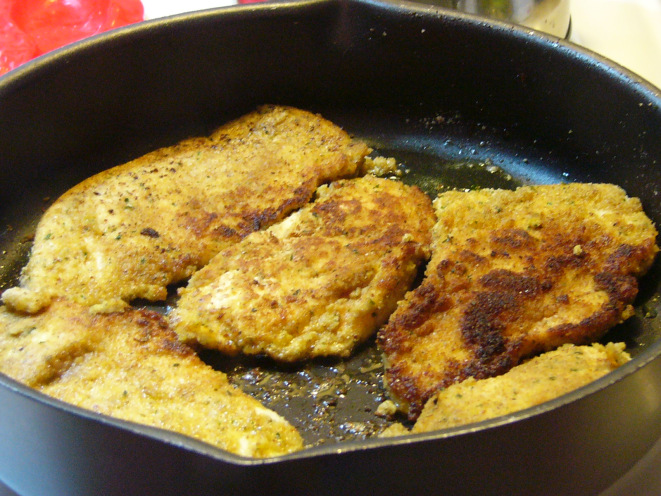
Remove the chicken to a baking dish large enough to hold all the chicken and Piccata sauce. Keep warm in a 300-degree oven. Add remaining olive oil to skillet. Repeat with remaining chicken breasts – dip; bread and brown. Place in oven to keep warm.
To the now empty skillet; add chicken broth, wine, lemon juice, capers, butter, salt, pepper and red onions to skillet. Bring to a boil, scraping up browned bits. Reduce heat and simmer for 10 minutes or until onions are tender.

Remove chicken from oven and pour sauce over the breasts. Arrange lemon slices on top of chicken. Cover chicken with foil, return to the oven until ready to serve. It’s best to allow chicken to sit in liquid for at least 15 minutes to soak in flavors before serving.

Note: This chicken is now ready to travel if you like. Keep covered until ready to serve. If necessary, reheat in a low oven for 10 minutes or so before serving.
